
Tag: insulated metal panels
Against the Wind: MBCI’s Wind Rating Dominance
After a major, damaging storm, such as hurricanes and tornadoes, many things happen at once. Rescue efforts begin. Shelters open to house the displaced. Cleanup gets underway. But one thing that happens in the aftermath of such an event is a little harder to see – unless you’re looking for it.
The Building Material Post-Mortem
The Roofing Industry Committee on Weather Issues, Inc. (RICOWI) gathers experts and an army of volunteers to spend time on the ground at the disaster site, documenting damage. They take careful notes and photographs, looking closely at how different building methods, materials and ages withstood the storm. What they observe helps inform product development and ensure both installation standards and roofing products can stand up better to the next storm.
Unabbreviated
As the Metal Construction Association’s technical director Robert Zabcik said in a recent white paper, “Engineering professionals go through great efforts to make sure the public is protected.” All this research is integrated into regular updates to the tests, ratings and codes applied to building products across the country. These can become an alphanumerical soup, but here are the most prominent, along with differences between them:
Model Codes (Codes) provide a minimum baseline of performance needed to protect property and the public. These are the barebones building basics.
Underwriter’s Laboratories (UL) is a consortium of test labs and research companies which maintain test standards, as well as product listings which meet certain performance criteria. These are usually superior to those required by code.
Factory Mutual Insurance Company (FM Global) is comparable to UL but funded by a consortium of insurance underwriters.
Since the Miami-Dade area has suffered some of the worst hurricane damage, they have some of the most stringent codes and test protocols, so those are among many that MBCI uses to test our products. Jason Allen, MBCI research and development engineer, explained what some of these are and how they’re used. The UL 580 rating is based on tests for uplift resistance of roof assemblies. While materials can receive a class 30, 60 or 90 rating, MBCI uses class 90 as a standard. We also maintain class four impact ratings under UL 2218 for hail and projectiles, as well as the UL 790 Class A fire rating.
Any Way the Wind Blows
But these ratings and classifications get very complicated. You won’t find MBCI materials themselves listed as withstanding certain windspeeds or projectile damage. Allen explained, “It’s dependent on several things: building codes, roof pressures, eave and building height, facing attachments, roof slope and wind speed – just to name a few.” There are differences based on locality, storm threats and codes. It takes a qualified engineer to calculate all of it for an entire project. But that’s the only way to be sure of safety. “It’s going to cover all scenarios,” said Allen.
During a hurricane or tornado, wind is just part of the problem. “Performance during these events must consider both water tightness and wind applied at the same time,” said Zabcik. “Wind-driven rain can force water into places it would not normally go … This is yet another reason why details are so important and why manufacturers work so hard to ensure the systems they produce meet stringent standards for performance.”
In conditions like these, traditional building methods have a difficult time comparing to metal. They suffer from softer connections, more porous materials, and less stringent assembly designs. “Shingles last 15 to 20 years,” said Allen. “A metal roof can last 40 to 60 years.” Across the nation, wherever post-storm studies and material testing have occurred, metal stands out. In Florida Building Commission, FEMA and NIST studies, metal buildings performed exceptionally well.
Second Wind
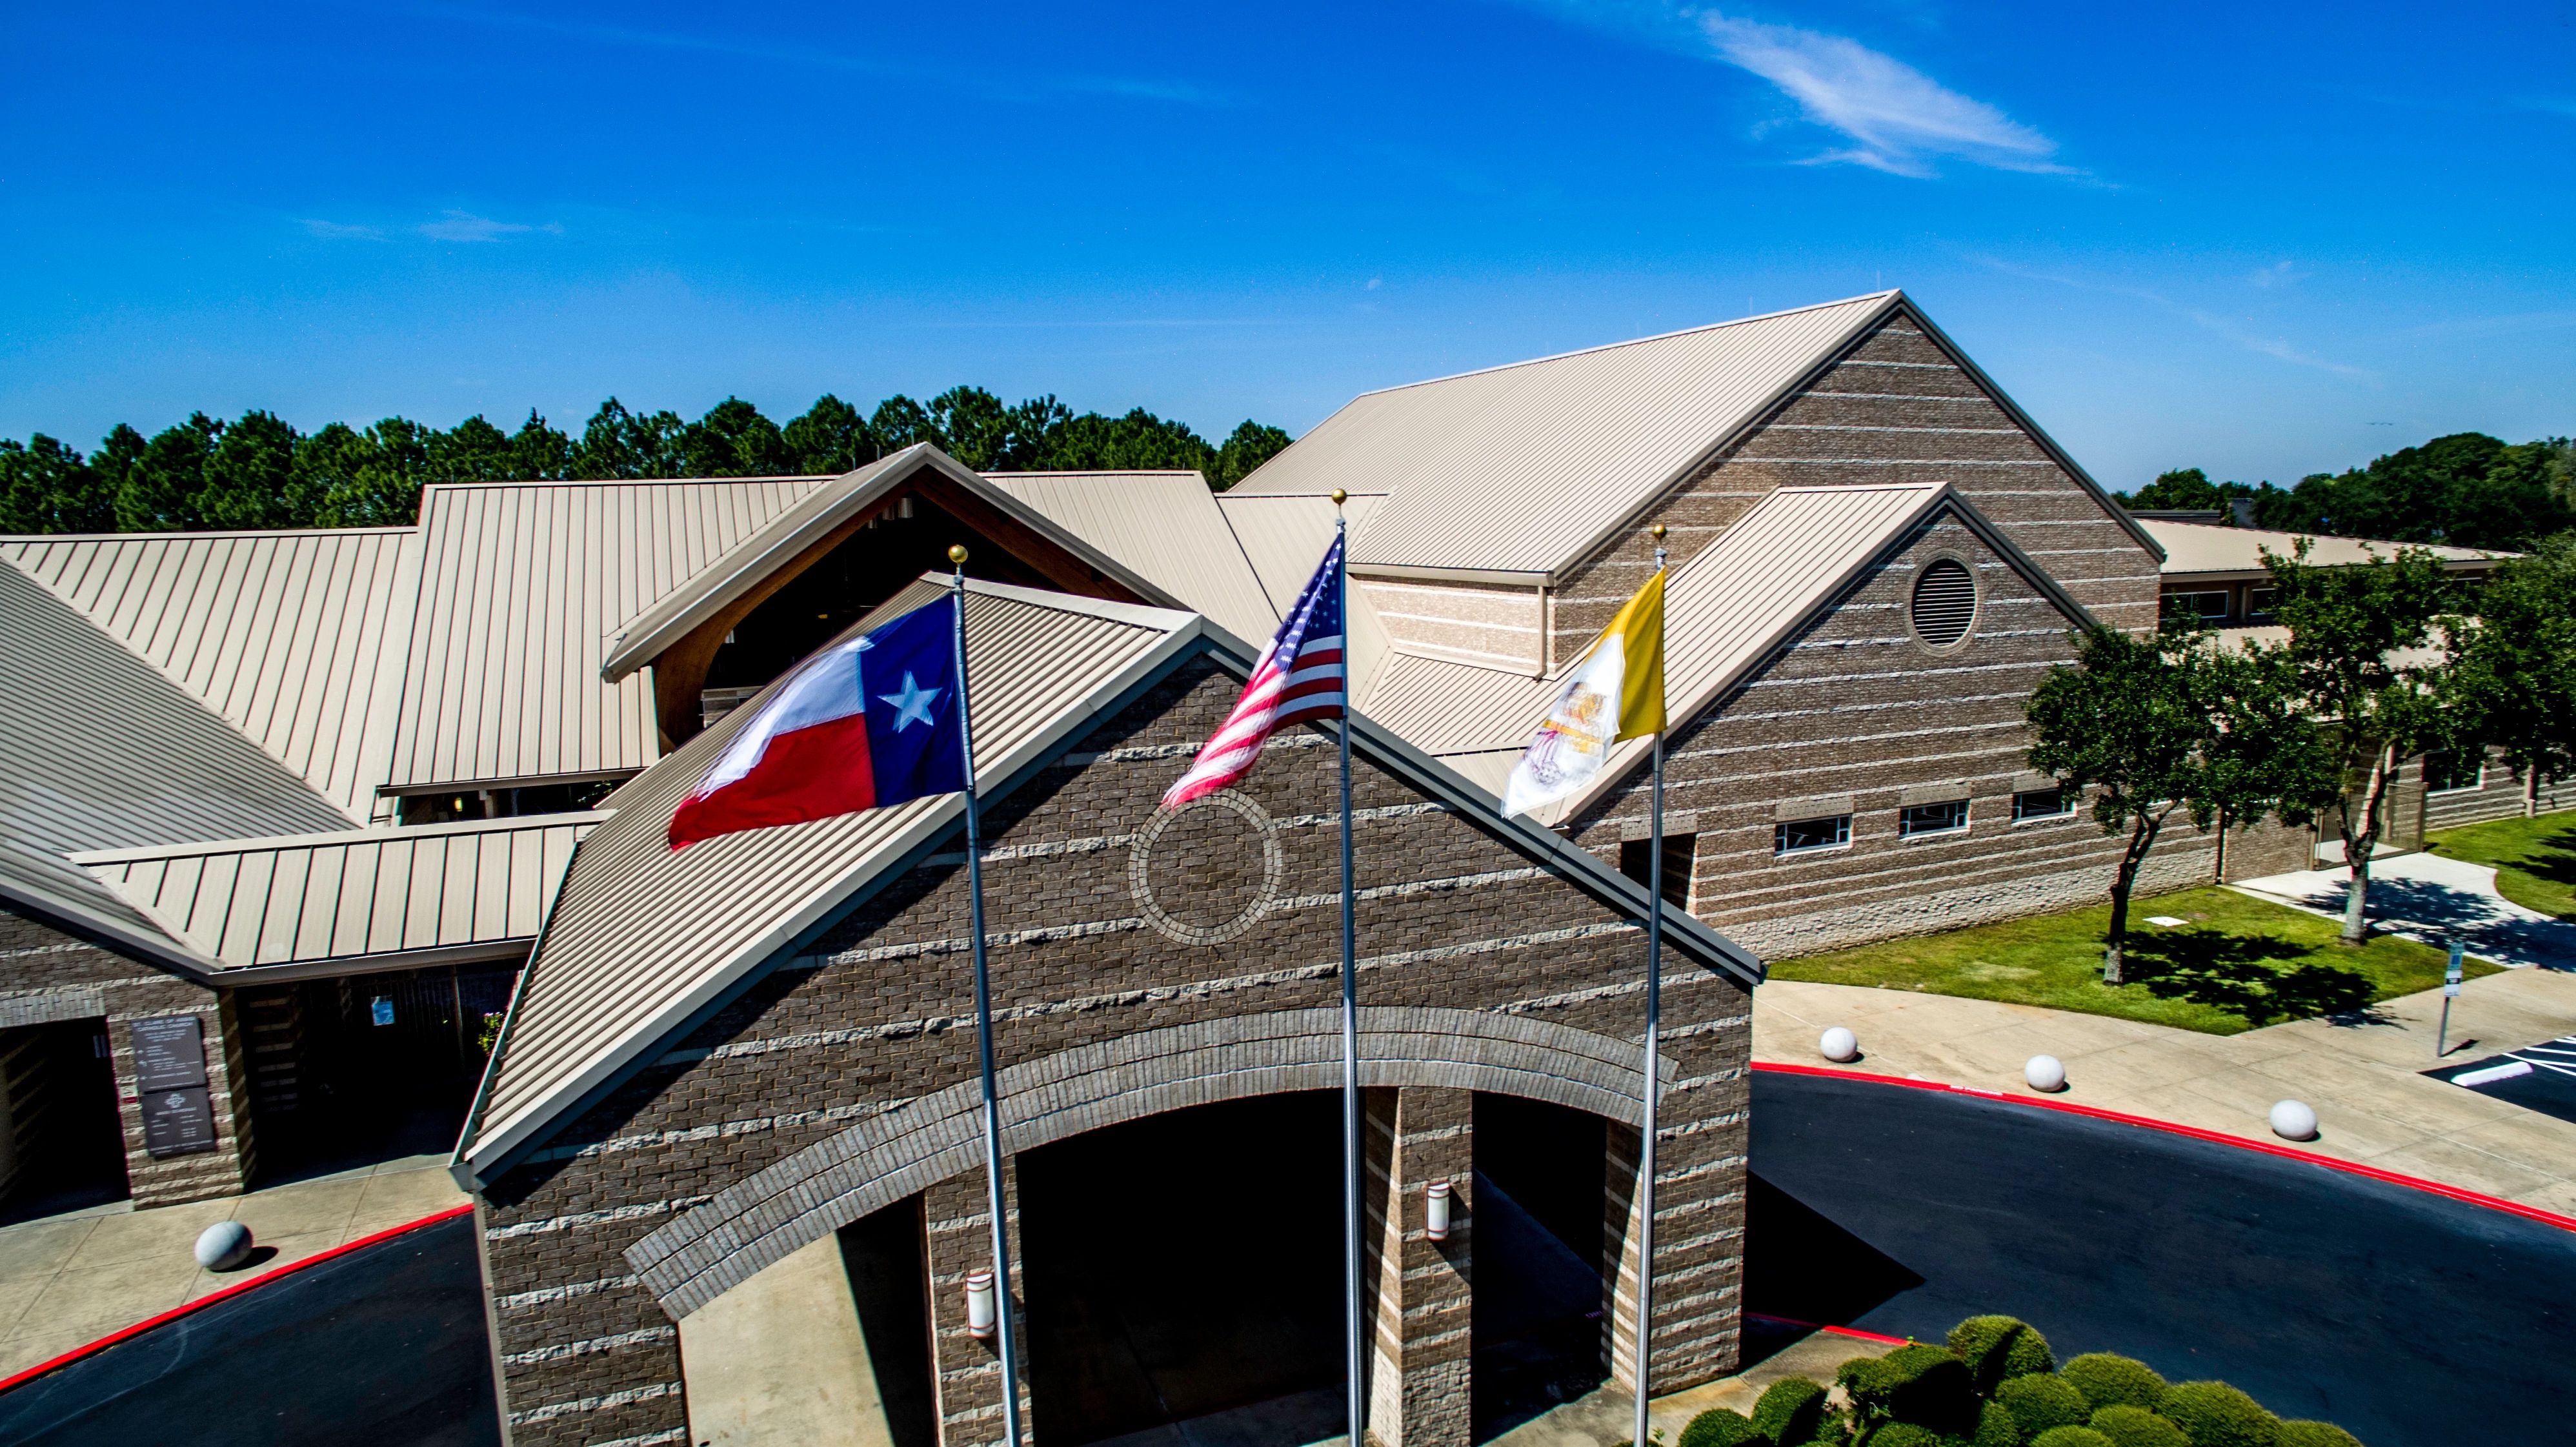
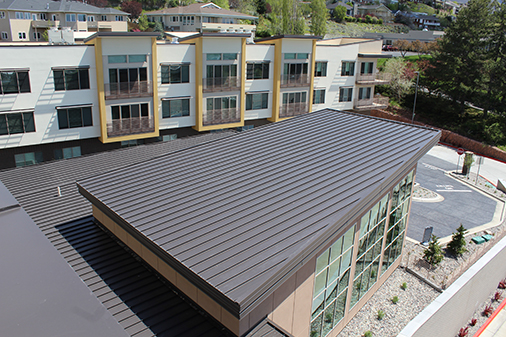
Whether standing seam, insulated metal panels, exposed fastener or concealed fastener roof solutions are chosen, metal roofing’s strength and durability keeps out rainwater and withstands windspeeds that devastate other types of construction. Standing-seam roof systems and IMP façades remained intact during Hurricane Katrina even as winds hit 120 mph. “Industry experts have found that metal panel roofs can withstand wind gusts as strong as 140 mph or more due, in part, to their large interlocking panels,” said Zabcik. “Metal panel systems provide not only the weather resistive barrier,” he said, “but can also provide diaphragm stability to both the underlying framing and sometimes, the building as a whole, because they can transmit shear from one panel to the next.”
Riders on the Storm
What about hail raining down from the sky, windborne projectiles, lightning, and everything else that severe storms hurl at buildings? Though they may suffer some cosmetic damage, metal construction such as standing seam roofs and IMPs are often able to absorb impact, remain functional and keep their protective metal layers intact. That can make all the difference in a hurricane when the wind can blow away other roofs and dump untold gallons of stormwater and debris inside. Somewhat counterintuitively, metal buildings also perform very well during lightning strikes.
Batten Down the Hatches. Then Batten Them Again
Before you assume that selecting an engineer’s recommended, rated, and tested metal roof will be a sure-fire protection against all nature’s hazards, there’s one more thing to understand. All the ratings and tests mentioned here are performed with a specific assembly procedure. It is absolutely critical that the same procedure is followed – to a T – to ensure your building will enjoy the same protection its ratings guarantee. Allen recommends that you “look at the company you want and make sure they have statewide approvals,” and make sure your installer reads the manual, then re-reads it, then re-reads it a final time. It’s no exaggeration to say that lives are at stake.
Zabcik sums it up nicely: “With proper preparation, a solid knowledge of metal roofing options, an understanding of the latest standards and codes – not to mention a willingness to strictly adhere to tested quality control methods – today’s metal roofing is a strong choice for even the most vulnerable structure.”
To learn more about MBCI roofing solutions, to retrofit a current building or to get an engineer started on designing out your project in a storm-prone area, get in touch with an MBCI representative today.
Metal Panel Roof Restoration & Installation
Backup to the Future: Benefits of Backup Wall Systems
Beauty is More Than Skin-Deep
The most basic requirement of any building is to keep the elements out – while keeping comfortable conditions in. Those elements can be relentless – from bitterly cold wind, snow, sleet and ice to ferocious heat and torrential rain. It’s no wonder buildings have historically been clad in multiple layers to combat these different forces. For centuries, those multiple layers have done the job adequately. But advances in manufacturing, materials and technology have completely changed the game, and you can take advantage of all of it with backup wall systems from MBCI.
A Package Deal
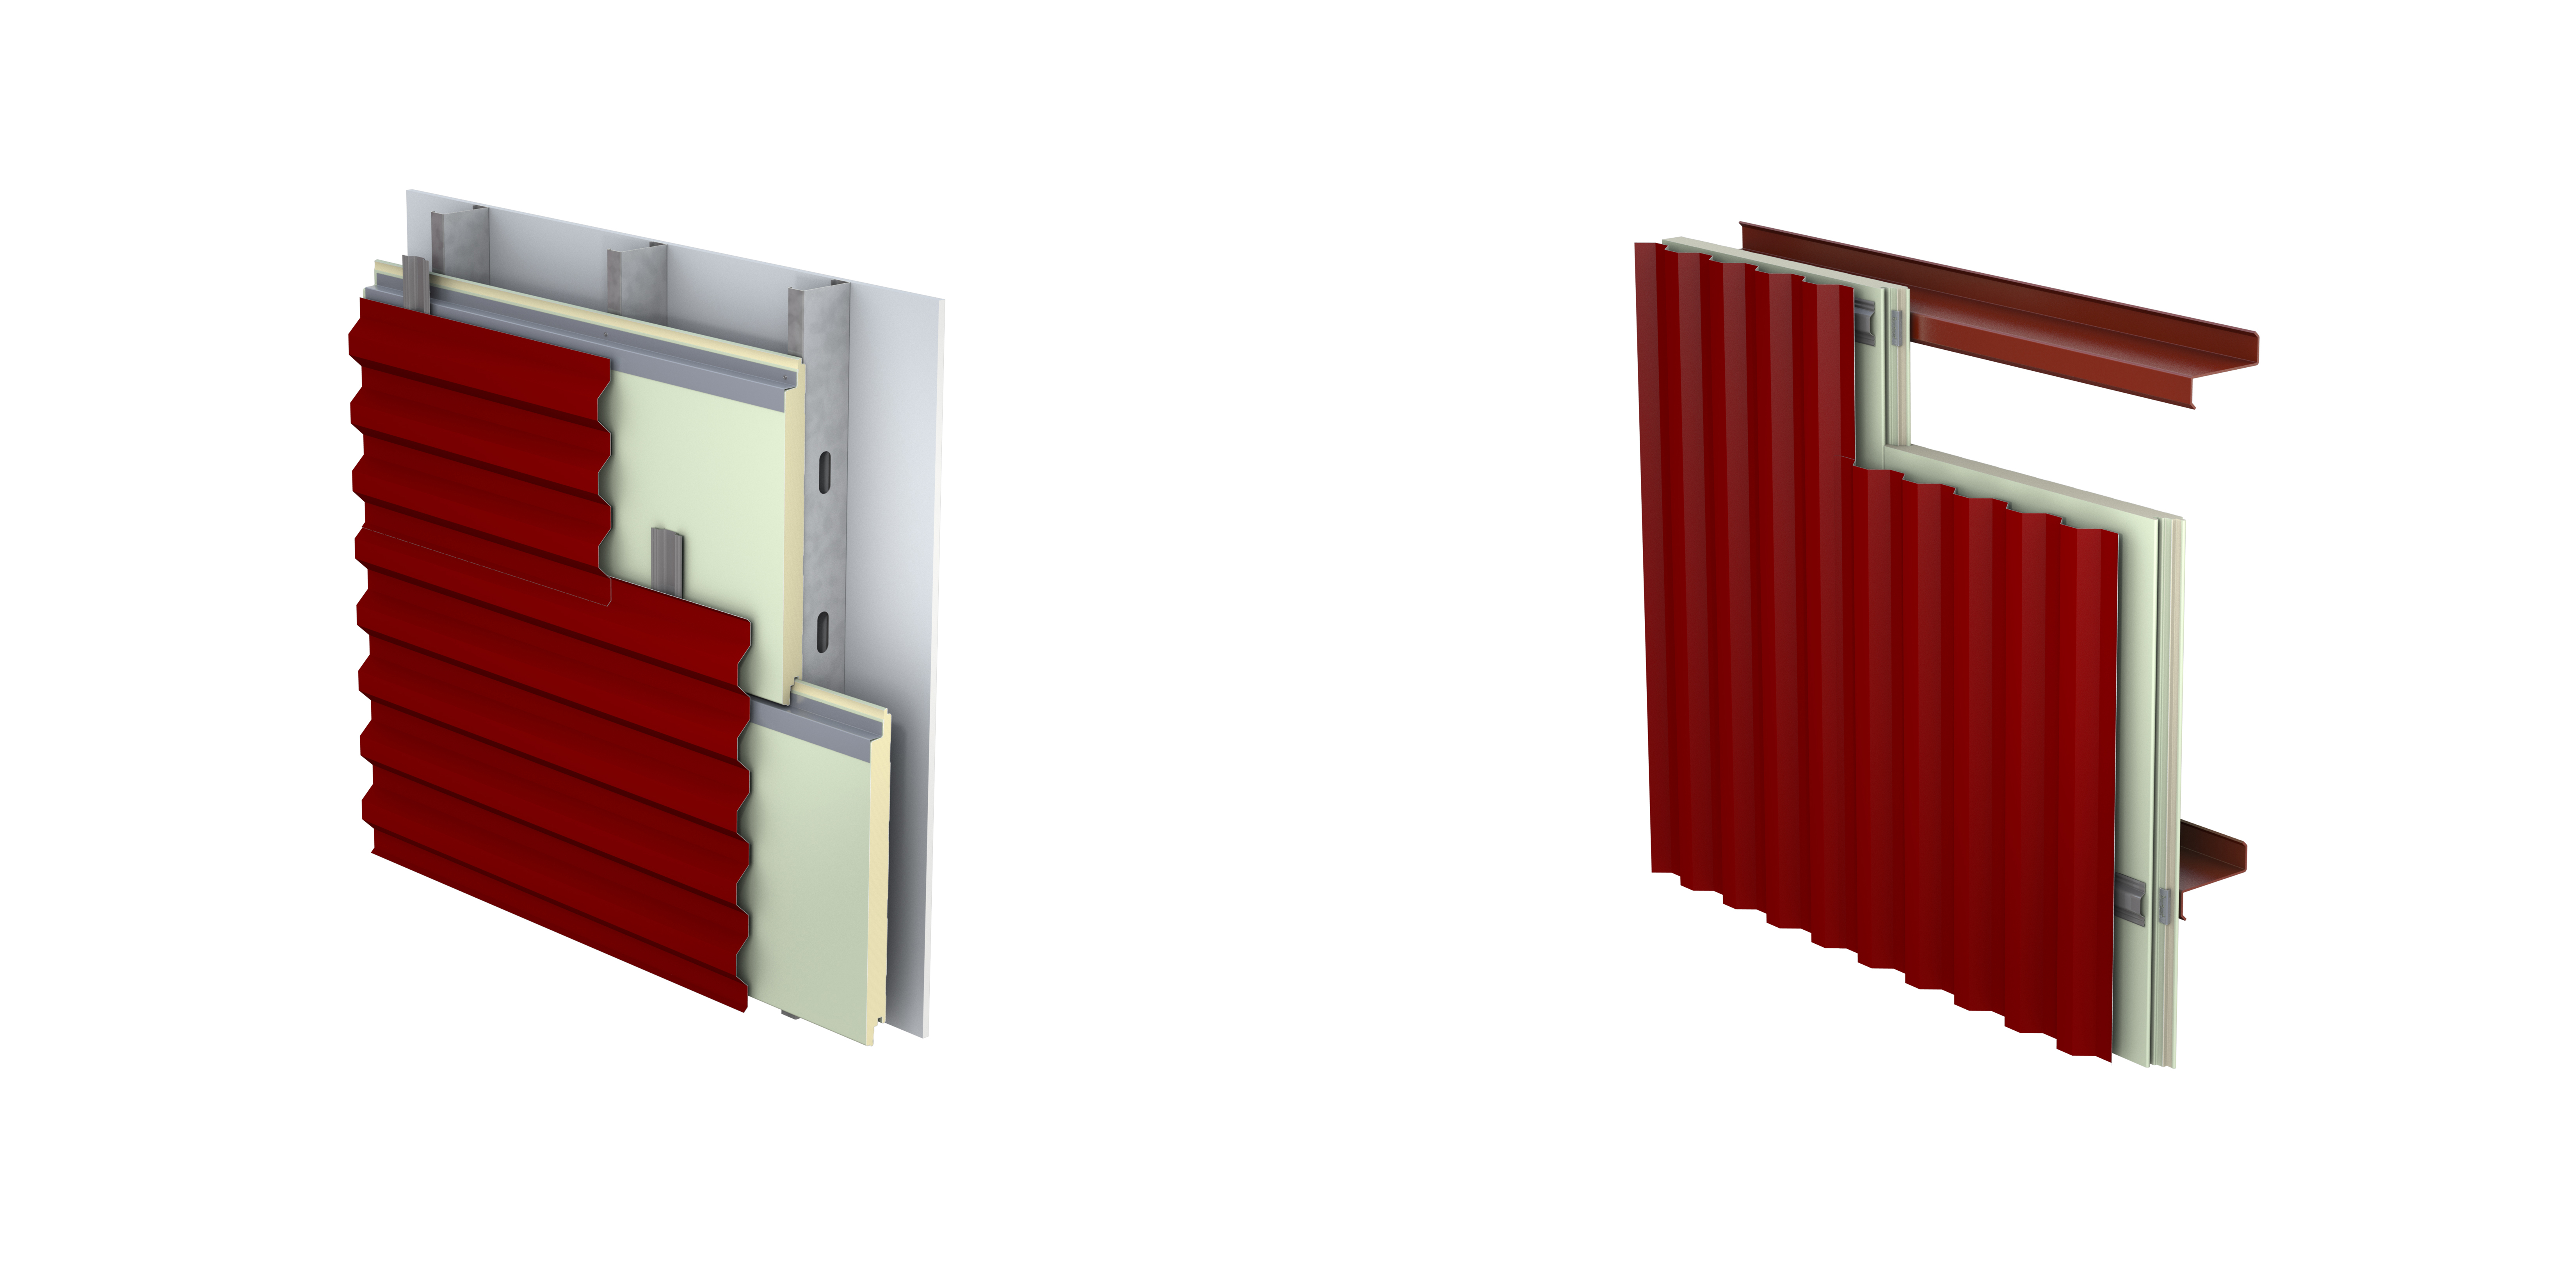
Like insulated metal panels (IMPs), backup walls combine air barrier, vapor barrier, moisture control and insulation into an all-in-one product. The key difference between IMPs and backup walls is that while IMPs function as the rainscreen or façade, MBCI’s backup walls are designed to work with the rainscreen or façade of your choice.
Instead of relying on three or four different contractors to install insulation, Zs, sub girts, air/vapor barriers and sheathing, one worker can install backup walls in one simple step. This has shifted construction standards in cost savings, sustainability and design integrity in ways with which traditional walls simply can’t compete. It’s hard to justify the scheduling and liability hassles of traditional backup wall construction when you could more quickly and reliably weather-in a building with a backup wall system.
Alleviating Headaches
Backup walls eliminate a number of common headaches from the jobsite. There’s no longer a need for multiple crews to work in turn on the cladding, and likewise no need for conventional batt or board insulation, exterior gypsum, air barriers, vapor retarders or building wraps. That’s a sizeable amount of material, subcontractors and coordination suddenly off your plate. Better yet, the expedited close-in/dry-in times mean interior trades can move in and get started sooner.
Façade Freedom
Backup walls are a virtually unbeatable solution for all building types in all climates. MBCI’s Backup Walls are made of foamed-in-place polyisocyanurate with two steel skins, offering strength, durability and a superior drain plane – all in one foolproof, easily installed product. Once the backup walls are installed, you can choose nearly any type of rainscreen or façade you like, from brick and metal to terracotta, ACM and stucco. A popular design choice is an aesthetically pleasing combination of facades. For instance, a public-facing part of a building might be clad in handsome brick or stone, while the obscured sides and rear are clad in IMP’s or something more economical.
Insulation Domination
Traditional multi-component walls with continuous insulation require supplemental Z steel framing to convey wind load from the rainscreen to the supports, causing a loss in thermal performance and condensation potential in the cavity. The all-in-one structural construction and enclosed system of backup walls eliminates this problem and makes for better thermal performance. Another often-overlooked concern, air infiltration is addressed in MBCI’s Backup Wall Systems by providing a continuous air barrier via a formed metal liner with a combination of field- and factory-applied sealants. In fact, MBCI’s Backup Walls achieve U-Factors that exceed the International Energy Conservation Code (IECC) energy performance requirements based on tests in accordance with ASTM C1363. They also offer outstanding fire resistance, meeting requirements of the NFPA 285 multi-story fire test.
Making the Right Choice
Depending on your ultimate end-goals for design and practicality, either the BW Universal System™ or the BW Stretch System™ will suit your needs best. BW Universal covers two-foot spans, is installed horizontally, and can accommodate nearly any rainscreen or façade with horizontal or vertical rainscreen rails, panel clips or brick ties. BW Universal is often chosen for more architecturally driven projects due to its compatibility with any façade. The BW Stretch System’s primary differentiating characteristic is its ability to cover up to six-foot spans. BW Stretch is compatible with several rainscreens, though it’s not a good match for masonry.
Though BW Stretch is installed vertically, and BW Universal is installed horizontally, MBCI product manager Jennifer Franz clarified that “Some people think that means the facade can only be installed horizontally or vertically. That is not the case. Either one can have horizontal or vertical facades.” Franz also pointed out that rainscreens and facades often have their own span requirements, which designers should be aware of before making final decisions. “The BW Stretch System can span up to six feet,” she said, “but that doesn’t necessarily mean the rainscreen or façade you put in front of it can. The façade may still dictate a lot of the capabilities of the wall. You need to understand the capabilities of the facade as well as the BW panels.”
Get Started
Whichever system you choose, you’ll receive a weathertight 10-year warranty. But you’ll also receive so much more in terms of time and money saved, hassles avoided, and peace of mind gained. When you’re ready to learn more about MBCI Backup Wall Systems, simply get in touch with your representative. We’ll be happy to help – and you’ll be happy you reached out.
How to Avoid Common IMP Installation Mistakes
Insulated metal panels (IMPs) are ideal for many roofing and wall applications. They are considered a top-of-the-line choice known for their superior insulation value, high performance air barrier, design flexibility, and fast installation. The simplicity of installation creates a high-performance building envelope. The many design options provide a versatile building solution for commercial, industrial, and institutional projects.
Sounds great, doesn’t it? What’s the catch? Well, those benefits won’t mean much if proper care is not taken during the installation process to ensure you’re getting what you paid for. Potential consequences can span the gamut—from minor aesthetic headaches to extremely costly errors such as leaks and structural issues.
Here are some ways to avoid common pitfalls when installing IMP panels on your next metal wall or roof project.
1. Pay attention to the manufacturer’s product installation manuals.
Installation manuals are not just for show! Even the most experienced installer should read, review and understand the installation guide before installing IMPs, and the panels should always be installed in accordance with the project’s installation drawings.
Don’t simply rely on the “what-you’ve-done-before” mindset. Take the time to review the specifics for every individual project. In addition to providing the information needed to execute a successful install, it can also give installers an opportunity to build upon their own knowledge base. One of the most common errors is related to proper receipt and handling of the panels. Investing a few minutes before the project starts and at the start of each day to review key topics helps avoid costly errors and improves production.
If you have a question or something does not seem right stop and call the manufacturer. It is always best to address a problem up front than try and fix a problem after the building is in operation.
2. Equipment check. Do you have what you need?
To keep your IMP installation on track, it’s imperative to ensure you have the equipment you’ll need for the job. Does your project need one or two forklifts, is a crane a better option? Will your project include longer-length IMPs being installed in a vertical orientation? If so, you may need special lifting equipment so as not to damage the panels. Whatever the details, crews need to be prepared to receive a project’s specific materials on site. A little advance planning will ultimately save you time and money by reducing labor and avoiding costly mistakes.
3. Don’t assume every IMP application is the same.
All buildings are not created equal. Just because a construction crew has had experience installing insulated metal panels on past jobs, doesn’t mean they can assume the process will be exactly the same every time. There will always be specific conditions and variables that need to be taken into consideration. Techniques used for vertical industrial panels will be different for horizontal architectural panels.
The vapor barrier (a key function of an IMP) is a great example of how a miscalculation can be problematic. Depending on the panel, the vapor barrier may be applied either at the factory or at the jobsite. If the project calls for a cold storage environment, the “warm” side of the vapor barrier will be on the exterior. Alternatively, a commercial or industrial application generally calls for the vapor seal to be on the opposite side of the panel. Confuse placement of the seal and you’re bound to run into problems down the road.
4. Be on the lookout for creases, buckles and framing alignment.
A crease or buckle on the face of a panel might seem like no big deal, but that couldn’t be further from the truth. In fact, framing alignment is one of the most critical aspects to ensure a proper fit-up of the construction as a whole. In terms of the panels themselves, not only will a framing misalignment not LOOK right but can also cause numerous efficiency and performance issues. Installing inexpensive shims can avoid panels needing to be replaced.
Additionally, make sure the first panel is plum and square, if you start right it is much easier to finish right.
Purlins must be level and square and all framing and bracing should be installed before installing panels. (The IMP manufacturer should specify the amount of tolerances allowed.) Also, take care with caulking and taping, foam-to-foam connections (in order to mitigate potential vapor leaks), seaming, and lap joints.
Attention to detail will avoid costly mistakes.
5. Always think ahead.
Being proactive may be the most important piece of advice construction crews need to hear.
For one, be sure to have a panel surplus on hand. You may be of the mindset that ordering extra panels is at worst a waste or at best, not worth the effort. This is a common judgement error that often leads to installation delays. If a crew has only ordered the exact number of panels needed for a job and there is any damage to the product, whether prior to delivery, on-site or during the installation, there a risk to the project schedule. Waiting on replacement panels can wreak havoc on schedules, especially with panels that may need special manufacturing due to custom components, finishes or colors. What do you do with extra panels you don’t need on the initial installation? Building owners can hold on to any surplus panels to be used as replacements, as needed, over the lifecycle of the building. A little preparation today can go a long way.
Other best practices include understanding the project’s site conditions and ensuring crews remain crews up to date on proper installation techniques—including staying current with training and certifications.
By taking this advice to heart, you can exponentially increase your ability to enjoy the many benefits of IMPs and be confident in your investment. For more information on MBCI’s insulated metal panels and proper installation guidelines, we encourage you to contact your local MBCI representative or visit our website.
Insulation Considerations for Metal Building Projects
Once you’ve set your sights on metal panels for your next building project, insulation will be one of the first, and most important, considerations. There are so many variables, though, so how do you know what’s best?
When you’re trying to make a determination of the insulation type, you should first identify what’s driving your decision making. Are your insulation requirements based on external parameters, such as job specs or established code requirements, or is there some other self-proposed condition at play like the end-use function of your building? Do you require upfront cost savings or is long-term value what you’re after?
Here we’ll take a look at some of the most common determining factors and how they might affect your insulation choices.
Energy Codes
Depending on whether you’re building in the commercial or residential arena, and what the physical location of your project is, you may have to adhere to strict energy/building codes that will be an unmovable goal post in your decision making.
Are there any local code or project-specific stipulations as far as minimum R-values for the roof or for the walls? What must you be in compliance with? There can be many different aspects of an energy or building code that you will need to research. For example, there may be an envelope solution where the whole building nets out “X” R-value. Or, a prescribed method could be mandated, where each individual component (i.e., windows, doors, walls, etc.) going into that building cannot exceed (or must meet) a particular requirement.
Let’s say, as an example, you have a code that requires you to have a continuous R-value at your structural attachment point. Depending on what that requirement is, it may be harder to achieve that by using a rolled or batt fiberglass systems. You might be able to achieve it much more easily with a componentized system using metal decking/liner and rigid board insulation, or perhaps an insulated metal panel (IMP) may be better suited. In that case, you could be looking at spending more money for that panel system while saving money on the labor … which brings us to the next variable: upfront costs.
Upfront Costs
Another critical factor is the cost associated with materials and labor of the system you’re going to install. Let’s say, for instance, your needs require a higher-end type installation in order to reach higher R-values or a code-prescribed method. How are you planning to achieve that?
In some instances, you may be looking toward an insulated panel system, which can readily give you those higher installed R-values. While these are extremely efficient systems, there can be a notable bump in the panel material price to get to that same level than if you choose a single-skin approach with a fiberglass or rigid board insulation system. You would, therefore, need to accurately compare the installed costs of the two systems versus just the material alone. Which will be less expensive/more efficient: the multiple components with lower individual costs plus more labor time and expense to assemble OR the potentially higher individual IMP panel price but with less time and expense to install? You will need to look at the project holistically to determine which is more cost-efficient for the specific situation.
Long-term costs, value and end-use functionality
Oftentimes, upfront material and labor costs need to be evaluated in terms of potential long-term savings and value. Some things to consider here are what your big picture needs are for the structure, including an assessment of how it will be used now and in the future. Unlike with dictated codes and regulations, here it may be more a question of wants vs. needs or owner-occupying vs. vendor leasing.
While you might want an R-30 building, for instance, is it economically beneficial for your end use of the building? Let’s use this example: If you’re a homeowner using a metal structure to store relatively non-valuable belongings, how well does it have to be insulated? Is it worth a high price point? In this case, perhaps single layer roof and wall insulation will be adequate for your needs.
If on the other hand, you’re a builder contracted to construct a structure for which interior climate control is critical for the end use—either because of the production to occur inside or perhaps due to food storage or other temperature-sensitive contents—then you might lean more toward an insulated panel system. In another example, if there’s going to be the potential for an abundance of heat or moisture in the building, as with paper products production or wastewater treatment, then you’ll want to be certain that the insulation system you use best resists such an interior climate and doesn’t permit condensation to form. In this example, it is critical that the structure is significantly protected so that moisture cannot become trapped in the roof or wall assemblies leading to reduced building efficiency or even formation of mold.
You should also consider how long it will take to recoup your initial investment. Obviously, for instance, you may spend less money upfront by only putting 4-inch blanket in your single layer metal walls as opposed to choosing to install an insulated metal panel (IMP) system, but long-term, is the money you save by going with the lesser insulation system going to be more than what the energy savings would be over the time that you’re the occupant of the building?
If you’re only going to be in the building for one or two years, or you’re not even occupying the building, you might be tempted to install a lesser expensive system, but then you might be risking not being able to retain tenants or impacting future resale value.
What Are the Insulation Options?
Once you’ve identified what the driving factors are for your insulation system choice, you can match up your needs with most popular options, which are:
Fiberglass insulation solutions, including over-the-purlin systems; cavity fill insulation systems; batt insulation; rigid board insulation via a composite system with metal decking and vapor barrier; or spray-on insulation systems. Alternatively, if a foam core insulation is preferred, it may be worth considering the use of insulated metal panels (IMPs) that are designed, engineered, and fabricated to be compatible with metal building construction as an envelope building solution.
For more specifics on the types of insulation systems that are available, check out this MBCI blog article: https://www.mbci.com/coordinating-roof-insulation-with-metal-building-construction/
Are Metal Panels An Ideal Low-Slope Roofing Material?
Many large, commercial, low-rise buildings often don’t benefit from steeply-sloped roofs the way residences and small commercial buildings might. This is because a steep roof slope would add unwanted height and unnecessary construction cost. Buildings like warehouses, retail stores, etc. are more appropriately built with low-slope roofing, commonly known as “flat roofs”. The National Roofing Contractors Association (NRCA) defines low-slope roofs as those with “a slope at or less than 3:12″. Anything steeper qualifies as a “high-slope roof”. With this in mind, let’s look at some key points to consider when designing and constructing a low-slope roof.
Low-Slope Roofing Materials
When it comes to selecting low-slope roofing products, there are generally three fundamental choices:
- Asphalt/ Bituminuous Products: The traditional commercial roofing norm for many years, the use of asphalt/bituminous products has dwindled as newer, more appealing options have emerged.
- Flexible Membrane Roofing: This roofing material can be made from a variety of types of plastic/polymer-based materials (commonly known as EPDM, TPO, PVC, etc.). Rolls of the chosen membrane are laid out on the roof structure and secured in place either with mechanical fasteners (screws with large washers) or with a continuous layer of adhesive.
- Metal Roofing: Sometimes overlooked, metal roofing is suitable for different roof slopes. Many metal roofs that use standing-seam systems are rated for use with a pitch as low as ½:12.
When considering which type of roofing material to use for a building project, there are a number of significant differences that illustrate why metal roofing is often the ideal choice.
Engineered For Superior Performance
Standing-seam metal roofing is made specifically for use on low-slope roofs as it meets a number of performance requirements:
- Water resistance: Precipitation doesn’t penetrate through metal or through the standing seams where the metal panels join together. This is why they can tolerate such low slopes, allowing the water to drain away slowly and predictably without leakage.
- Rigidity: The rigid nature of metal means that there is less opportunity for ponding (standing water). This is not always the case with asphalt/bituminous or membrane roofing systems.
- Drainage: Metal roofs carry water to the building’s edge toward gutters and downspouts that carry it away from the building. Other roofing systems rely on drainage piped inside the building. This takes up space and has the potential to leak water inside the building and cause damage.
- Wind Resistance: Standardized uplift testing shows that metal roofing performs as well or better in extreme weather than mechanically-fastened or fully-adhered membrane systems.
- Durability: The most cited advantage of metal roofing is its long-term strength and durability. Engineered design and use of high-quality coatings ensures a longer lifespan—50 years or more. In contrast, other roofing types typically feature lifespan ratings of 20 or 30 years.
- Puncture Resistance: Low-slope metal roofing is more puncture-resistant than asphalt/bituminous or membrane roofing. This makes it better able to tolerate foot traffic, hail and other puncture-inducing hazards.
- Construction/ Installation Ease: Metal roofing panels are custom-made to suit specific building sizes and end uses. This customization typically means it takes less time to place and install metal roofing in the field. Further, metal panels can tolerate a wide range of temperatures and weather conditions and still install and perform as intended. Low-slope roofs are also safer to walk on with less risk of slips, falls and other hazards.
Cost-Effectiveness
Using metal roofing on low-slope roofing systems can be cost effective in a number of ways:
- Fewer labor hours as a result of the ease of installation saves money during construction.
- Competitive material costs, particularly if the metal roofing is part of a total metal building package from a single manufacturer.
- Minimal maintenance requirements and aversion to rusting, mold growth and decay that save the building owner money over time.
This all adds up to a very favorable life-cycle cost.
The performance, cost-effectiveness and life-cycle benefits of metal roofing panels make them a viable option for low-slope roofing systems. Manufacturers like MBCI can help you select the right metal roofing products and provide information and resources to help ensure proper installation.
View examples of low-slope metal roofing projects and contact your local MBCI representative to start your project today.
Metal Roof Seaming: Best Practices for Ensuring Weathertight Seams
It would seem logical that the most important field installation process for a standing-seam metal roof is the actual process of creating the weathertight seams that connect the metal panels together and ensures the structural integrity of the roof. Perhaps for many different reasons, however, this critical seaming process is not always given the proper attention it deserves, nor are installers given the proper training required to ensure installation runs smoothly. This approach can cause some serious issues, not the least of which is the voiding of a manufacturers warranty or the discovery of roof leaks and the resulting damage.
To help, here are some best practices for readily and successfully carrying out the metal roofing seaming process:
Personnel
Because of the critical nature of seaming metal roofs, the crew members doing this work should be properly trained. Team members who will be performing this work should not perform the seaming without having participated in the appropriate installation training required to ensure the seaming process is appropriately managed. Most roofing manufacturers offer installation training that many installers take advantage of—and this training opportunity should be taken advantage of by the staff who will be doing the seaming.
Seaming Equipment
It is very important that the seaming equipment being used is matched to the specific roof panel system being installed. Manufacturers routinely rent out this equipment in order to be sure that the metal panel profiles are installed properly and are not compromised through the use of generic equipment or that of another manufacturer. Using the wrong equipment can end up being costly for everyone if panels and seams are ruined in the process.
Hand Crimper
As metal panels are set in place, they are often secured with metal clips, spaced according to engineering and construction needs. Hand crimpers are used to form the seams around the clips as well as any end laps. This process must not be overlooked as improper hand tooling is the number one cause of faulty seaming. To ensure costly mistakes aren’t made, follow the process described in the “Field Seaming Tool Manual”. This manual should be provided with the equipment and reviewed in training.
Electrical Sources
The next step will involve the use of an electric seamer which obviously needs a source of electricity to operate. However, not just any electrical power source will do. Almost all professional seamers have an AC/DC motor that will require 10 or 15 amps and 120 volts. A dedicated electrical circuit—preferably from a temporary electrical pole or an existing building electrical panel—is the best and most reliable way to go. A generator with 15 amp capacity dedicated to be used only for the seamer (in order to avoid power surging) may be acceptable as well. In either case, the power line to the seamer needs to be 10-gauge (minimum) cord. It should also be no more than 200 feet long (to avoid power drop).
Electrical power sources that are NOT acceptable include outlets from a powered man lift or a generator that is not dedicated to only the seamer. (This includes a generator that is part of a welding machine.) Check the manufacturer’s requirements for any other restrictions that can damage the seamer. Skipping this step can place the responsibility for repair or replacement onto the installer.
Electric Seamer
Once all panels are in place, the hand crimping is done and the power source is set. Then, electric seaming takes care of finishing the roofing system. Again, consult the seamer manual for proper procedures, including which direction the seaming should be done. (Seaming can either be done up or down the roof depending on direction of roof installation.) The electric seamer includes a switch for the operator to control the starting and stopping of the process.
On low-slope roofs, the operator should walk alongside the seamer to be sure nothing is in its path and that the seam is done properly. While stopping and re-starting is fine, the seamer should never be removed in the middle of a seam. Doing this makes it very difficult to set it back in exactly the same spot again. If something appears to be wrong with the seamer or the seams being produced, then don’t keep using it. There is no point in damaging multiple roof panels if any one panel indicates that things aren’t going right. In this case, contact the manufacturer right away for assistance or replacement of the seamer.
Safety
Electrical seamers are heavy and—if not used and secured properly—can cause harm or injury. Therefore, they should always be tied off with a safety line—the same type used for workers—not a common rope and definitely not the electrical cord. The safety line should be properly secured to the seamer and then attached to something rigid on the building. Never attach this to a person who could be pulled off of a roof by it.
Cleaning
Before use each day, check the electric seamer and remove any oils, debris or dirt. Make sure the seamer is unplugged from the electrical power source before you begin cleaning. Also, check the grease level in the machine daily and only add a little bit (2-3 pumps from a grease gun) as needed. Too much will cause the grease to leak out onto the roofing.
Following these pointers should help assure the safe and efficient use of the right seaming equipment when installing roofing panels. To find out more about proper seaming or to schedule training, contact your local MBCI representative.
Design and Performance Benefits of Insulated Metal Panels
In a prior post on insulated metal panels (IMPs) we reviewed some of the basic things everyone should know about this versatile and lightweight metal building component. In this posting, we will drill down a bit more on the benefits of incorporating IMPs into a new or retrofit construction project. Here are some of the top reasons they are so popularly used in both walls and roofs:
Energy Conserving, Space Saving Insulation
Foam plastic insulation is used between the metal skins of IMPs. Such insulation has been accepted for use by building codes for quite awhile provided it meets certain conditions. IMPs have been tested and shown to meet or exceed all code requirements for construction and for energy conservation too. Part of their appeal over other ways to insulate is that they can achieve high performance in a thinner wall or roof assembly than would be required with other types of insulation, such as fiberglass. IMPs are available in thicknesses that range from 2 to 6 inches and have corresponding R-values from R-14 to R-46 allowing design professionals to select the thickness that matches the energy performance level sought in a particular building. Other insulation types would require thicknesses of at least twice as much to approach the same R-values as IMPs. Further, the metal interior and exterior skins are the only finish material needed so the total panel thickness is very space efficient. Thinner IMPs in the walls and roofs can save space in the building or on the site all while achieving high energy performance.
Durability, Longevity, and Low Maintenance
The manufactured panels are rigid and quite strong. They have been tested for compression, tensile, and shear strength with impressive numbers that come about because of the combination of the rigid foam and steel properties. The surfaces are made from the same long-lasting galvanized and factory finished steel used in other metal wall and roof panels so their resistance to weather, abuse, and even harsh conditions has been proven, making them very easy to maintain. In locations where severe weather and storms are a concern, they can also be specified to meet requirements for heavy winds, hail, and similar concerns. Plus, since the skins of the IMPs are made of noncombustible steel, they provide an ignition barrier as part of an overall fire protection scheme for the building.
Cost Saving Construction
IMPs are an “all-in-one” product that takes the place of many other products and components used in traditional construction. Instead of requiring multiple trades and materials to be installed individually over some number of weeks, IMPs are installed by a metal building contractor and allow the walls and roof to be completely closed in with a single trade. The use of concealed fasteners in the side joint of the panels makes installation quick and easy. Unlike other construction systems, the inherent strength and resiliency of IMPs means that work doesn’t need to stop over weather concerns. All of this saves a considerable amount of labor costs and can also save a lot of time meaning buildings can be completed quicker and more economically. It could also mean that an owner is able to occupy and use the building sooner, thus reducing construction financing costs and allowing operations to begin more quickly.
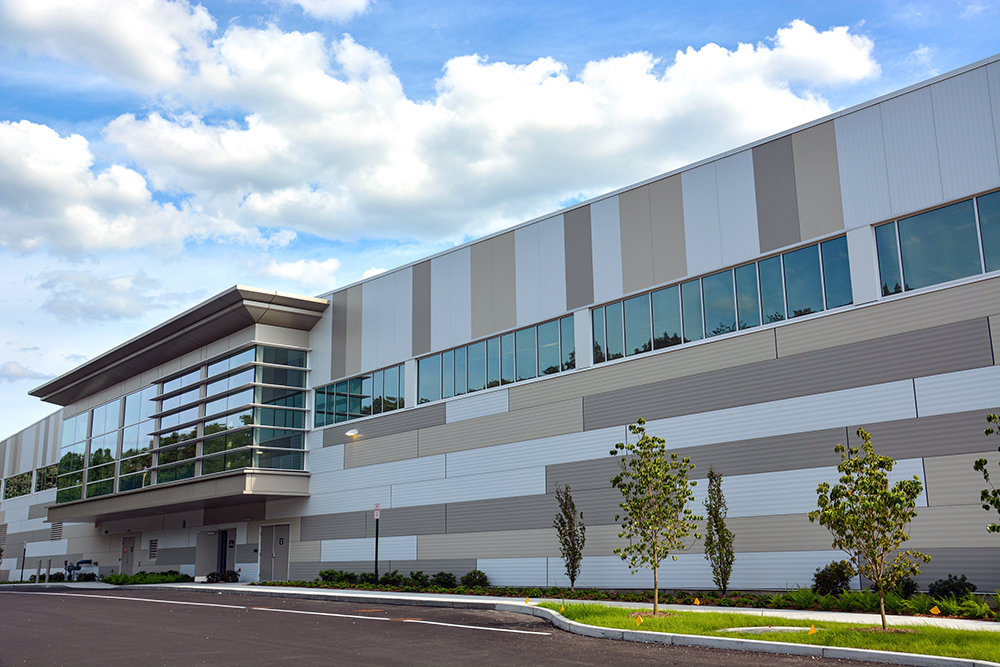
Versatility for Use in Many Building Types
IMPs can be used in virtually any type of new construction and for many retrofit applications too. There is a range of modular panel sizes that can work successfully with different structural elements of the rest of the building. The finished profiles and colors can all be selected to match the design needs of the building with edges, corners, and trim details all based on simple, appealing aesthetics. There are even IMPs specially designed for cold storage or refrigerated space applications. These panels may be part of the building exterior or create an isolated space within a larger building. Either way, they are designed for the rigors of a high use installation.
With such a broad range of benefits and capabilities, you owe it to yourself to check them out for a building project that you may be involved in. The best place to start is by contacting your local MBCI representative, and by signing up for our newsletter to subscribe to our blog.
What You Need to Know About Insulated Metal Panels
Insulated metal panels (IMPs) are “lightweight, composite exterior wall and roof panels with metal skins and an insulating foam core” as defined by the Metal Construction Association (MCA). The outer skin serves as either metal wall siding or metal roofing using standard profiles, while the inner face serves as a metal interior finish or liner. The rigid insulation between the metal skins gives the panels their superior energy conservation properties and also provides a rigid core for extensive spanning capabilities across structural members.
With this basic make-up in mind, here are a few things you should know about using IMPs in a metal building project:
Building Types
Virtually any building being designed as a metal building should consider the use of IMPs. This includes all types of commercial, industrial, institutional, recreational and government buildings. More specifically, IMPs have been used very successfully on manufacturing facilities, schools, retail centers, offices, warehouses, power plants and many other building types.
Insulated Roofing and Walls Assemblies
IMPs serve as a complete wall or roof assembly. That means they can provide cladding, insulation, a water-resistant barrier, an air barrier, and finished surfaces all in one panelized product – essentially everything but the building structure upon which they are installed. These characteristics are true for conventional buildings as well as for specialty construction types such as the climate controlled processing, storage, or distribution of perishable food or other items. With panel thicknesses commonly available from 3 inches to 6 inches, walls and roofs can be designed to meet the specific thermal performance requirements of virtually any building need.

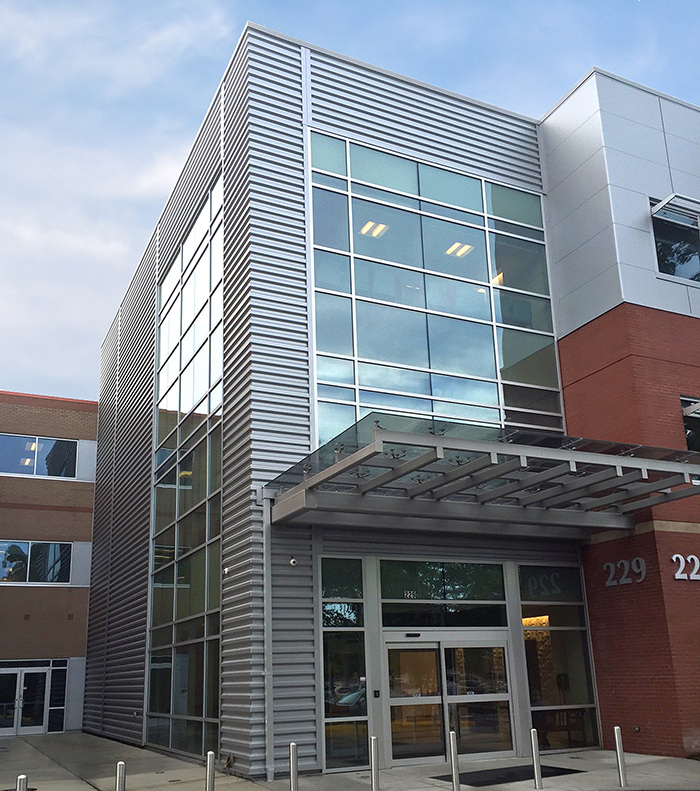
Architectural Design
IMPs are available in a wide variety of colors, widths, profiles and finishes, enabling virtually any aesthetic desired for walls and roofs. Further, architectural IMPs provide the freedom to address building-specific or unique circumstances with options such as custom shapes and widths, special custom colors and finishes, custom fabrication including, but not limited to bent corners, curved panels, and trimless ends. Architectural IMPs also offer options to integrate with windows, louvers, sunshades or other similar products to offer total building envelope solutions.
Panel Joints
Most IMPs are fabricated with the intention of working together as a complete system. That means attention has been paid to the design of the edges so the panels can interlock and be sealed to form a continuous joint that is water tight and air tight. In some cases panels may need to overlap, such as on long roof runs over 50 feet, but manufacturers have worked out those details to help assure the roof or wall performs as intended. Based on this, properly-installed IMP systems generally come with a very long warranty period.
Ease of Installation
The fact that IMPs are a single, finished, rigid panel, makes them quicker to install than other multi-product and multi-step assemblies. This translates to obvious labor savings and some material cost savings compared to other systems. Further, the simplified installation process has been shown to limit exposure to accidents, helping create a safer, more efficient work flow. It can also mean that construction time schedules are easier to meet or even beat.
To find out more about IMPs and ways to use their full characteristics and capabilities on a building you are working on, contact your local MBCI representative.