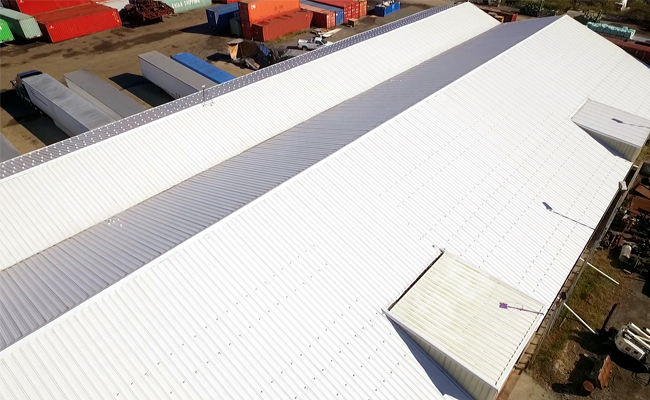
Tag: standing seam
How to Retrofit Existing Roofs with New Metal Roofing Systems
In our prior blog post, Benefits of Roofing Retrofits with Metal Roofing Systems, we looked at the benefits associated with retrofitting an existing building with a new metal roofing system. In this discussion, we will look at several ways to do it.
New Sloped Roof Over an Existing Flat Roof
Buildings with flat roofs can be retrofitted with light-gauge steel framing systems to create a new sloped metal roof. Such systems can be installed directly over existing roofing membranes and structures, subject to appropriate structural engineering review. These systems typically use light-gauge (16 gauge to 12 gauge) steel framing installed directly above the existing roof to create a sloped plane. Regardless whether the existing roof structure is steel, wood or concrete, the new, lightweight framing system can be designed to disperse roof loading appropriately and connect securely.
The physical footprint of the existing roof, the type of framing system employed, and any special rooftop conditions will typically control the final geometry of the new sloped roof. A low-slope application (less than 2:12) can be selected based on economy and configured to discharge rainwater off of the roof. High-slope applications (greater than 2:12) are typically selected to improve and update the look of an existing building while improving long-term performance. Once the metal framing system is in place, then standing seam metal roof panels are commonly installed, creating a ventilated attic space in the process.
Retrofit Roofing Panels
Low-slope metal roofing can be a great choice when a fairly utilitarian solution is needed for improving overall roofing performance. Exposed fastener systems can be used to allow direct installation of the new roofing panels over existing metal roofing or some other materials. Roofing panels specifically designed for retrofit applications typically have a rib spacing of 12″ on center with a rib height of just over an inch. The minimum slope for such a panel is 1/2:12. Any existing lap screws must be removed from the existing roof before the new panels are installed. The new retrofit panels are then attached with screws that fasten through the existing panel major ribs and into the existing purlins.
A New Standing Seam Roof
In some cases, an existing sloped roof may have another roofing material in place that is nearing the end of its service life. In that case, a new long-lasting, standing seam metal roofing system can be installed directly over the existing roof. Some systems will require a simple sub-framing system that allows the new roof to be installed directly over the existing. Retrofit roofing systems such as this can be UL-90 rated and FM Global rated. Other strategies exist to increase the energy efficiency of the building when adding new standing seam roofing, such as adding unfaced fiberglass insulated between the existing and the new roof and to vent the cavity between the old and new roofs by adding vent strips at the eaves, plus a vented ridge to allow air intake and exhaust. This method works well with roof slopes of 3:12 or greater.

End Results
Regardless of the specific system selected and designed, installing a retrofit metal roofing system allows the existing roof to remain in place, which saves on labor costs. It also minimizes the chance for water entry into the building during the roofing process and provides for a safer working environment. Existing rooftop equipment, vents, or light-transmitting panels can be accommodated by any of the systems described.
According to the Metal Construction Association (MCA), “retrofit metal roofing represents an economical and functional solution for building owners who want to beautify their existing structure or correct performance issues related to aging roofs and out-of-date materials. They have been employed in millions of square feet of existing commercial, industrial, retail and education facilities. The result is a new code-compliant metal roof that will last for 60-plus years, providing higher energy efficiency by reducing heat gain through the roof in summer months and reducing heat loss during winter months.”
To find out more about these retrofit systems, contact your local MBCI representative.
Can Metal Roofing Be Installed Over Shingles?
Why Upgrade a Roof to Metal Panels?
Steep Slope Metal Panel Roof Retrofitting Over An Existing Low-Slope Roof: Part 2
Against the Wind: MBCI’s Wind Rating Dominance
After a major, damaging storm, such as hurricanes and tornadoes, many things happen at once. Rescue efforts begin. Shelters open to house the displaced. Cleanup gets underway. But one thing that happens in the aftermath of such an event is a little harder to see – unless you’re looking for it.
The Building Material Post-Mortem
The Roofing Industry Committee on Weather Issues, Inc. (RICOWI) gathers experts and an army of volunteers to spend time on the ground at the disaster site, documenting damage. They take careful notes and photographs, looking closely at how different building methods, materials and ages withstood the storm. What they observe helps inform product development and ensure both installation standards and roofing products can stand up better to the next storm.
Unabbreviated
As the Metal Construction Association’s technical director Robert Zabcik said in a recent white paper, “Engineering professionals go through great efforts to make sure the public is protected.” All this research is integrated into regular updates to the tests, ratings and codes applied to building products across the country. These can become an alphanumerical soup, but here are the most prominent, along with differences between them:
Model Codes (Codes) provide a minimum baseline of performance needed to protect property and the public. These are the barebones building basics.
Underwriter’s Laboratories (UL) is a consortium of test labs and research companies which maintain test standards, as well as product listings which meet certain performance criteria. These are usually superior to those required by code.
Factory Mutual Insurance Company (FM Global) is comparable to UL but funded by a consortium of insurance underwriters.
Since the Miami-Dade area has suffered some of the worst hurricane damage, they have some of the most stringent codes and test protocols, so those are among many that MBCI uses to test our products. Jason Allen, MBCI research and development engineer, explained what some of these are and how they’re used. The UL 580 rating is based on tests for uplift resistance of roof assemblies. While materials can receive a class 30, 60 or 90 rating, MBCI uses class 90 as a standard. We also maintain class four impact ratings under UL 2218 for hail and projectiles, as well as the UL 790 Class A fire rating.
Any Way the Wind Blows
But these ratings and classifications get very complicated. You won’t find MBCI materials themselves listed as withstanding certain windspeeds or projectile damage. Allen explained, “It’s dependent on several things: building codes, roof pressures, eave and building height, facing attachments, roof slope and wind speed – just to name a few.” There are differences based on locality, storm threats and codes. It takes a qualified engineer to calculate all of it for an entire project. But that’s the only way to be sure of safety. “It’s going to cover all scenarios,” said Allen.
During a hurricane or tornado, wind is just part of the problem. “Performance during these events must consider both water tightness and wind applied at the same time,” said Zabcik. “Wind-driven rain can force water into places it would not normally go … This is yet another reason why details are so important and why manufacturers work so hard to ensure the systems they produce meet stringent standards for performance.”
In conditions like these, traditional building methods have a difficult time comparing to metal. They suffer from softer connections, more porous materials, and less stringent assembly designs. “Shingles last 15 to 20 years,” said Allen. “A metal roof can last 40 to 60 years.” Across the nation, wherever post-storm studies and material testing have occurred, metal stands out. In Florida Building Commission, FEMA and NIST studies, metal buildings performed exceptionally well.
Second Wind
Whether standing seam, insulated metal panels, exposed fastener or concealed fastener roof solutions are chosen, metal roofing’s strength and durability keeps out rainwater and withstands windspeeds that devastate other types of construction. Standing-seam roof systems and IMP façades remained intact during Hurricane Katrina even as winds hit 120 mph. “Industry experts have found that metal panel roofs can withstand wind gusts as strong as 140 mph or more due, in part, to their large interlocking panels,” said Zabcik. “Metal panel systems provide not only the weather resistive barrier,” he said, “but can also provide diaphragm stability to both the underlying framing and sometimes, the building as a whole, because they can transmit shear from one panel to the next.”
Riders on the Storm
What about hail raining down from the sky, windborne projectiles, lightning, and everything else that severe storms hurl at buildings? Though they may suffer some cosmetic damage, metal construction such as standing seam roofs and IMPs are often able to absorb impact, remain functional and keep their protective metal layers intact. That can make all the difference in a hurricane when the wind can blow away other roofs and dump untold gallons of stormwater and debris inside. Somewhat counterintuitively, metal buildings also perform very well during lightning strikes.
Batten Down the Hatches. Then Batten Them Again
Before you assume that selecting an engineer’s recommended, rated, and tested metal roof will be a sure-fire protection against all nature’s hazards, there’s one more thing to understand. All the ratings and tests mentioned here are performed with a specific assembly procedure. It is absolutely critical that the same procedure is followed – to a T – to ensure your building will enjoy the same protection its ratings guarantee. Allen recommends that you “look at the company you want and make sure they have statewide approvals,” and make sure your installer reads the manual, then re-reads it, then re-reads it a final time. It’s no exaggeration to say that lives are at stake.
Zabcik sums it up nicely: “With proper preparation, a solid knowledge of metal roofing options, an understanding of the latest standards and codes – not to mention a willingness to strictly adhere to tested quality control methods – today’s metal roofing is a strong choice for even the most vulnerable structure.”
To learn more about MBCI roofing solutions, to retrofit a current building or to get an engineer started on designing out your project in a storm-prone area, get in touch with an MBCI representative today.
Metal Panel Roof Restoration & Installation
Everything in Order: MBCI’s Online Ordering Assembly Feature
There’s no getting around it. Erecting any building involves thousands of parts. Different sizes, colors, lengths, types – you name it. Depending on the nature of the project, there could be numerous parts to be ordered and accounted for. Although MBCI simplifies the process, it can still be a lot to manage. Until now, everyone has come up with their own method – like the many long-timers who write it all out by hand. But for those newer to the process, it can be overwhelming. Now we’re taking the guesswork out of it and making the process considerably easier, with exciting new user-friendly features on our online ordering platform.
With the new addition of “Assemblies”, you can simply choose which area of a building you’re working on, fill in some details such as panel type, trim condition, attachment type, size, and color, and the system will do the rest of the work for you – making sure you have any necessary fasteners, accessories or other parts, adding everything to your order. No longer will you have to study construction drawings, noting fastener types and adding everything to your order by hand. No longer will you find yourself on-site without the needed materials. And, even if you do, the online ordering platform is available right from your phone to get whatever you need on the way ASAP.
As Director of Development Tyler Roose says, “We’ve heard testimonials from many, many customers and it’s the only way they like to order anymore. It’s a huge time saver.”
Ready to get started? Head to shop.mbci.com. If you are registered and an existing customer, you should have everything you need to log in. For new customers, simply fill in the requested information and provide your customer number to create an account. If you don’t have a customer number, reach out to your district sales manager or customer service rep.
Once you’re logged in, you’ll see the dashboard, which has links to any existing orders, quotes or other information you may need.
To get started on a new quote, simply click the “Start New Quote” button, which will give you an option to name your new quote and use a template if desired (more on that later).
Once you’ve begun a new quote, you will land on the Products page, where you have the option to shop by category, such as accessories, fasteners, panels, structural and trim. However, for this purpose, let’s focus on the newest option: Assemblies.
Choosing “Assemblies” will open a list of component types to choose from. For this example, we’re selecting PBR, but you’ll choose whichever is appropriate to your project. From the next list, select the area you’re working on, such as eaves, gutters, valleys, corners, bases, etc.
Once you’ve selected your assembly, the form will prompt you to choose details such as thickness, color, lineal footage of the assembly being used, and further options depending on the assembly and area you’re working on. Then, all the core trim items as well as necessary fasteners, sealants and accessories are automatically added to your material list for review. Notice the additional parts automatically added on the PBR form. If satisfied with your work, click “add to cart”, and a more formal review can now be completed once all parts from the project are accounted for.
Now you can simply repeat this process for whatever other areas you need. You can save and share this quote with others who may need to review and approve. If you anticipate needing similar orders in the future, choose the “Save as Quote Template” option in the dropdown box. The next time you have a similar project, choose this option when you start a new quote, then simply make whatever changes are necessary – colors, lengths, quantities, etc. – and you’ll be done with your order in much less time than with previous methods.
If for any reason you need to make changes to a quote, simply use the “Modify Quote” button at the bottom of the quote page.
Be sure to check out the other handy features on the online ordering site, such as related literature, documents and parts at the bottom of each product page and in catalogs. You can also search by keyword or use the navigation at the top for anything you might be looking for.
We hope you’ll take the time to learn the new system. It’s sure to save you innumerable hours in the long run. And if you get stuck or run into any problems, we’re here to help. Refer to the FAQ and don’t hesitate to get one of our sales individuals involved. We are all fully versed on online ordering and happy to help.
The Importance of Cleaning Metal Roof and Wall Panels
Metal panels need attention; they should not be taken for granted. True, they are a notably long-lasting and attractive choice, particularly with the myriad colors and protective finishes available, but once installed, proper care is imperative in order to maintain their durability, performance and good looks for decades.
What are the main culprits of potential damage? Dirt and residue (such as from trees or animals) left to sit on metal panels, for instance, can cause the irreversible degradation of protective coatings, thereby compromising the longevity of roof and/or wall systems. Additionally, corrosive elements, including bacteria, mold, mildew or even acid rain can damage the structural integrity of the panels. Additionally, buildup of foreign elements, such as leaves, can hide potential leak areas or places that may be rotting away. Even in terms of energy efficiency, keeping the panels clean may help a roof reflect heat as they were originally intended.
To keep panel appearance in top shape, protecting the finishes must be a priority—otherwise, you may find yourself needing to re-coat the panels. Stains from leaves and moisture, algae and lime deposits that remain on panels for extended periods can do serious harm to the finish. It should be noted, however, that re-coating should only be considered if the panels remain structurally sound and if doing so wouldn’t void the manufacturer warranty.
How often should you clean metal panels? Most experts agree that at a minimum, an annual cleaning is advisable in order to keep the panels free of common elements that can jeopardize the integrity of the finishes. If you have heavy tree overhang, you may need to clean it or remove debris a little more frequently.
Deep cleaning to remove more stubborn substances (e.g., tree sap, oxidation) can be done every 3 to 5 years, depending on the building conditions, location and weather, etc. Interim, moderate cleanings can also be performed following substantial weather events and seasonal allergen build-up. It’s a good idea, in fact, to assess roof conditions before winter hits to identify any potential issues that need to be addressed.
No matter the frequency, perhaps the most important advisory when it comes to cleaning the panels is to follow the panel manufacturer’s recommendations regarding who should perform the work and with what solutions and tools so as not to void any warranties. In some instances, it may be beneficial (or perhaps even required) to have a professional building surface cleaning company with metal panel experience do the work.
Tips on Proper Cleaning Techniques and Solutions
As for the maintenance and cleaning instructions, it’s always best to refer to the manufacturer’s guidelines in order to best protect specific products, for example, to determine which cleaning solutions and techniques work best for a given manufacturer’s panels. Neglect or improper care can degrade the finish, compromising not only the visual appearance and performance but, as noted, can also potentially void the panel warranty. But maintaining the panels doesn’t just entail washing them like you would a car; it also means keeping them free of harmful debris.
Here are a few general tips for the proper cleaning of metal panels (again, refer to the panel manufacturer’s specific directions):
Simple cleaning: generally, water and mild detergent will be sufficient. Do NOT use bleach, which can change the finish color or have a harmful interaction with certain finishes.
Water-soluble dirt or other deposits requiring more complete cleaning: you can use a solution of hot or cold water mixed with detergent. In a container of water, use a 5 percent solution of commonly used commercial (non-industrial, non-bleach) mild detergent. Use a cloth or a soft-bristle brush for application of the cleaning solution, followed by a clean water rinse. Alternatively, pressure-washing with a 40° tip is also an option.
Non-water-soluble deposits such as tar, grease, oil and adhesives: a solvent or alcohol-based cleaner may be required. In this case, since most organic solvents are flammable and/or toxic, they must be handled accordingly. Generally, keep them away from open flames, sparks and electrical motors; use adequate ventilation, protective clothing and goggles; and read the manufacturer’s Material Safety Data Sheet (MSDS) of any solvent used for any other specific safety details.
The following are among the cleaners widely recognized by manufacturers for this type of non-water-soluble cleaning: alcohols—denatured alcohol (ethanol) and isopropyl alcohol (rubbing alcohol); and solvents, including VM&P Naphtha, mineral spirits, kerosene, and turpentine (wood or gum spirits).
For any level of cleaning, do NOT use wire brushes, abrasives, or similar tools that will erode the surface coating and leave scratches or other finish damage that can lead to corrosion. Additionally, always test a small area before proceeding with any of the cleaning agents mentioned to ensure there is no adverse effect resulting from the product’s use.
Remember, the misuse or abuse of any of the acceptable cleaning agents will automatically void any manufacturer’s warranty for the affected surfaces, so be sure to check with the manufacturer and also follow directions on any cleaning products used.
By following the tips above, installers can keep metal panels looking great and performing well for years to come.
To learn more about the importance of cleaning metal panels, contact your MBCI representative or check out our blog post on metal panel maintenance.
Types of Standing Seam Metal Roof Clips & Why They’re Essential
A successful standing seam metal roof project goes beyond the obvious panels, substrate and frame. In order for the roof to look great and perform properly, don’t neglect the importance of selecting the proper roof clips for your given project. What may seem like a minor detail is, quite literally, what’s holding it all together. Here we’ll take a look at the key factors that go into selecting the correct clip type and see why this is so essential for the well-being of any standing seam metal roof.
When you are looking at the installation manual or if you’re ordering your materials directly—or even if you’re submitting the order to MBCI to do the engineering for you—you’re going to need to know and identify certain details. The roof clip selection criteria will be based predominantly on two main factors: 1. What is your insulation system and 2. What are the expansion and contraction requirements for your roof? You’ll also need to know your project’s roof geometry and how the panel you’ve selected is able to meet the roof clip range on a particular plane, because the distance the panel spans impacts what type of clip you would use. Additionally, the type of substrate you are attaching the clip to will dictate what type of clip you should use. Is it going over wood, metal decking, open framing?
With that information in hand, you’re ready to do your due diligence. MBCI classifies clips in two ways: high or low; fixed or floating.
The high and low clips are predominantly determined by insulation systems. For a low clip, for instance, MBCI will typically will go up to a maximum of four inches of insulation; a high clip will go up to six inches of insulation.
Here’s a bit of a caveat. What we’re referring to is how much insulation you’re trying to compress between the roof panel and the substrate—and particularly the purlins or the steel frame you’re attaching it to. The clips are designed with a “stand-off” that elevates the roof panel above the substrate to permit insulation to pass between the roof panel and the substrate at the structural attachment points. A low clip is typically a 3/8-inch stand-off; a high clip, depending on panel type, can be 1-inch, 1-3/8-inch or even possibly 2-inch.
Knowing this helps determine whether you’re choosing the right clip because, let’s say, you go with too tall of a clip or not tall enough to accommodate your insulation system, then the system’s going to be difficult to install and will not perform correctly. And watch out for roof systems that have roof clips with no stand-off that do not permit fiberglass insulation to be installed or is discouraged from being installed at the clip lines due to impact on the panel appearance.
Another factor here is if you are putting the roof over a solid substrate, such as wood or metal decking. In this case, we will typically default customers to a low clip system because they don’t need to accommodate for any sort of fiberglass insulation systems. We’re assuming the insulation is occurring elsewhere below the decking or incorporated with the decking, such as rigid board insulation. In the case of rigid board insulation over decking, a low clip is still utilized but with an added bearing plate. The clip is attached through the rigid board insulation into the decking or structure below.
The more particulars you know of your intended insulation system to determine the clip height needed, the better prepared you will be in determining the right clips. Will there be fiberglass insulation or rigid board insulation or no insulation? What is the insulation thickness? What type of insulation system? Share these details with your MBCI sales rep to help you get started selecting the right clip height.
You can also find much of this information on the MBCI website by searching the roof type and then reviewing the corresponding installation manual and details to determine what clip height to use based on your insulation and substrate.
Which brings us to the other main factor in selecting the right clip. A fixed or floating clip is dependent on the substrate and how much anticipated movement is needed for the roof size.
With fixed clip systems, there are no moving parts in the clip. The ability for that clip to expand and contract as the roof expands and contracts is dependent on the substrate. In layman’s terms, if you were to screw that clip to a purlin, as the purlin heats up and cools down, it’s going to allow for some of the movement of that roof. Generally, when a fixed clip is installed over a metal building purlin, the manufacturer advises a limit of 100-foot maximum on a single roof surface. This is an average and can be impacted also by roof color and geographic location of the roof install that control temperature swing ranges, i.e., 100-foot maximum is a guide.
It is advised that the fixed clip always be installed over open framing in order to permit the greatest ability to accommodate roof panel expansion/contraction. It is not advised to use fixed clips attached to a solid substructure because those don’t accommodate roof panel movement.
If the roof needs to be installed over a solid substrate OR if the roof plane is over a slope more than 100 feet, then the manufacturer would prescribe a floating clip system. [Note: A floating clip can also be used even if the slope is less than 100 feet.] The floating clip system permits the roof panel to move (expand/contract) independent of the substrate to which the clip is installed. The system either contains a clip with a tab seamed into the roof panel rib that is able to float/slide where it attaches to the clip, or the clip is such that when it engages the panel seam is doesn’t restrict the panel movement. The only thing controlling for floating clips is the maximum range of the clips that allows it to float. In other words, how far can the clip tab or panel slide at the clip attachment. The panel manufacturer again will have information as to this amount. You will need to make sure they’re aware of what the maximum single panel run distance is from low side to high side.
One more thing to note is that not every roof system is available with fixed clips and not all systems have high and low clips (although the majority do). That said, educating yourself and researching the panel you’re looking at will give you the information you need to make the determination as to which clip will not only work best, but potentially will work at all. Every panel has its own roof clips, so the roof clips are not interchangeable across all systems. An essential part of selecting a roof panel is verifying that its clip attachment is suitable for your project.
It might not be immediately obvious that you have the wrong clip. For instance, let’s say you ordered an Ultra-Dek® roof and you ordered an Ultra-Dek® clip. That sounds straightforward, but did you order the RIGHT Ultra-Dek® clip for your particular project? The roof may even be able to be installed regardless, but, after installation you may discover it doesn’t perform properly or as intended due to the wrong combination of clips, insulation and substrate. That’s why it is so critical to check with the manufacturer that you have the right clip before you purchase or start putting down the roof.
For more information, reach out to your local sales rep or go to the MBCI Ask An Expert site to confirm the clip you need to make your project a success.