Commercial Metal Roof Flue & Pipe Penetration

Pipe penetrations are one of the most common types of roof penetration in commercial metal roofs. Regarded for their proven record of longevity and value in providing weathertight solutions, a metal roof’s performance can be compromised by improper pipe or flue penetrations to accommodate other building systems. Done poorly, metal roof penetrations can cause leaks, building damage, and unnecessary expenses. When expertly designed and installed, however, pipe and flue penetrations may be successfully integrated into metal roofing systemswithout compromising performance. Here are five proven and practical guidelines to help avoid problems. 

Metal Roof Flue & Pipe Penetration Tips

1. Use Qualified Installers

A qualified roofing installer is the best person to cut and install appropriately flashed and booted pipe penetration. If that isn’t possible or practical, then any penetration installed by another contractor should be fully coordinated with the architect/owner’s representative and the roofing contractor. This is the only way to be sure that the integrity of the roofing system is maintained. 

2. Use Only Commercial Materials for Pipe Penetration

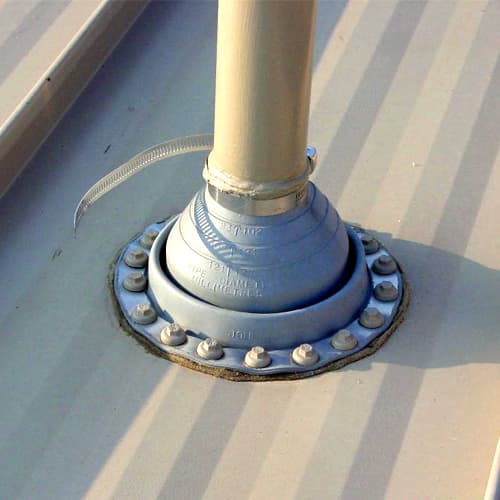
Use Only Commercial Materials for Pipe PenetrationTo properly seal around the pipe penetration, use only a rubber roof jack made specifically for use with metal roofs. Do not use residential-type roof jacks or those designed for other roof types – they will not last over time. Further, do not use materials that are dissimilar to the standing seam metal roof, such as copper, lead, or galvanized metal roof jacks, which can corrode the metal roof system, or are of inferior quality with a short service life (less than 20 years). Proper commercial roofing products combine an EPDM rubber boot (or silicone for high-heat applications) with a bonded aluminum band to allow a compression seal to be formed at the roof panel. 
Penetrations
Pipe and flue penetrations allow for a long-term performance of the roof.
  • Standard EPDM roof jacks can withstand temperatures up to 212º and are suitable for most applications.
  • High-heat, silicone-based roof jacks can withstand temperatures up to 437º and are suitable for flues.
  • Retrofit roof jacks are available in both temperature ranges for applications in which the roof jack cannot be slipped over the top of the pipe.
  • Use only tape and caulk sealants approved by the roof manufacturer.
  • Use only long-life fasteners at all exposed fastener applications. Note that zinc-plated fasteners will not last for 20 years and will typically void roof warranties for finish and weather tightness.

3. Metal Roof Flue & Pipe Penetration Locations

All planned commercial pipe and flue penetrations should be assessed first to be sure they are not inadvertently creating a potential leak or other problem. Rather, they should be located so they can be properly sealed with no immediate obstructions that would make the seal to the roof unnecessarily difficult or compromise the long-term performance of your pipe or flue penetration. 

  • Never allow a pipe to penetrate through a standing seam. It is almost impossible to seal around the roof jack and the panel seam in a manner that will be leak free for the life of the roof. Therefore, always locate the roof penetration onto a smooth or flat area of the roof surface.
  • Place the penetration in a location that has the least amount of water draining into the immediate area around it.
  • Similarly, never allow a pipe to block the water flow down a roof panel and create a buildup of water. When a pipe is encountered that is too large to fit in the flat of the panel without blocking the water flow, use an aluminum pipe curb to allow the water to flow around the pipe and to provide a large, flat area in which to seal the roof jack to the roof surface.
  • In Northern areas, vent pipes should be located as high as possible or otherwise protected against sliding ice and snow from above. On roofs with slopes as low as 2:12, sliding snow, impacting an unprotected pipe, can tear the metal roof or shear the pipe off flush with the roof.

4. Allow for Thermal Movement

The metal roof flue and pipe penetration must allow for thermal movement of the roof. Pipes or other penetrations that are rigidly attached to the structure below may not be able to move as the roof expands and contracts. In these cases, the hole in the standing seam roof should be large enough to allow for this movement without the roof panels impinging on the penetration. 

5. Check Warranties

If the penetrations are to be included in a manufacturer’s weather tightness warranty, the manufacturer must approve in writing beforehand the materials and methods to be used to install the penetrations. Failure to follow this guideline may result in the penetrations being excluded from the weather-tightness warranty. If everyone involved with the roofing penetrations is aware of and follows these five guidelines, then in the end everyone should be quite happy with the long-term performance of the roof. If not, the potential for roof leaks and other related problems only increases. 


Preventing Roof Damage from Rusted Fasteners

These days, the majority of metal roofs are made from Galvalume coated steel, which typically carry a warranty against perforation due to rusting for a period of 20 years. A study on Galvalume standing seam roofs (SSR) conducted at the behest of the Metal Construction Association (MCA) showed that a properly installed Galvalume SSR can be expected to last 60 years or more.  However, the caveat is “properly installed”. One of the major issues that will drastically reduce the service life of a Galvalume-coated roof is the use of non-long-life fasteners in exposed locations.

Anytime you have an exposed fastener on a metal roof, you risk rust—the term commonly used for the corrosion and oxidation of iron and its alloys. While a little rust might not seem like a big deal, its presence can actually be a harbinger of severe damage to your metal roof panels if not caught early, or ideally, stopped before it ever has a chance to start.

The issue is most prevalent on R-panel roofs due to the use of exposed fasteners. And even with standing seam roofs, which use clips and are typically referred to as a concealed fastener roofs, there are exposed fasteners as well, most often at the eave, the end laps and at trim, such as ridge flash, rake trim, and high-eave trim.

Prevention

The best recommendation for any exposed fasteners (meaning they are exposed to the weather and other harmful elements), is that they should be long-life fasteners. When you don’t use long-life fasteners, they start rusting with exposure to moisture and, over time, the rust virus stretches down to the roof, causing severe and often irreparable damage.

Suppose you have a metal roof that is 10 to 15 years old. Depending on the environment, the roof could be in excellent shape—except for where those screws are; you can have holes right through the roof at the fastener locations. More people than ever are starting to realize they’re supposed to use a long-life fastener, in a case like this. We see a lot of roofs when we inspect them for weathertightness warranties. What often happens is a worker on the roof may have just grabbed some screws that were handy without thinking about the kind of screw or the inevitable chemistry that could potentially cause rusting. Or, you may have a situation where there is some type of accessory put on the roof by another trade, perhaps a plumber or an HVAC installer—and maybe they didn’t use long-life fasteners.

The best recommendation to mitigate this potential problem is two-fold. First, make sure roofing installers know to use a long-life fastener at every exposed location. Secondly, make sure that every other contractor working on the roof that you’re responsible for knows to use long-life fasteners with whatever they’re doing.


Fasteners
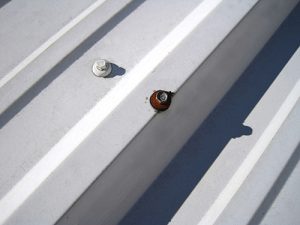
A long-life fastener (left) can withstand the elements and prevent rust buildup longer than other fasteners. A regular fastener (right) will begin to rust upon exposure to moisture.

What if rust does occur?

One question frequently asked is: if the fasteners do become rusty, do you have to replace all the panels? If you catch the problem before the rust virus makes its way down to the roof itself, you can just change out the screws. However, if the rust has compromised the roof, you very likely would have to change out all the panels, at the least everything that has been affected—just because of one little spot. Truthfully, if the rust is in one spot, it’s probably all over.

Another thing worth mentioning is if aluminum panels are used along with typical long-life fasteners, it could still rust, especially if the roof is exposed to salt spray (think close to the coast).  The answer in this case is to use a stainless steel screw, which are long-life fasteners (but not all long-life fasteners are stainless steel).

Be aware from the start.

It’s crucial for installers and contractors to take notice and order the right fasteners from the start so that problems can be avoided.

Also, after some wear and tear, if subsequent work is done on the roof, everyone involved should take note. For instance, you buy a building and somewhere down the road you decide to frame out a small office and add a bathroom. You’d need a water heater, so a plumber goes on the roof, puts in pipe penetration and doesn’t use long-life fasteners. The onus would be on the owner to ensure that everyone performing work on that roof—no matter when—is using long-life fasteners.

Conclusion

The best-case scenario with a metal roof is to get the right fasteners to begin with. However, if the roof is already installed, the next step is to be on the lookout for rust and if you notice it, consider that it might be because of the fastener.

If that’s the case and you catch it early—when it’s just the screws that are rusting but the rust virus hasn’t yet transferred down onto the roof, you can just change out the screws with the proper long-life fasteners. We recommend doing a roof inspection at least once a year. If you see any loose or rusty screws, replace as needed.

For more information on MBCI’s broad selection of metal roof and wall panels, contact your local MBCI representative.

Proper Fastening Helps Prevent Leaks and Callbacks

Installing metal roofing and siding requires placing and aligning metal panels over the structural supports. But ultimately it requires installers to spend a fair bit of time fastening them in place, typically using a great many fasteners. It is easy to get complacent about this repetitive activity, but the reality is that every fastener plays a crucial role in the integrity and longevity of the installation. Properly selecting, installing, and using the right tools, allows for a proper fastening process that assures a weathertight installation. But if a few fasteners are installed poorly, causing water or air leaks, then the installer is called back to correct the condition. Do a lot wrong, and warranties can be void, with the durability of the building left compromised, possibly requiring a total do-over.

What’s the difference between a good fastening installation and a problematic one? Here are some of the things to pay attention to onsite:

Fastener Types:

The most common type of fasteners used in metal buildings are self drillers, which vary based on diameter, length, head shape, and material. They are also specifically designed for use in metal substrates. Different fasteners are also available for wood versus metal, and either type can be sized for different substrate and panel thicknesses. Zinc alloy or stainless steel fasteners are common choices for durability, longevity, and avoiding galvanic action with other metal products. Selecting and using the right fastener type for each of the different locations on a metal building begins with determining what is being attached and what is it attaching to.

Fasteners
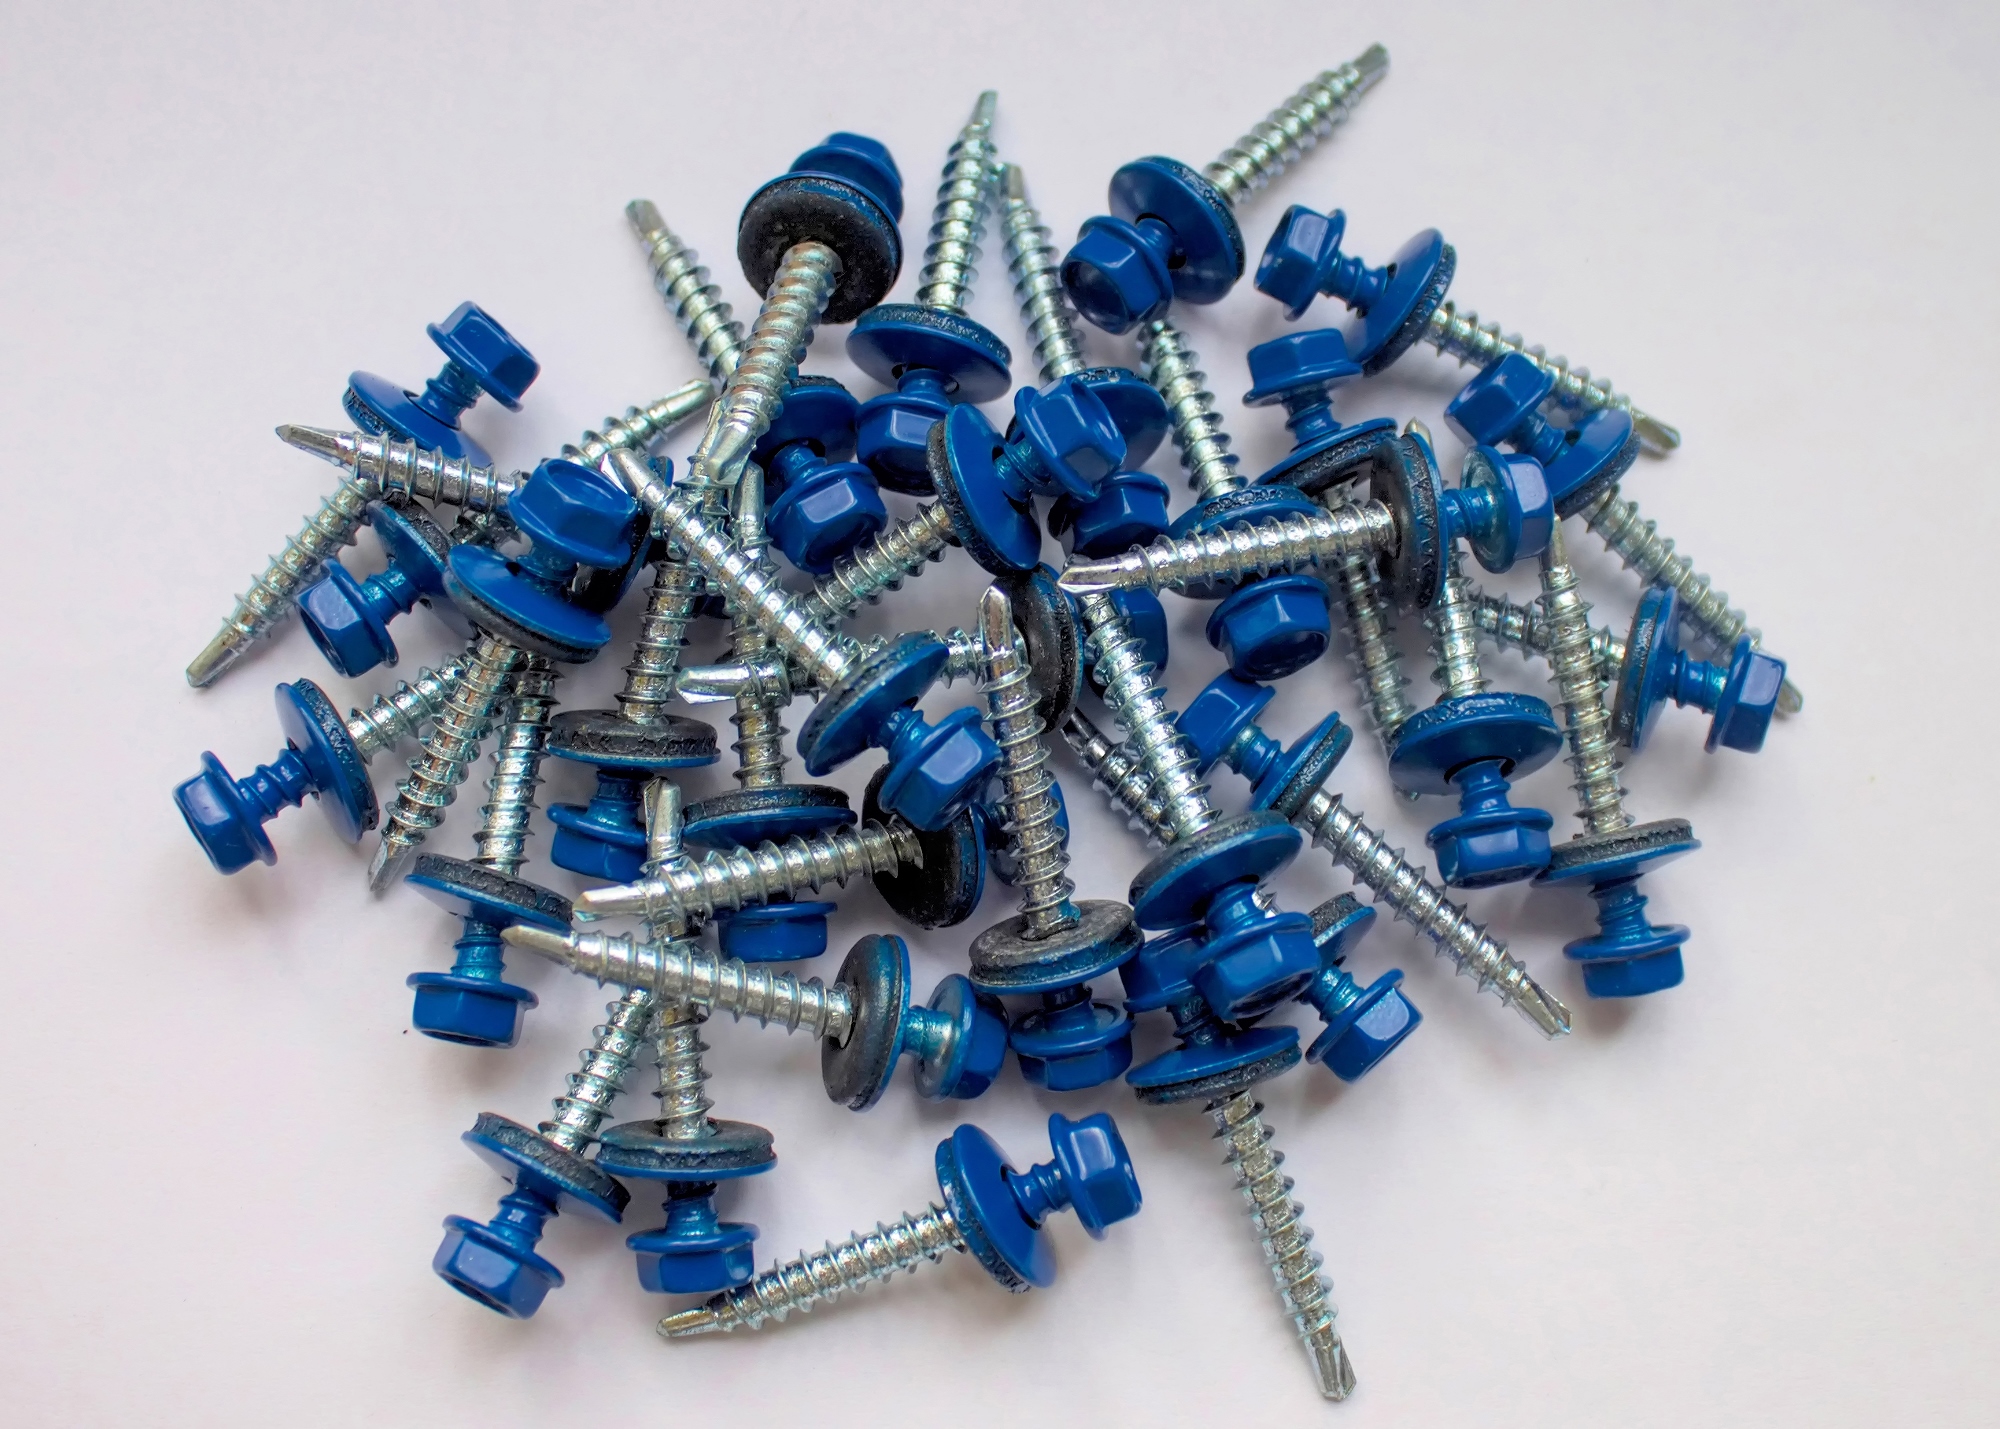
Fasteners can also be colored to match the roof or wall panel.

Weathertightness:

Fasteners of any type cannot be relied upon by themselves to keep out the elements. Instead, a sealing washer is used that is compressed between the fastener head and the metal panel as the fastener is tightened to form the weathertight seal. High-performance or long-life fasteners may be required for a durable approach to weathertightness and/or may be required by the metal building manufacturer to receive a weathertightness warranty.

Installation Process:

With the right fasteners onsite, the success of the installation now rests with the field crews. A few minutes to review the different fasteners and match them with the right tools and settings for installation is time very well spent. Since electric screw guns with or without impact drivers are common on the jobsite, it’s easy to think any tool will do, when it probably won’t. The wrong tool at the wrong setting can place too much torque or other force on the fastener, causing it to crush or damage washers or even the metal panels. Impact drivers are rarely needed in most cases and, while the fastening needs to be tight, overtightening is never a good thing.

Fastener Locations:

In addition to weathertightness, fasteners provide a structural function as well. Their location and spacing will directly correlate to the ability of a panel to resist wind and other forces after installation. Therefore, it’s always best to use information prepared by a professional engineer on the proper fastening locations, spacing, and sizes. The calculations behind such information can prove to be the difference between a successful installation and one that creates problems.

Understanding the importance of fasteners and the role they play in the integrity of the building, and corresponding warranties, allows installers to see beyond the repetitive task of fastening and into the craft of assembling a durable, long-lasting building. To find out more about fasteners for metal products and systems for your next project, contact your local MBCI representative.

Knowing When to Call the Metal Manufacturer: Part 1

Metal panel installers have a tough job—not only navigating the details of the task at hand but also being confident enough to know when to seek the manufacturer’s guidance. Part of overseeing a successful project is for the installer to know when something is out of his or her comfort zone, beyond their expertise, or just doesn’t look or feel right. And when that’s the case, it’s imperative to call on the manufacturer for input before it’s too late.

Technical support, such as MBCI’s Ask the Technical Expert, can be most useful for answering upfront general product questions. Once the project has started or material is on the jobsite, it’s generally preferable for the installer to go through their sales person or field service/customer service representative rather than sending a question via a website.

When to Seek Assistance from the Manufacturer

First things first: The installer should study the installation manual and construction drawings. If, after that, he or she is experiencing a problem—for instance, the panel doesn’t look right, it’s not engaging properly, it’s not meeting the tolerances stated in the manual, the fasteners that are called out in the drawings are not working or are even missing—then contacting the manufacturer should be the next step. That one simple call can save a lot of time in potential headaches.

Improper Storage of Metal Panels
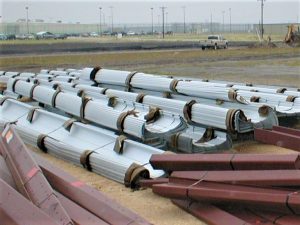
The above image depicts damage to metal panels caused by improper storage, rendering them unable to install properly.


While it’s not the manufacturer’s direct responsibility to make sure the installer is doing the job on site per the drawing details, a reputable manufacturer can at least provide recommendations when asked how to possibly alleviate or mitigate any number of potential pitfalls, or share common oversights that other installers have made—and how to avoid those same mistakes.

Top Circumstances

Here are two of the top circumstances under which MBCI recommends immediately reaching out to the manufacturer:

  1. Damage to the physical panel itself. If a customer receives materials and there’s suspected or noticeable damage to it, he or she may or may not know what impact that damage could initially have on the system. Notify the manufacturer immediately to assess if it’s a minor issue or if the panels should not be installed because it will be detrimental to the system. No one wants to have to reorder or wait for new materials, but it’s worse to wait until after installation when the impact of removing/replacing is significantly more costly and time-consuming.
  2. Fasteners. Contact the manufacturer if the substrate on site changes in any form from the project details, there is any difficulty with the screws themselves engaging, or any problems with the fastener type. When installing fasteners, make sure to use the ones per the installation details. The manufacturer can assist in verifying the correct fastener is being used in the correct location per the details and per the substrate on site. There could be situations where the installer is not accurately reading the drawing or has substituted an alternative screw not supplied by the manufacturer. Don’t assume. Instead, call.

There are, of course, other scenarios when a call to the manufacturer will save time, money and aggravation for all parties involved in an installation, including alignment and substrate issues, the addition of accessories, and problems with panel engagement. In Part 2 of this topic, we will go into more detail on these additional circumstances.

For more information on metal roof and wall products and training, MBCI offers courses through its Metal Institute. These courses are available for general training purposes or for those seeking installer certification.

Find a sales representative