Metal Roof Skylight Benefits

The beauty of metal roof system skylights can be a real benefit to the aesthetic value of a metal building project. Beyond looks, though, the proven benefits of daylighting are many: building occupant satisfaction from natural lighting, mold, mildew growth prevention, and, of course, energy savings, to name a few. In fact, once the decision has been made to go with metal for the roofing material, a skylight is often a natural tie-in when it comes to sustainable design—for both form and function. To make the most of the design choice, there are a few key considerations to bear in mind during the specification and pre-installation phases of the process. 

Types of Metal Roof System Skylights 

Common metal roofing skylight installation involves one of two types of skylights, Light Transmitting Panels (LTPs) and Curb Mount Skylights. Both metal roof system skylights supply natural light into the building and provide similar benefits.  

LTPs, which are formed from a translucent material and come in many different panel profiles can be used not only in metal roofs but as an accessory for metal wall panels, too. One of the key benefits of LTPs is that the panel is formed so that it matches the configuration and characteristics of the system into which it is installed, and therefore can work seamlessly with specific metal roof systems.  

Curbed (curb mount) skylights include a raised structure (“curb”) formed around the roof opening where the skylight will be attached. Curb skylights come in many shapes and styles. 

In addition to the general “type” of the skylight, another consideration is selecting the best orientation for the skylight—which we will look at next. 

Skylight installation Metal Roof Placement, Orientation, and Climate Factor

Placement and orientation are some of the most crucial factors in getting the maximum benefit from metal roof system skylights. During the planning phase, determine the best location to achieve optimal light and avoid obstructions (such as HVAC, plumbing, electrical, and vent pipes) below the skylight. In terms of getting the most out of the skylight from an energy-savings standpoint, climate, and exposure are also key factors. For example, with southern exposure, skylights provide an excellent level of passive solar heat during the colder winter months, while keeping cooling costs down during the summer heat. On the other hand, a skylight with western exposure will increase cooling costs if the structure is in a warm climate. 
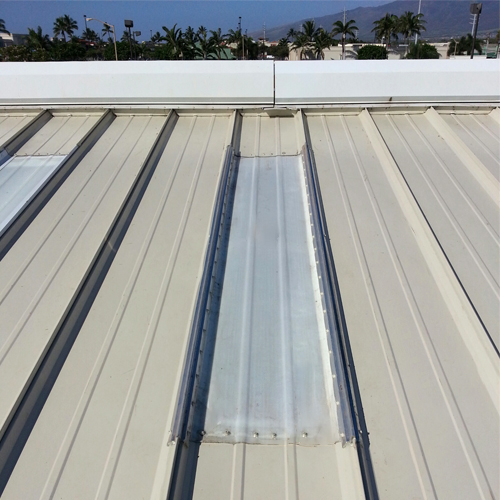
skylight on metal roof
Skylights and Light Transmitting Panels supply natural light into the building as shown above.

Installation Planning and Timing

Metal roof skylight installation can be installed during or after the roof has been installed, but it is in the best interest of the project to plan for a skylight from the initial stages of the design phase to best accommodate and prepare for the addition of the skylight. 

Safety Concerns, Responsibility, and Compliance  

Skylights and LTPs should be guarded to protect from fall through the metal railing, nets or some other protection method. Last but certainly not least, it must be stated that it is the user’s responsibility to ensure that the installation and use of all light transmitting panels comply with State, Federal and OSHA regulations and laws, including, but not limited to, guarding all light transmitting panels with screens, fixed standard railings, or other acceptable safety controls that prevent fall-through. 

For additional information about skylights for metal roofs, please contact MBCI at (877) 713-6224. 
Sealing the Deal: The Importance of Properly Sealing the Building Envelope Using IMPs and Single-Skin Panels

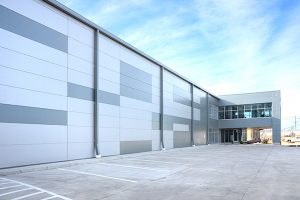
The primary purpose of a building’s envelope (roof and walls) is to protect the building’s interior spaces from the exterior environment and provide the desired exterior aesthetics. Whether choosing insulated metal panels (IMPs) for their superior performance or, instead, looking to the wide range of aesthetic choices available with single-skin panels—or some combination of the two—the common goal must always be to protect the building from the potential ravages of water, air, vapor, and thermal/heat. By ensuring proper installation of metal panels and, thereby, properly sealing the building envelope, problems can be mitigated, efficiencies maximized, and the integrity of the building protected.

Here, we’ll briefly consider the benefits of each panel, and some key considerations relative to their sealant needs and capabilities.

Insulated Metal Panels (IMPs)

IMPs are lightweight, composite exterior wall and roof panels that have metal skins and an insulating foam core. They have superior insulating properties, excellent spanning capabilities, and shorter installation time and cost savings due to the all-in-one insulation and cladding. In effect, IMPs serve as an all-in-one air and water barrier, and are an excellent option for retrofits and new construction. With their continuous insulation, roof and wall IMPs provide performance and durability, as well as many aesthetic benefits.

IMPs offer excellent R-value and improve energy efficiency to the building envelope.

Generally speaking, because of the nature of the joinery, it is easier to get a good seal in place with IMPs given their relative simplicity (i.e., putting the two pieces together with the sealant). They require great attention, though, in terms of air and vapor sealing—aspects largely controlled by the installers on a given project. As an example, vapor sealing in cold climates or applications is critical to the overall soundness of a building. Consider the damage a building could incur if moisture seeps into a panel and becomes trapped; it if freezes, it could push panels out of alignment. This would result in not just an unattractive aesthetic, but a performance failure as well. In order to be effective, all sealant and caulking must be fully continuous.

Single-Skin Panels

Single-skin panels, alternatively, offer the advantage of an expansive array of colors, textures and profiles. They are also thought to have more “sophisticated” aesthetics than IMPs. Single-skin panels are available in both concealed fastener and exposed fastener varieties, and are part of an assembly. They can be used alone or in combination with IMPs, and as long as the needed insulation is incorporated, single-skin panels can meet technical and code requirements, depending on the application. Single-skin products offer a wide range of metal roof systems and wall systems as well.

Getting the proper seal on single-skin panels may require extra sealants or closures, and have more parts and pieces that have to come together to create the seal. However, when properly installed and sealed, they can provide excellent performance in their own right. Some key caveats include ensuring panel laps are properly sealed with either tape or gun butyl sealants, and carefully inspecting air and water barriers for proper installation as well as penetrations through the wall for sealing/fire caulking prior to panel.

In most cases, following the details for the most common conditions will give you a successful and high-performing outcome.

Regardless of the type of metal panel used, taking the time and effort to ensure the sealing and caulking details are properly handled, metal buildings can protect the built environment and provide long-lasting quality and performance.

Proper Fastening Helps Prevent Leaks and Callbacks

Installing metal roofing and siding requires placing and aligning metal panels over the structural supports. But ultimately it requires installers to spend a fair bit of time fastening them in place, typically using a great many fasteners. It is easy to get complacent about this repetitive activity, but the reality is that every fastener plays a crucial role in the integrity and longevity of the installation. Properly selecting, installing, and using the right tools, allows for a proper fastening process that assures a weathertight installation. But if a few fasteners are installed poorly, causing water or air leaks, then the installer is called back to correct the condition. Do a lot wrong, and warranties can be void, with the durability of the building left compromised, possibly requiring a total do-over.

What’s the difference between a good fastening installation and a problematic one? Here are some of the things to pay attention to onsite:

Fastener Types:

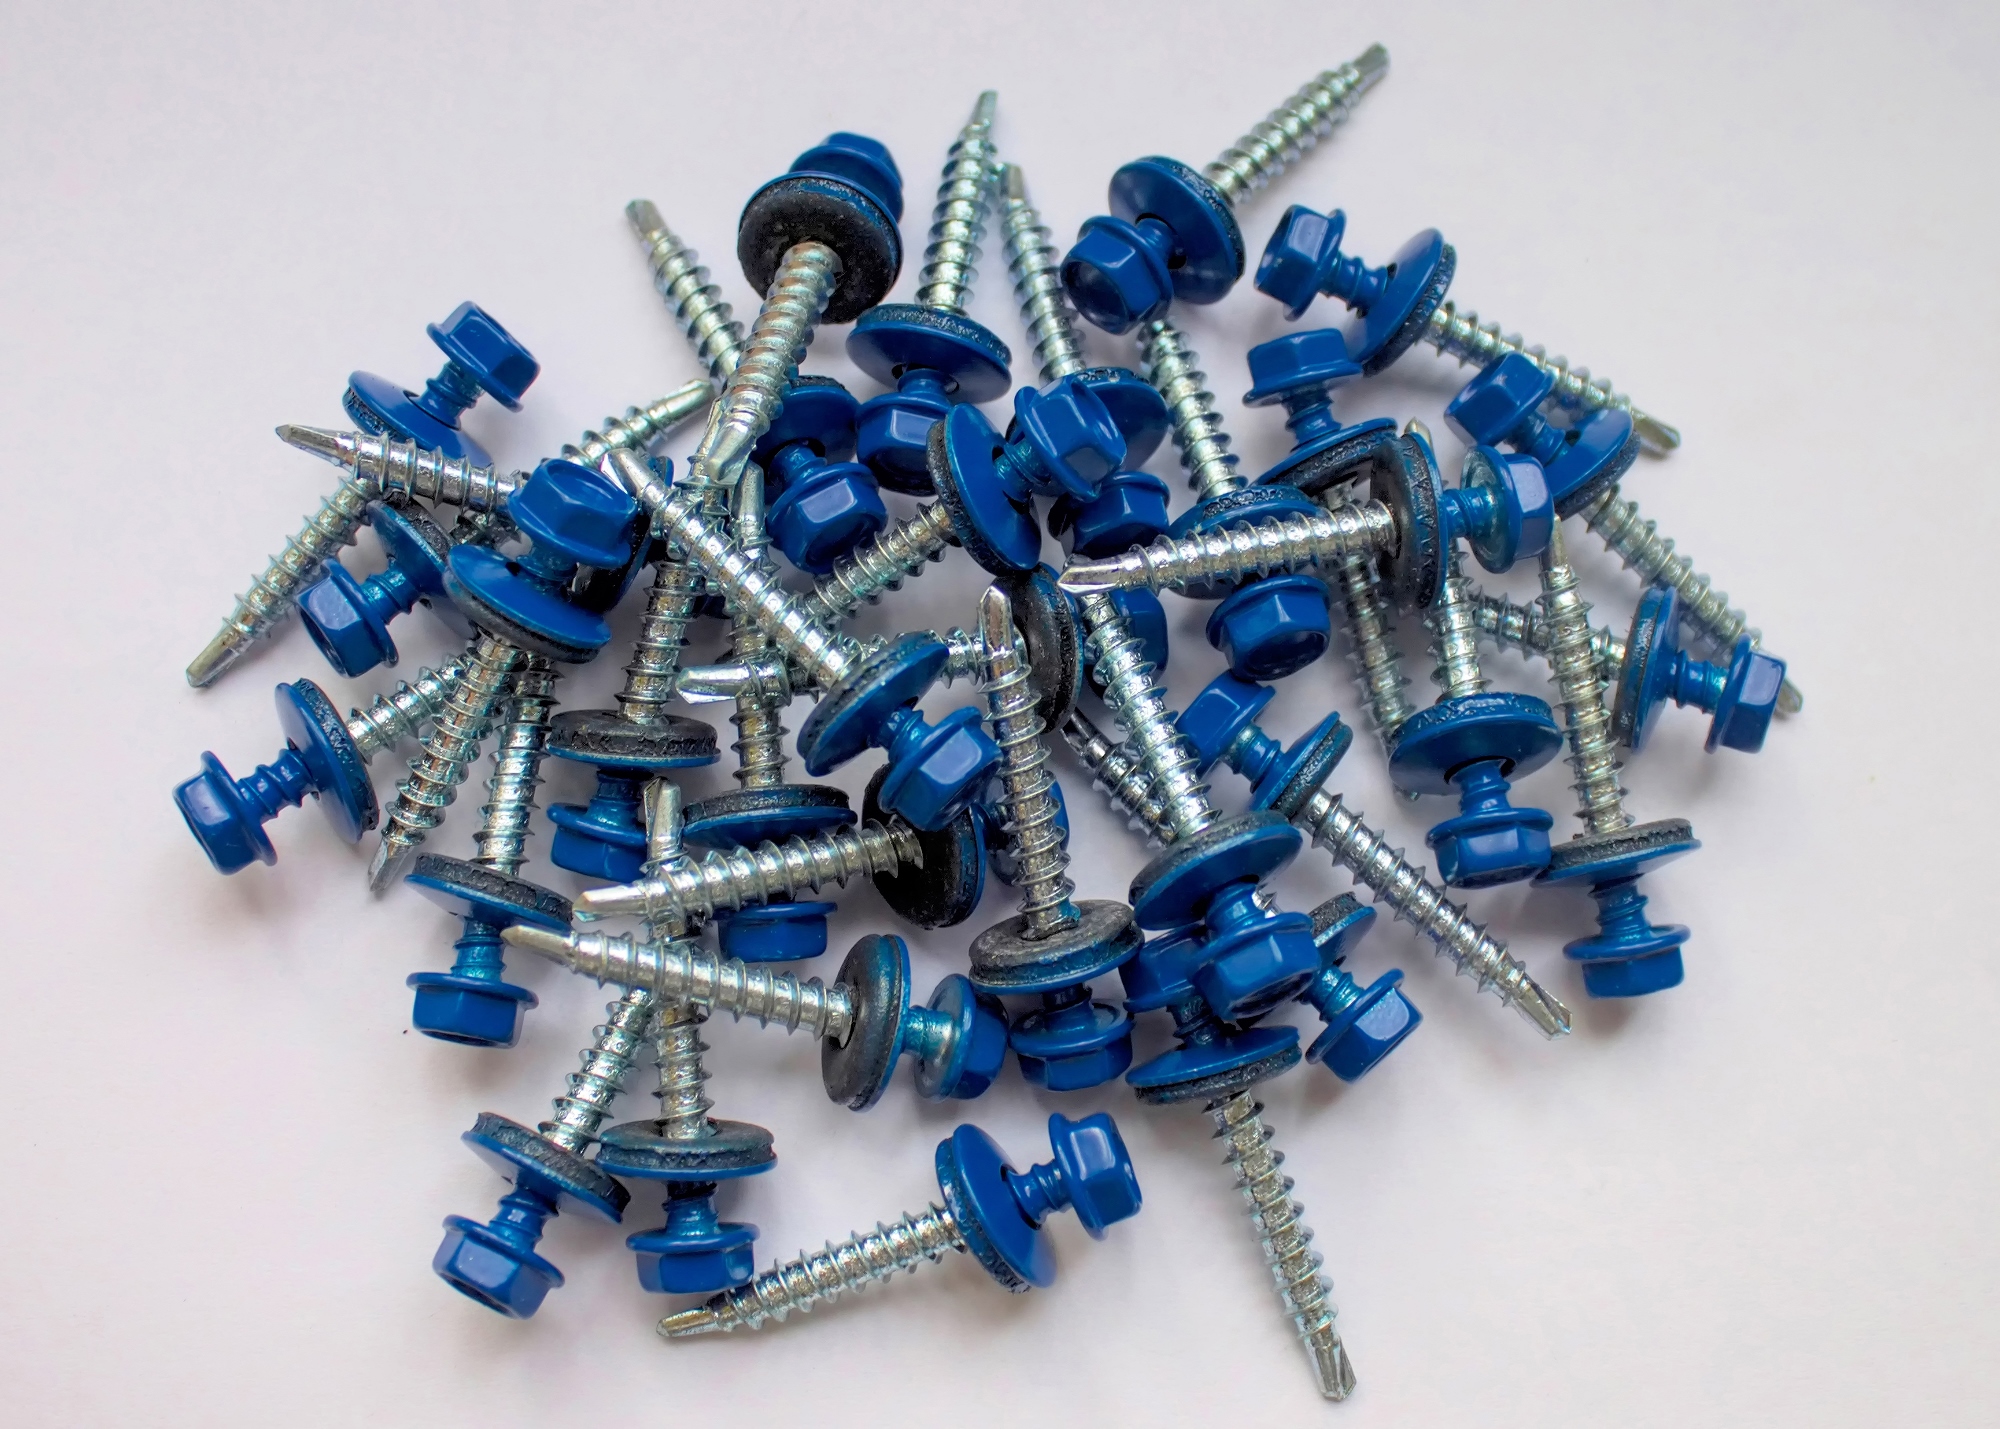
The most common type of fasteners used in metal buildings are self drillers, which vary based on diameter, length, head shape, and material. They are also specifically designed for use in metal substrates. Different fasteners are also available for wood versus metal, and either type can be sized for different substrate and panel thicknesses. Zinc alloy or stainless steel fasteners are common choices for durability, longevity, and avoiding galvanic action with other metal products. Selecting and using the right fastener type for each of the different locations on a metal building begins with determining what is being attached and what is it attaching to.

Fasteners
Fasteners can also be colored to match the roof or wall panel.

Weathertightness:

Fasteners of any type cannot be relied upon by themselves to keep out the elements. Instead, a sealing washer is used that is compressed between the fastener head and the metal panel as the fastener is tightened to form the weathertight seal. High-performance or long-life fasteners may be required for a durable approach to weathertightness and/or may be required by the metal building manufacturer to receive a weathertightness warranty.

Installation Process:

With the right fasteners onsite, the success of the installation now rests with the field crews. A few minutes to review the different fasteners and match them with the right tools and settings for installation is time very well spent. Since electric screw guns with or without impact drivers are common on the jobsite, it’s easy to think any tool will do, when it probably won’t. The wrong tool at the wrong setting can place too much torque or other force on the fastener, causing it to crush or damage washers or even the metal panels. Impact drivers are rarely needed in most cases and, while the fastening needs to be tight, overtightening is never a good thing.

Fastener Locations:

In addition to weathertightness, fasteners provide a structural function as well. Their location and spacing will directly correlate to the ability of a panel to resist wind and other forces after installation. Therefore, it’s always best to use information prepared by a professional engineer on the proper fastening locations, spacing, and sizes. The calculations behind such information can prove to be the difference between a successful installation and one that creates problems.

Understanding the importance of fasteners and the role they play in the integrity of the building, and corresponding warranties, allows installers to see beyond the repetitive task of fastening and into the craft of assembling a durable, long-lasting building. To find out more about fasteners for metal products and systems for your next project, contact your local MBCI representative.

Level of Development (LOD) BIM Specifications for Metal Buildings

When designing and constructing metal buildings, an increasing number of professionals are using a computerized building information model (BIM) as their primary tool. This allows for detailed, three-dimensional computer models to be created, not only to develop the design, but to identify material lists, coordinate details, avoid conflicts between building systems and streamline the design and construction process.

Problem: BIM Coordination

Of course, design is a process that requires some back-and-forth between multiple parties to arrive at the best final solution. So, when a metal-building supplier or manufacturer is asked to provide their information to be incorporated into a BIM process, the question that naturally comes up involves the level of detail. This is common across all trades, and fortunately, there is an organization that is addressing this issue. Known as the BIMforum (www.BIMForum.org), is is the not-for-profit United States chapter of buildingSMART International, and its mission focuses on improving BIM technology, collaboration, education, innovation and open information exchange. As they describe themselves, “Co-sponsored by the Associated General Contractors of America (AGC) and the American Institute of Architects (AIA), BIMForum seeks to lead by example and synchronize with counterparts in all sectors of the industry to jointly develop best practice for virtual design and construction.”

Solution: Level of Development (LOD) Specification

A flagship publication of BIMForum is the 2016 version of Level of Development (LOD) Specification. Having evolved over several years, this publication is “a reference that enables practitioners in the AEC Industry to specify and articulate with a high level of clarity the content and reliability of Building Information Models (BIMs) at various stages in the design and construction process.” Coordinated with other industry standards, it “defines and  illustrates characteristics of model elements of different building systems at different Levels of Development.”

Essentially, it defines and standardizes how much detail is expected in a building information model at different stages of design development. Therefore, if a metal-building manufacturer or any other trade is asked to supply its BIM information, then it needs to ask “What Level of Development?” so that is it providing the right amount of information to coordinate with the larger computer model for the building.

How LOD Works:

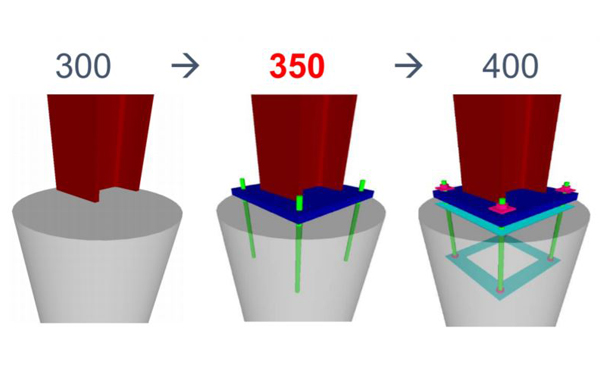
The LOD Specification is based first on the familiar Uniformat specification sections used by most spec writers. Metal Buildings commonly fall under Special Construction in Section F1020.40 in the Uniformat approach, or 21-06 10 20 40 in the Omniclass approach, and are found that way in the LOD Spec. From there, five levels of detailing are described by the numbers 100, 200, 300, 350 and 400, as described further below.

  • LOD 100 – This is the most basic of model, described as “Generic mass of special structure with system typically noted with a design narrative for conceptual pricing.” It is likely that this level of BIM is already developed by an architect or engineer and given to a manufacturer or supplier as a starting point.
  • LOD 200 – This level calls for basic primary structural member sizing, generic representation of secondary framing, and general cladding and exterior trim to be provided, including openings.
  • LOD 300 – More-specific sizing of all needed primary frame structural members, web tapers, frame connections and similar details are called for at this level. Similarly, secondary framing needs to be shown, including purlins and bridging, girts, subframes and base conditions. Exterior panel and trim with actual profiles, actual openings and all significant trim and accessories are shown here.
  • LOD 350 – This level starts to show coordination with other elements or building systems. Therefore, for the primary structure, things like base plate locations, bracing/gussets, clips and any reinforcement all need to be included. Secondary framing elements need to include similar details, such as nested members, connections to primary structure, any miscellaneous or secondary steel members, bridging, etc. Cladding and exterior trim would include all actual profiles, closures, downspouts and all minor trims shows at least generically.
  • LOD 400 – This is the full-fabrication level equivalent to shop-drawing level of detail. As such it includes all final details, including welds, bolts, holes, cinching and all other details of fabrication and assembly for primary and secondary framing, plus all cladding and trim.
BIM
Level of Development (LOD) Specification Example – image courtesy of BIMForum.org

By using these standardized Levels of Development, all design and construction professionals can proceed in an orderly sequence to provide the appropriate information, receive coordination feedback and then move on accordingly to the next level.

The full 2016 LOD Specification can be downloaded for free at http://bimforum.org/log/. The specific information for Metal Building Systems can be found on pages 177–186. For information on how to work with a manufacturer to provide the appropriate BIM information, contact your local MBCI representative.

Find a sales representative