Commercial Metal Roof Flue & Pipe Penetration

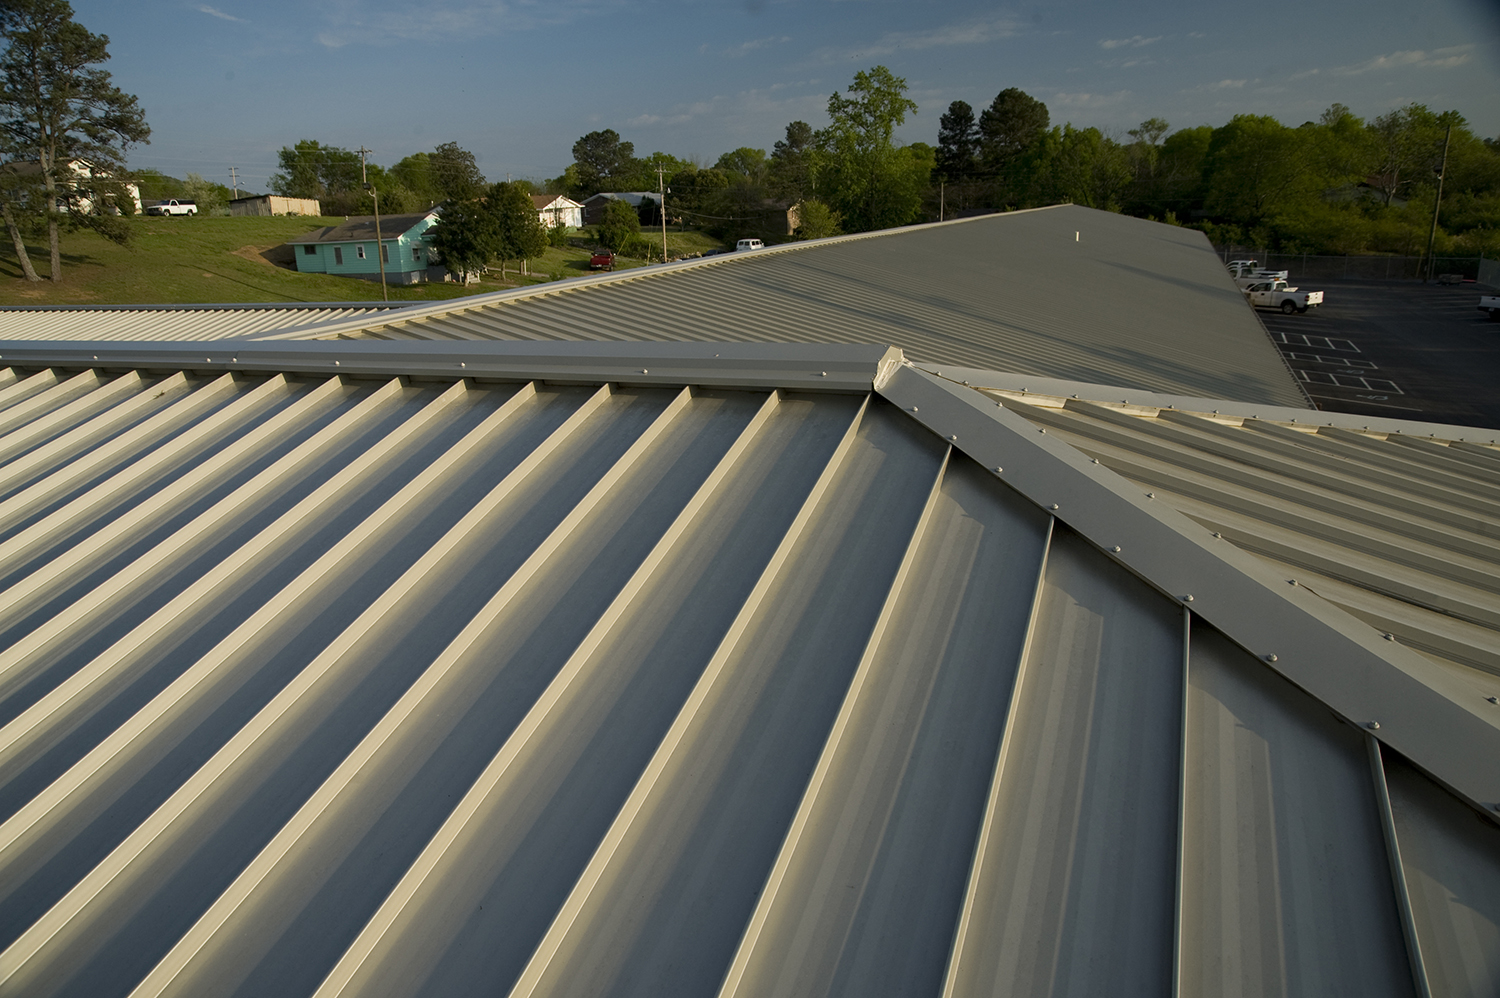
Pipe penetrations are one of the most common types of roof penetration in commercial metal roofs. Regarded for their proven record of longevity and value in providing weathertight solutions, a metal roof’s performance can be compromised by improper pipe or flue penetrations to accommodate other building systems. Done poorly, metal roof penetrations can cause leaks, building damage, and unnecessary expenses. When expertly designed and installed, however, pipe and flue penetrations may be successfully integrated into metal roofing systemswithout compromising performance. Here are five proven and practical guidelines to help avoid problems. 

Metal Roof Flue & Pipe Penetration Tips

1. Use Qualified Installers

A qualified roofing installer is the best person to cut and install appropriately flashed and booted pipe penetration. If that isn’t possible or practical, then any penetration installed by another contractor should be fully coordinated with the architect/owner’s representative and the roofing contractor. This is the only way to be sure that the integrity of the roofing system is maintained. 

2. Use Only Commercial Materials for Pipe Penetration

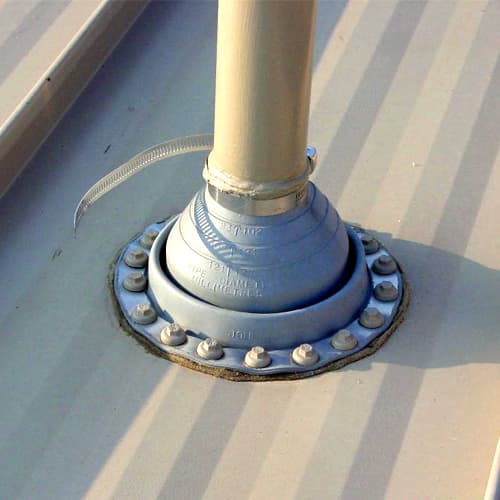
Use Only Commercial Materials for Pipe PenetrationTo properly seal around the pipe penetration, use only a rubber roof jack made specifically for use with metal roofs. Do not use residential-type roof jacks or those designed for other roof types – they will not last over time. Further, do not use materials that are dissimilar to the standing seam metal roof, such as copper, lead, or galvanized metal roof jacks, which can corrode the metal roof system, or are of inferior quality with a short service life (less than 20 years). Proper commercial roofing products combine an EPDM rubber boot (or silicone for high-heat applications) with a bonded aluminum band to allow a compression seal to be formed at the roof panel. 
Penetrations
Pipe and flue penetrations allow for a long-term performance of the roof.
  • Standard EPDM roof jacks can withstand temperatures up to 212º and are suitable for most applications.
  • High-heat, silicone-based roof jacks can withstand temperatures up to 437º and are suitable for flues.
  • Retrofit roof jacks are available in both temperature ranges for applications in which the roof jack cannot be slipped over the top of the pipe.
  • Use only tape and caulk sealants approved by the roof manufacturer.
  • Use only long-life fasteners at all exposed fastener applications. Note that zinc-plated fasteners will not last for 20 years and will typically void roof warranties for finish and weather tightness.

3. Metal Roof Flue & Pipe Penetration Locations

All planned commercial pipe and flue penetrations should be assessed first to be sure they are not inadvertently creating a potential leak or other problem. Rather, they should be located so they can be properly sealed with no immediate obstructions that would make the seal to the roof unnecessarily difficult or compromise the long-term performance of your pipe or flue penetration. 

  • Never allow a pipe to penetrate through a standing seam. It is almost impossible to seal around the roof jack and the panel seam in a manner that will be leak free for the life of the roof. Therefore, always locate the roof penetration onto a smooth or flat area of the roof surface.
  • Place the penetration in a location that has the least amount of water draining into the immediate area around it.
  • Similarly, never allow a pipe to block the water flow down a roof panel and create a buildup of water. When a pipe is encountered that is too large to fit in the flat of the panel without blocking the water flow, use an aluminum pipe curb to allow the water to flow around the pipe and to provide a large, flat area in which to seal the roof jack to the roof surface.
  • In Northern areas, vent pipes should be located as high as possible or otherwise protected against sliding ice and snow from above. On roofs with slopes as low as 2:12, sliding snow, impacting an unprotected pipe, can tear the metal roof or shear the pipe off flush with the roof.

4. Allow for Thermal Movement

The metal roof flue and pipe penetration must allow for thermal movement of the roof. Pipes or other penetrations that are rigidly attached to the structure below may not be able to move as the roof expands and contracts. In these cases, the hole in the standing seam roof should be large enough to allow for this movement without the roof panels impinging on the penetration. 

5. Check Warranties

If the penetrations are to be included in a manufacturer’s weather tightness warranty, the manufacturer must approve in writing beforehand the materials and methods to be used to install the penetrations. Failure to follow this guideline may result in the penetrations being excluded from the weather-tightness warranty. If everyone involved with the roofing penetrations is aware of and follows these five guidelines, then in the end everyone should be quite happy with the long-term performance of the roof. If not, the potential for roof leaks and other related problems only increases. 


Metal Panel Roof Restoration & Installation

The Color Of Success: MBCI’s Durable Coating & Finish Options

The building is designed. The construction schedule is worked out. The materials have been chosen. The trades have been hired. There’s just one more crucial decision to make: The finish.

Metal construction with MBCI already has a long list of benefits basically built in, from enhanced sustainability to superior durability and longevity. But to ensure the long-term, high-performing life of the MBCI materials you’ve invested in, you also need to choose the right finish for your metal components.

Though many people think of finish as simply the color on top of the metal, it’s actually far more. Standard finishes include a primer designed to bind the colorcoat to the metal substrate and provides additional corrosion protection. The colorcoat is comprised of a resin and pigments to create a durable finish in a variety of colors. MBCI’s color finishes are composed of a combination of layers and ingredients to provide you with the best technology for your specific project. MBCI can provide customized finishes that can include additional layers of primer, colorcoat or topcoats depending on the level of protection you choose. The selected resins, pigments and other ingredients determine not only the color and gloss, but how well the finish can stand up to the elements, its expected longevity – and therefore the lifetime of the material it’s protecting.

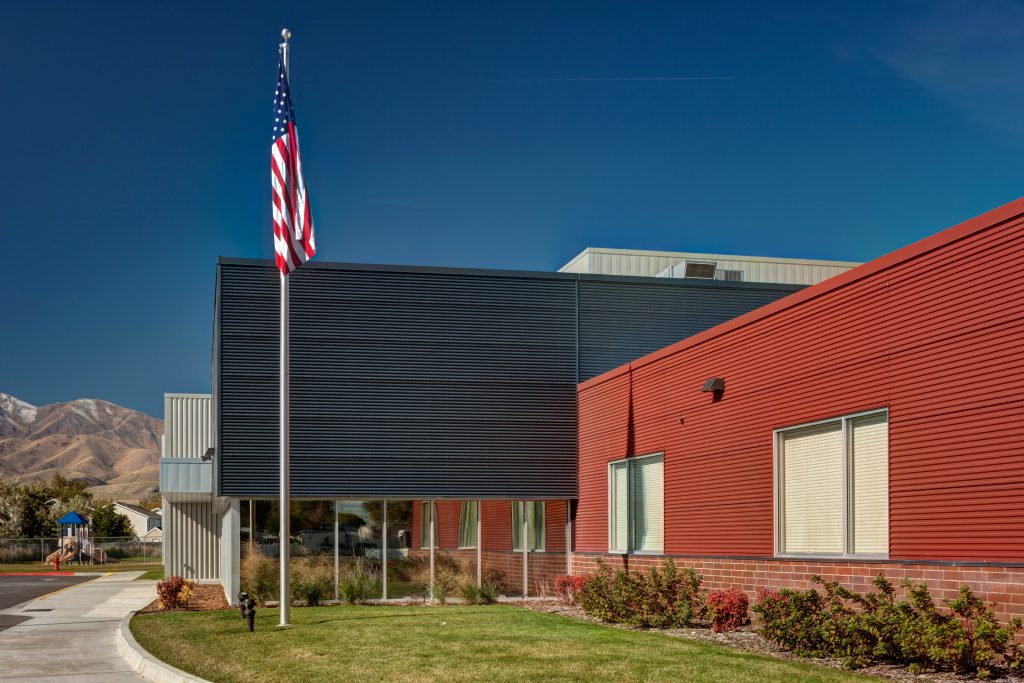
MBCI_FW-120_Bluffdale City Hall_Rodac_Ext_002_1116

Which finish?

MBCI offers two categories of standard finishes. The Signature® 200 series of coatings is a silicone modified polyester (also known as SMP). Silicone modified polyester coatings are hard, durable finishes that provide remarkable gloss, color retention and chalk resistance. A perfect choice for doors, wall cladding, agricultural and high traffic commercial projects. The most economical choice, Signature® 200, comes in a variety of stock colors and can also be customized to your specifications.

For premium projects or projects in more aggressive environments, MBCI’s Signature® 300 series of coatings utilize a 70%polyvinylidene fluoride (PVDF) resin. PVDF finishes offer superior color retention and are highly resistant to harsh conditions such as UV radiation, high winds, high altitudes, acid rain, high humidity and other chemically or environmentally aggressive environments. Signature® 300 coatings are perfect for high visibility architectural and industrial projects. If you’re building near the coastline, MBCI carries a special finish formulated to stand up to marine environments and damaging salt spray.

MBCI also provides customized finishes for interior projects wherever corrosive conditions occur indoors, such as in water treatment plants, indoor swimming pools or facilities that use or manufacture caustic, corrosive chemicals.

Color Choices

The popular reds and greens of recent decades have given way to trends toward more natural colors, earth tones, calming blues and natural metallics such as copper and bronze. As MBCI Paint and Coatings Specialist Martin Thompson explains, “MBCI’s stock color options reflect the changes in color trends – and if there is something we don’t offer on the standard color chart, we will customize it for you.”

You can download MBCI’s Color Charts here:

Architectural Color Chart

Commercial & Industrial Color Chart

Residential Color Chart

If you don’t find the option you had in mind, contact your friendly MBCI representative to start the color customization process. We can match virtually any shade, but custom colors may require increased lead time.

MBCI_7.2, Artisan, FW-120, PBD_Sandstone Met, Dove Met, Col. Red_Entheos Academy_Rodac Roofing_Ext_019_0812

Maintenance/Best Practices

Once you’ve completed a project, you’ll certainly want to maintain it. While MBCI products require little to no maintenance, there are a few pointers that will help get the longest life and best performance out of your MBCI metal finish:

  1. Don’t allow cut panel ends to contact uncured concrete — Metal panels are susceptible to corrosion when exposed to chlorides or highly alkaline uncured concrete. Leave a gap between these panel edges and green concrete and ensure good drainage away from walls and off rooftops.
  2. Keep metal components dry  Corrosion is made possible by prolonged wet conditions. Inspect your entire building envelope at least twice a year, removing dirt buildup, mold, mildew or anything else that traps or holds water against metal components.
  3. Wash annually — A light washing with household soap or siding cleaner is recommended once a year. In wet environments with excessive organic material like mold or pollen, wash more frequently.

Warranties

We know our finishes are strong, and we stand by them. Both the Signature® 200 and Signature® 300 series come with 30-year colorfastness and 40-year film integrity warranties. Colorfastness refers to the color maintaining its appearance, while film integrity is an indicator of how long the finish will adhere to the panel surface. In exceptionally harsh environments such as heavy industrial or coastal areas, the warranty may be different. Speak to your representative for more details. In case of small scratches or blemishes, touchup paint matching your finish is available through MBCI.

When you’re ready to make decisions on coatings and finishes – or if you just have questions – don’t hesitate to reach out to your MBCI representative.

Five Installer Responsibilities for Weathertightness Warranties

Every metal roof installation comes with an implied warranty: the roof shouldn’t leak. This is true even if your customer didn’t buy a “manufacturer’s weathertightness warranty.” It’s just the very basic expectation. Any details we send out, any materials, whatever the manufacturer supplies the installer…all go to that simple premise that you are buying a quality roof system from the get go.

Beyond that, though, a purchased manufacturer’s weathertightness warranty takes it a step further. It’s added insurance. In order to get the full value and peace of mind from a warranty, there are certain considerations the installer needs to keep in mind. Let’s take a look at five key installer responsibilities on projects with manufacturer weathertightness warranties—beyond, of course, putting down the roof correctly!

MBCI Calhoun GA 4-09, 06_resized

1. Understanding the weathertightness warranty type selected for the project.

MBCI sells two types of weathertightness warranties: Standard and Single Source. The approval process up front is the same for both but it is crucial to know the scope of the project’s warranty. With a standard warranty, the only real expectation is that the roof will remain watertight for 20 years. It is a very basic, very inexpensive warranty in which the manufacturer and the installer jointly warranty the roof for that period of time. The manufacturer covers all the materials and the details, and the installer is covering the installation.  

The opposite end of that spectrum is the single source warranty, which is purchased when the customer wants not only the roof warrantied, but prefers everything associated with the roofany accessories, anything else penetrating the roofto be 100 percent covered by the manufacturer, if applicable. These warranties do cost more, require inspections, and require an installer to have completed the manufacturer’s certified installer training program. 

It’s important for the installer to know what warranty was sold, particularly because he/she may not have been the one involved from the start. They may be coming in to bid the job as the installer onlyTherefore, he/she needs to ask questions because they may or may not have the personnel on their crew that meets the requirements to install that roof for the weathertightness warranty purchased. 

2. Obtaining/confirming building geometry approval for warranty. 

Beyond the type of warranty, it is simultaneously necessary to investigate whether there are additional procedures related to the building geometry. Has everything been correctly noted so that the warranty itself will be valid? Is the manufacturer aware of transitions, edge conditions, roof penetrations, roof accessories (snow guards, solar, etc.)? It is extremely important to make sure that the geometry—or the conditions of the roofare covered within a particular warranty. 

MBCI, for instance, will review your roof plan and see the eave gutters, the ridge, the rake, etc. and we can survey what’s going on. Is that roof tying into something else? Will there be materials on that roof that aren’t provided by us or not being installed by the roof installer? As the manufacturer, we would be taking a cursory view to say, yes, we can warranty the roof or no, revisions are needed. If there is anything that we can’t warranty, we’re going to spell that out upfront. We will give as much direction as possible to get the project to a point it can be warranted.  

That said, it’s the installer’s and customer’s responsibility to make sure that the manufacturer knows what’s happening. Think about it this way. Many times, there are other trades involved outside of the roofing contract. Along comes someone who says, “I need to run something  through your roof,” or six months down the road the owner wants a satellite dish on the roof and the installer incorrectly penetrates the roof., causing a leak. Guess who they’re going to call? The installer/customer/owner needs to get that approved by the manufacturer. Otherwise, the warranty could be voided.  

The main takeaways here: Do not make modifications to that roof without the manufacturer’s approval because the roof installer can end up inheriting the liability for that if they do. And, communicate the criteria or the requirements of the warranty to the customer. Don’t just hand them the paperwork. Make sure they understand what’s in it and their responsibilities as metal roof owners. 

3. Ensure proper installer certification and training as required by the warranty type. 

This sounds self-explanatory, but it goes back to the warranty type and the necessity to make sure the warranty selected is appropriate for the job. Verify whether or not the job requires a certified installer and if so, ensure certifications are current. If the installer is not certified, then they need to take the steps to get certified in order to meet that warranty requirement.  

A common situation: A warranty gets sold by a general contractor and he/she subs it out to another roofing contractor. That sub comes in and says not to worry, “we know how to put the roof on. We’re certified.” Then, MBCI gets ready to issue the warranties or schedule inspections and finds out the subcontractor doesn’t know our system that wellAnd remember—for certain types of weathertightness warranties the installer needs to be certified via our training program.

4. The installer is responsible for correct installation per manufacturers details. 

The onus is on the installer to follow the details and directions provided by the manufacturer. If you install the roof per those details, and then there’s a problem, the responsibility falls back on the manufacturer unless determined otherwiseIf, however, the installer doesn’t follow the details provided and the manufacturer comes out to do a warranty claim or warranty inspection, then the installer is going to be responsible for correcting it. The installer can’t put it in wrong and just say, oh, well, that’s covered by the warranty. It’s not. A manufacturer’s warranty is not for covering a bad installationparticularly in the case of a standard warranty. If the installer does a poor install and the roof leaks, that’s not covered by the standard warranty; it falls back on the installer. Of note, this scenario can be different with a single source warranty, since the manufacturer will be out there doing ongoing inspections and ultimately can become responsible for the installation as well. 

And, it goes without saying, the warranty doesn’t cover the interior contents of a building that may be damaged due to an installation issue.  

5. Do not make adds or changes to an installed system once completed and the warranty has been issued without first getting manufacturer approval. 

The warranty only covers the installed product per details, as mentioned. It does not cover additional materials added to the roof or any changes made, at least without the manufacturer’s prior approval—after the install is complete. 

Some examples would be adding a mechanical unit to the roof, a plumbing vent added through the roof, or the satellite TV cable through the roof. Putting a penetration, fasteners, holes of any kind, into a previously installed roof system, unless approved by the manufacturer, will void the warranty in that location. If the manufacturer does not give approval, the installer, along with the customer, would need to make the decision—is it worth the risk to proceed knowing that if the roof leaks, that location would no longer by covered by the warranty.  

To find out more about MBCI warranties and installer certification, contact your local MBCI representative or visit our website.

Metal Roofing Considerations for Coastal Areas

Whether it is wind speed, sun exposure or the proximity to a coastline, these factors would be the major considerations when choosing metal roofing for a project in coastal areas. The good news is that metal panels can be used in just about any coastal area so long as you find the right product profile and finish that meets your specific requirements to maximize performance given the variables of the environment.

There are a number of special considerations given the environmental conditions inherent to a coastal area, including the impact to paint systems and certain unique maintenance requirements, wind ratings, hurricane conditions and certifications/regulatory product approvals that will limit the panels you can you use within specific coastal areas, for instance Dade County, the state of Florida, and the Texas Coast.

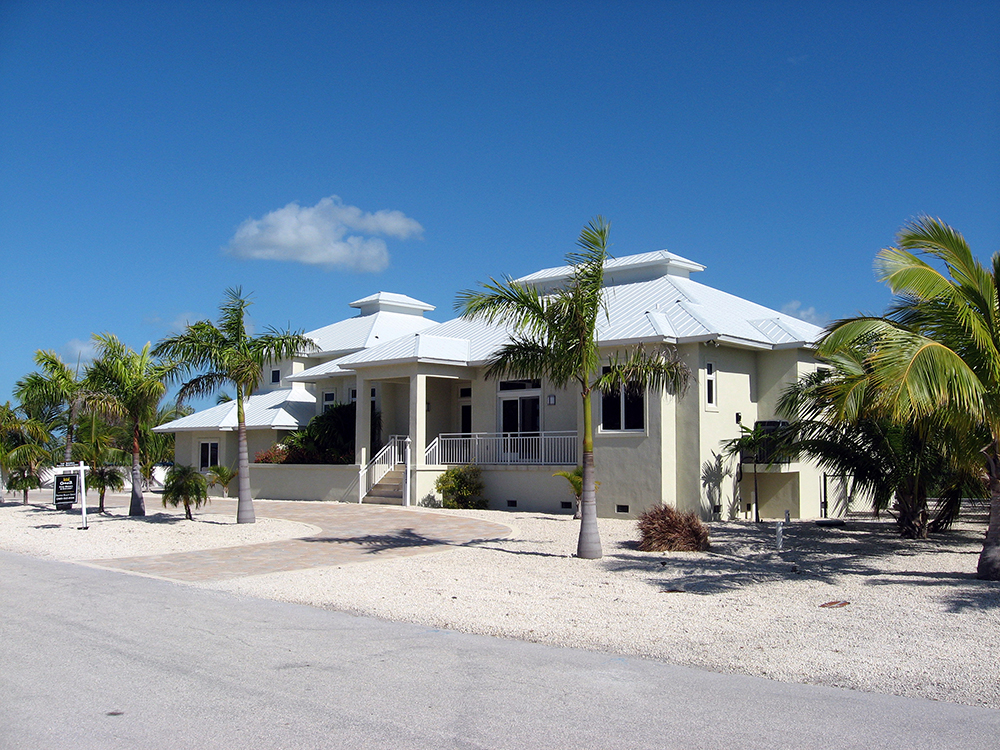
5vcrimp_residence_forrestalBpk02_resized2

Finishes: The 1,500-Foot Rule

Metal components can be a great roofing choice, even in a coastal area, whether a bay, gulf, or ocean water. Key is how you manage the finish on the products and how close you are to the actual salt environment. Simply stated, if you’re outside of a 1,500-foot range from the coastline or salt water, then standard metal roofing would be suitable, but if you’re closer to the coastline there are special paint options or finishes you’d need for the product to withstand the coastal environment.

At MBCI, we use Flurothane Coastal coil coating system* as our standard solution to the challenge of salt spray and harsh coastal environments. This coating is a premium fluoropolymer (PVDF) system developed for use in the most extreme coastal environments. This system is unique in its use of an innovative thick film primer. The two-coat system has a total dry film thickness (DFT) of 1.7 to 2.0 mils.

Choosing an appropriate coastal finish can also affect your product’s warranty. If, for example, your project is within the 1,500-foot range and you don’t choose the required coastal finish, if the panels were to rust there would be no warranty offered and it could affect your warranty for weathertightness as well.

Suitable Panel Types and Additional Coastal Conditions

Overall, roof failures are the largest hurricane loss due to wind and water damage. For this reason, metal roofing is a highly recommended option for coastal regions where hurricanes and high force winds are prevalent. The appropriate metal panel type for these areas is mainly contingent upon what you want to accomplish. Because MBCI does have high wind ratings for most of our panels, whether it be a screw down (aka through-fastened) panel or a standing seam profile panel, selections should be determined by the complexity of the roof itself and the roof conditions. There are standing seam panels and through-fastened panels that can be approved for both roof and wall applications in many coastal areas.

Also, of note, different types of coastal areas may receive higher wind speeds. There is obviously a wide difference in wind speeds between the East Coast and the West Coast, for example, although both are coastal communities. In an area with higher wind speeds and/or hurricane conditions, you would want to consider panels that achieve higher wind ratings. Since there are many different panel options, and some may not be able to achieve as high wind ratings as others, you should look at what those values would be for wind and what testing has been done. MBCI’s metal wall panels and roofing systems are able to resist and withstand extreme environmental conditions, such as those in Florida or the Texas coast where strict product approval and testing processes are required.

MBCI has panels that meet requirements for Florida Approval, Dade County and Broward County for instance, where you need to have an NOA (Notice of Acceptance) for those county areas, as well as products that are TDI approved (Texas Department of Insurance), which is usually seen in the Texas coastal area.

Additionally, sun exposure and color can have an impact as far as solar reflectance, so that is another consideration. Somewhere like Florida gets a lot of sun yet a coastal area in Washington State would be mostly cloudy. If you are in an area that has more sun, then you may want to consider a panel with a higher solar reflectance value.

Maintenance Requirements

If you have metal roofing in a coastal area, you’re going to follow much of the same maintenance as you would on any metal roof, but you would want to inspect it for damage, especially after a wind event or storms. One of the main differences, though, especially if you’re within the 1,500-foot limit where you needed a special finish, is that you’re going to have to do a fresh water rinse regularly on the panels a couple of times a year. What this means is you are basically hosing it off with fresh water to get the potentially corrosive salt spray residue off of it.

For more on metal roof and wall panels and finishes for use in coastal areas, contact your local MBCI representative.


* (1) All substrates must be properly pretreated. (2) American Society for Testing and Materials. (3) Flurothane Coastal system is not designed to bridge cracks in the substrate. (4) Varies by color. (5) Flurothane Coastal system will generally meet the requirements for most post-painted fabrication processes. However, variations in metal quality, thickness or cleaning/pretreatment applications can lead to diminished flexibility.
SOURCE: Valspar Corporation

Tips for Selecting and Field Applying Touch-Up Paint

Metal roofing and wall panels routinely come from the factory pre-finished a durable, baked-on paint finish that covers the Galvalume®-coated steel surface. This production occurs in a controlled environment, which helps create a consistent product, and allows metal panels to last decades with minimal maintenance. It turns out, however, that the biggest threat to a metal panel’s paint coating can happen during panel installation. Tools, fasteners and other installation-related items and activities can scratch or damage the finish, requiring touch-ups to the paint. If you experience this, here are some touch-up paint tips to keep in mind.

Assess the Damage

First, determine how noticeable the scratch is. Do you have to be close to see it, or can you see it easily from several feet away? Generally, if the scratch isn’t noticeable and has not penetrated the Galvalume coating, its best to refrain from doing a paint touch-up. This is because touch-up paint can’t match the fade resistance of the original baked-on pre-finish, and if the Galvalume is still intact, it will still protect the steel beneath the scratch.

On dark or bright colors in particular, the touch-up paint will fade much more quickly than the original paint. Often, the end result is that touch-up paint is more noticeable than if the scratch is left alone. On the other hand, if the scratch is noticeable and needs a touch-up, there are some best practices to follow. It’s important to note though, that if a large area of the panel is damaged (more than 10–15%), then it’s best to just replace the panel.

Getting the right touch-up paint

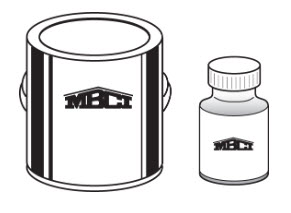
MBCI Metal Panel Touch-Up Paint

Metal panel manufacturers recognize that there may be a need for minor paint touch-ups in the field. So, most offer small containers of paint conducive to field work. These paints are specifically formulated to match standard color offerings, and have properties that make them compatible with the factory finish. Therefore, it’s important to always buy touch-up paint from the manufacturer that produced the original panels. Never ask a paint store to match colors based on a piece of panel or trim. Doing so may get a color match, but it won’t contain the other protective properties of the paint coating you receive from a manufacturer.

Choice of touch-up paint application

Touch-up paint for field application is often available in three types of containers: paint pens, small bottles and spray cans. Usually, the best choice for a scratch is a paint pen. Touch-up paint pens have small, precise tips that can fit into scratches, allowing it to only apply paint where needed. For larger scratches or scuffs, manufacturers offer bottles of paint (with a small brush) similar to those used for nail polish. Generally, these are best for dings on the panel.

Spray cans are also available, and are ideal for painting small accessories like plumbing vent pipes. Don’t use spray cans to conceal a scratch because they apply much more paint than necessary. This can cause unsatisfactory results as the paint weathers and fades differently than the original paint.

Using touch-up paint

When performing a paint touch-up, it’s important to make sure the area in and around the scratch is clean and dry. Wipe down the area as needed, then dry it completely before applying any paint. Afterward, paint the surface using the least amount of paint necessary. This eliminates excess paint on the pre-finished panel. Paint pens are ideal for this since they apply less paint than a nail polish-type bottle or spray can. Once the touch-up paint is on the panel, it will need time to dry. During drying, make sure that dust or other contaminants do not embed into the wet paint.

Consult the metal panel manufacturer

To ensure you or your maintenance professional properly select and apply touch-up paint, be sure to check all warranty and installation requirements and resources with the metal panel manufacturer. They can help ensure you get touch-up paint that matches the paint originally used on your panels and that you take the right steps to ensure warranties remain intact. MBCI offers metal panel touch-up paint for industries and applications including:

For more on metal roof and wall panel finishes, colors and touch-up paint techniques, contact your local MBCI representative.

Cutting Metal Panels Properly On Site

Cutting metal panels on site is an often-necessary part of installing metal roofing and wall panels. However, using the right tools and methods to ensure the panels remain damage-free is vital. Using the wrong tools can result in rust, rust stains, the voiding of warranties and diminished building service life. In this blog post, we’ll share several common field-cutting techniques and best practices that help ensure good results.


Maintaining Longevity When Cutting Metal Panels On Site

When metal panels are made in a manufacturing facility, the tools and methods used to cut the coated metal coil help protect the cut edge from deterioration like corrosion. When cutting metal panels on a jobsite or in the field, protecting any cut edges is just as important. To understand how to field-cut metal panels without sacrificing the quality and protection delivered from the manufacturing facility, you must first understand the what protects the panels. Most often, metal roof and wall panels are fabricated from Galvalume®-coated steel coil because of its proven longevity. Not only does the Galvalume coating protect the surface area of the metal panels, it has also been shown to be effective along the thin edges of the metal too, as long as those edges are cut properly.

During fabrication, the Galvalume metal panels are cut to length either by shearing while flat before entering the roll former, or by means of a profile shear as the panels exit the roll former. Either method tends to “wipe” the Galvalume coating across the cut edge of the metal panels. This provides superior cut-edge protection from corrosion.

Likewise, when panels arrive on site, any needed field cutting should address the same concerns of protecting the edge of the steel from corrosion. Of course, there are ways of doing the field cutting correctly. However, there are also poor strategies that can lead to real problems. The following are examples of common field cutting tools and the best practices for good results.


Common Tools and Methods for Cutting Metal Panels On Site:

Aviation Snips

Red and green aviation snips are a good choice for small cuts on metal panels, such as around pipe penetrations. These snips will wipe the Galvalume® coating in the same way as factory shears, making them a good choice.

Electric Shears

Electric shears are optimal when making lengthier cuts along the steel, such as cutting a wall panel at a corner or at a door opening. These shears take a ¼” strip of metal out of the panel during the cutting process, which tends to leave both sides of the panel smooth and flat along the cut. Like the aviation snips and factory shears, electric shears will wipe the Galvalume coating and protect the edges.

Mechanical Shears

Mechanical shears are an add-on tool that fit onto a battery-operated impact or screw gun. These shears do not take any metal out of the panel and will leave a slightly wavy edge. Mechanical shears are an excellent choice for bevel cutting standing-seam panels at hips and valleys, since they too wipe the Galvalume coating over the cut edges to offer protection.

Nibblers

A nibbler is a great tool for cutting across corrugations in wall panels to create openings for windows, doors and similar structural additions. A good nibbler typically costs $500-$700 (currently), but is well worth it if you often cut corrugated metal panels. The punch and die in the nibbler tends to wipe the Galvalume across the cut edge as it punches out small, half-moon shaped pieces of panel. However, because these little metal pieces will fall away from the cut, it’s important to contain them so no one walks on them. Otherwise, they can embed in the soles of installer’s shoes and create scratches in roof panels when they walk on the roof.

Skill Saw

Skill saws are an ideal tool for cutting metal panels because of their versatility. This tool can cut either across or parallel to corrugations, whether straight or at an angle. When using a skill saw, it is critical to use a saw blade that cuts cool. Otherwise, the Galvalume coating can melt along the cut edge and become ineffective. In particular, do not use an abrasive blade, which will generate heat and damage the coating.

MBCI Blog: Field Cutting Metal Panels On Site
Panels cut with abrasive blades corrode. A cool-cutting blade leaves a smooth edge.


Additionally, its vital to avoid cutting panels on the roof or above other panels. A skill saw blade will throw considerable amounts of steel debris into the air and down onto any panels below. This debris, called swarf, will quickly rust and ultimately cause rust spots in the panels. If enough swarf gathers in one spot, it can rust through the panel.

MBCI Blog: Field-Cutting Metal Panels On Site

Steel swarf, like this collected at the ridge will rust through the panel.


Which Tools Should To Avoid When Cutting Metal Panels On Site:

Tools that should never be used include:

  • Torches
  • Cut-off saws
  • Reciprocating saws
  • Hacksaws
  • Grinders

All of these tools will melt the Galvalume® coating, causing edge rust just like an abrasive blade would. These tools also throw a lot of steel debris (swarf) onto the panels they cut. This debris will be hot and will embed into the panel coating. This can cause rust spots and bigger problems down the road.

In conclusion, using the right tools and following metal panel manufacturer recommendations when cutting metal on site will help ensure that the panels remain damage-free and the final installation will be a fairly seamless process. Using the wrong tools can result in rust, rust stains, and the voiding of warranties. For more on best practices and recommendations for on-site cutting and installation of metal panels contact your local MBCI representative.

Are Metal Panels An Ideal Low-Slope Roofing Material?

Many large, commercial, low-rise buildings often don’t benefit from steeply-sloped roofs the way residences and small commercial buildings might. This is because a steep roof slope would add unwanted height and unnecessary construction cost. Buildings like warehouses, retail stores, etc. are more appropriately built with low-slope roofing, commonly known as “flat roofs”. The National Roofing Contractors Association (NRCA) defines low-slope roofs as those with “a slope at or less than 3:12″. Anything steeper qualifies as a “high-slope roof”. With this in mind, let’s look at some key points to consider when designing and constructing a low-slope roof.

MBCI Low-Slope Roofing

 Low-Slope Roofing Materials

When it comes to selecting low-slope roofing products, there are generally three fundamental choices:

  • Asphalt/ Bituminuous Products: The traditional commercial roofing norm for many years, the use of asphalt/bituminous products has dwindled as newer, more appealing options have emerged.
  • Flexible Membrane Roofing: This roofing material can be made from a variety of types of plastic/polymer-based materials (commonly known as EPDM, TPO, PVC, etc.). Rolls of the chosen membrane are laid out on the roof structure and secured in place either with mechanical fasteners (screws with large washers) or with a continuous layer of adhesive.
  • Metal Roofing: Sometimes overlooked, metal roofing is suitable for different roof slopes. Many metal roofs that use standing-seam systems are rated for use with a pitch as low as ½:12.

When considering which type of roofing material to use for a building project, there are a number of significant differences that illustrate why metal roofing is often the ideal choice.

Engineered For Superior Performance

Standing-seam metal roofing is made specifically for use on low-slope roofs as it meets a number of performance requirements:

  • Water resistance: Precipitation doesn’t penetrate through metal or through the standing seams where the metal panels join together. This is why they can tolerate such low slopes, allowing the water to drain away slowly and predictably without leakage.
  • Rigidity: The rigid nature of metal means that there is less opportunity for ponding (standing water). This is not always the case with asphalt/bituminous or membrane roofing systems.
  • Drainage: Metal roofs carry water to the building’s edge toward gutters and downspouts that carry it away from the building. Other roofing systems rely on drainage piped inside the building. This takes up space and has the potential to leak water inside the building and cause damage.
  • Wind Resistance: Standardized uplift testing shows that metal roofing performs as well or better in extreme weather than mechanically-fastened or fully-adhered membrane systems.
  • Durability: The most cited advantage of metal roofing is its long-term strength and durability. Engineered design and use of high-quality coatings ensures a longer lifespan—50 years or more. In contrast, other roofing types typically feature lifespan ratings of 20 or 30 years.
  • Puncture Resistance: Low-slope metal roofing is more puncture-resistant than asphalt/bituminous or membrane roofing. This makes it better able to tolerate foot traffic, hail and other puncture-inducing hazards.
  • Construction/ Installation Ease: Metal roofing panels are custom-made to suit specific building sizes and end uses. This customization typically means it takes less time to place and install metal roofing in the field. Further, metal panels can tolerate a wide range of temperatures and weather conditions and still install and perform as intended. Low-slope roofs are also safer to walk on with less risk of slips, falls and other hazards.

Cost-Effectiveness

Using metal roofing on low-slope roofing systems can be cost effective in a number of ways:

  • Fewer labor hours as a result of the ease of installation saves money during construction.
  • Competitive material costs, particularly if the metal roofing is part of a total metal building package from a single manufacturer.
  • Minimal maintenance requirements and aversion to rusting, mold growth and decay that save the building owner money over time.

This all adds up to a very favorable life-cycle cost.

The performance, cost-effectiveness and life-cycle benefits of metal roofing panels make them a viable option for low-slope roofing systems. Manufacturers like MBCI can help you select the right metal roofing products and provide information and resources to help ensure proper installation.

View examples of low-slope metal roofing projects and contact your local MBCI representative to start your project today.

Metal Roof Seaming: Best Practices for Ensuring Weathertight Seams

It would seem logical that the most important field installation process for a standing-seam metal roof is the actual process of creating the weathertight seams that connect the metal panels together and ensures the structural integrity of the roof. Perhaps for many different reasons, however, this critical seaming process is not always given the proper attention it deserves, nor are installers given the proper training required to ensure installation runs smoothly. This approach can cause some serious issues, not the least of which is the voiding of a manufacturers warranty or the discovery of roof leaks and the resulting damage.

To help, here are some best practices for readily and successfully carrying out the metal roofing seaming process:

MBCI Blog Image_Seaming_062019_00_in post_reduced

Personnel

Because of the critical nature of seaming metal roofs, the crew members doing this work should be properly trained. Team members who will be performing this work should not perform the seaming without having participated in the appropriate installation training required to ensure the seaming process is appropriately managed. Most roofing manufacturers offer installation training that many installers take advantage of—and this training opportunity should be taken advantage of by the staff who will be doing the seaming.

Seaming Equipment

It is very important that the seaming equipment being used is matched to the specific roof panel system being installed. Manufacturers routinely rent out this equipment in order to be sure that the metal panel profiles are installed properly and are not compromised through the use of generic equipment or that of another manufacturer. Using the wrong equipment can end up being costly for everyone if panels and seams are ruined in the process.

 Hand Crimper

As metal panels are set in place, they are often secured with metal clips, spaced according to engineering and construction needs. Hand crimpers are used to form the seams around the clips as well as any end laps. This process must not be overlooked as improper hand tooling is the number one cause of faulty seaming. To ensure costly mistakes aren’t made, follow the process described in the “Field Seaming Tool Manual”. This manual should be provided with the equipment and reviewed in training.

Electrical Sources

The next step will involve the use of an electric seamer which obviously needs a source of electricity to operate. However, not just any electrical power source will do. Almost all professional seamers have an AC/DC motor that will require 10 or 15 amps and 120 volts. A dedicated electrical circuit—preferably from a temporary electrical pole or an existing building electrical panel—is the best and most reliable way to go. A generator with 15 amp capacity dedicated to be used only for the seamer (in order to avoid power surging) may be acceptable as well. In either case, the power line to the seamer needs to be 10-gauge (minimum) cord. It should also be no more than 200 feet long (to avoid power drop).

Electrical power sources that are NOT acceptable include outlets from a powered man lift or a generator that is not dedicated to only the seamer. (This includes a generator that is part of a welding machine.) Check the manufacturer’s requirements for any other restrictions that can damage the seamer. Skipping this step can place the responsibility for repair or replacement onto the installer.

Electric Seamer

Once all panels are in place, the hand crimping is done and the power source is set. Then, electric seaming takes care of finishing the roofing system. Again, consult the seamer manual for proper procedures, including which direction the seaming should be done. (Seaming can either be done up or down the roof depending on direction of roof installation.) The electric seamer includes a switch for the operator to control the starting and stopping of the process.

On low-slope roofs, the operator should walk alongside the seamer to be sure nothing is in its path and that the seam is done properly. While stopping and re-starting is fine, the seamer should never be removed in the middle of a seam. Doing this makes it very difficult to set it back in exactly the same spot again. If something appears to be wrong with the seamer or the seams being produced, then don’t keep using it. There is no point in damaging multiple roof panels if any one panel indicates that things aren’t going right. In this case, contact the manufacturer right away for assistance or replacement of the seamer.

Safety

Electrical seamers are heavy and—if not used and secured properly—can cause harm or injury. Therefore, they should always be tied off with a safety line—the same type used for workers—not a common rope and definitely not the electrical cord. The safety line should be properly secured to the seamer and then attached to something rigid on the building. Never attach this to a person who could be pulled off of a roof by it.

Cleaning

Before use each day, check the electric seamer and remove any oils, debris or dirt. Make sure the seamer is unplugged from the electrical power source before you begin cleaning. Also, check the grease level in the machine daily and only add a little bit  (2-3 pumps from a grease gun) as needed. Too much will cause the grease to leak out onto the roofing.

Following these pointers should help assure the safe and efficient use of the right seaming equipment when installing roofing panels. To find out more about proper seaming or to schedule training, contact your local MBCI representative.

Understanding LEED for Green Metal Buildings

Designing and constructing sustainable buildings has become a mainstream expectation of most building owners. Whether for reduced energy costs, higher returns on investment, or as an organizational philosophy, “green” building solutions are in demand. Perhaps the best known and most often cited program to achieve these goals is the US Green Building Council’s (USGBC’s) LEED® rating system. While some may think that green buildings are more complicated and costly to build, that is not actually the case. This is especially true when metal building materials are used. In fact, metal buildings are an ideal and economical way to pursue sustainability goals and LEED certification. How? We break it down as follows:

LEED

The LEED® Program

The LEED program has been in use since 1998 and is now used worldwide. It is a voluntary, point-based rating system that allows for independent review and certification at different levels. These levels include Certified (40-49 points), Silver (50-59 points), Gold (60-79 points), or Platinum (80 or more points). Since it allows for choices in which points are pursued, innovation and flexibility are entirely possible as long as specific performance criteria are met. It also encourages collaborative and integrative design, construction and operation of the building.

Points are organized into six basic categories, many of which can be addressed through metal building design and construction, as summarized below.

  • Location and Transportation: Metal buildings can be manufactured and delivered to virtually any location. That means they can support LEED criteria for being located near neighborhoods with diverse uses, available mass transit, bicycle trails, or other sustainable amenities. Metal building parking areas can also be designed to promote sustainable practices for green vehicles and reduced pavement. This all contributes toward obtaining LEED eligibility.
  • Sustainable Sites: Adding a building to any site will certainly impact the natural environment already there. Delivering portions of a pre-engineered metal building package in a sequence to arrive as needed means that the staging area on-site can be minimized—reducing site impacts. Additionally, using a “cool metal roof” has been shown to reduce “heat island” effects on the surrounding site and also qualify for LEED.
  • Water Efficiency: Any design that reduces or eliminates the need for irrigation of plantings and other outdoor water uses is preferred. Incorporating metal roofing with gutters and downspouts, as is commonly done on metal buildings, allows opportunities to capture rainwater for irrigation or other uses. It also helps control water run-off from the roof and assists with good storm water control.
  • Energy and Atmosphere: Metal buildings can truly shine in this category. Creating a well-insulated and air-sealed building enclosure is the most important and cost-effective step in creating an energy conserving building. A variety of insulation methods for metal building roof and wall systems are used to achieve this. Typically, metal building construction uses one or more layers of fiberglass insulation and liners combined with sealant and air barriers. Alternatively, insulated metal panels (IMPs) provide all of these layers in a single manufactured sandwich panel with impressive performance. Windows, skylights and translucent roof panels can provide natural daylight, allowing electric lighting to be dimmed or turned off. For buildings seeking to generate their own electricity,  standing-seam metal roofing provides an ideal opportunity for the simplified installation of solar photovoltaic (PV) systems. Metal roofs generally provide a sustainable service life in excess of 40 years. This means they can outlast the PV array, thus avoiding costly roof replacements during most PV array lifespans.
  • Materials and Resources: Life Cycle Assessments (LCAs) are recognized by LEED as the most effective means to holistically assess the impacts that materials and processes have on the environment and on people. Fortunately, the Metal Building Manufacturer’s Association (MBMA) has collaborated with the Athena Sustainable Materials Institute and UL Environment to develop an industry-wide life cycle assessment report. There is also an Athena Impact Estimator that can help with providing LEED documentation. Metal buildings support exceptional environmental performance through the significant use of recycled steel and the reduced need for energy intensive concrete due to lighter weight buildings.
  • Indoor Environmental Quality: Most people spend much more time indoors than outside, which impacts human health. Therefore, LEED promotes or requires using materials that don’t contain or emit harmful substances. It also promotes design options for natural daylight, exterior views and acoustical control to promote psychological and emotional well-being. Metal buildings are routinely designed to readily incorporate components that help achieve these indoor qualities.

In addition, some LEED points are available for demonstrating innovation and addressing priorities within a geographic region.

Considering the qualities listed above, metal buildings clearly provide a prime opportunity to pursue LEED certification at any level. To find out more about the LEED rating system, visit https://new.usgbc.org/leed. To find out more about successfully designing and constructing metal buildings pursuing LEED certification, contact your local MBCI representative.

Find a sales representative