A Guide to Selecting the Right Metal Roof Panel

With the great variety on the market, one of the main questions we, as metal roof panel manufacturers, get from customers is “How do I select the right panel for my project?” The answer can generally be found by examining a number of criteria, including the properties of the roof, the region and climate, geometry, slope, warranty type…among other key factors.

Here we will provide a brief overview of the various factors that should be considered when narrowing down the choices.

Determining Factors
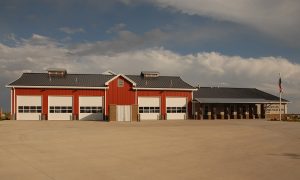
Slope-BattenLok
Steep slope roofs will usually be more expensive than low-slope roofs, but steep slope roofs have the ability to prevent ponding water and have higher snow loads.

1. Slope— Slope is the first consideration as just this one aspect will eliminate certain panels, making it easier to narrow down options right from the start. The two types of roof slopes are low slope and steep slope.

  • A low-slope roof, commonly found in commercial applications, is one whose slope is less than 3:12. The benefits include a simpler geometry that is often much less expensive to construct, and the requirement of fewer materials than a steep slope, thereby reducing material costs.
  • A steep slope roof, more common in residential construction, is one whose slope is greater than 3:12. Steeper slopes are ideal for areas that have higher snow loads and will also prevent the possibility of ponding water on the roof. Since the roof is a visible part of the structure, choosing a metal roof for residential construction often skews more toward aesthetic considerations.

2. Location/Climate— The location and climate of the project is a factor, specifically when looking at certifications/regulatory product approvals, which will limit the panels you can you use within specific regions. This is most relevant to Dade County, the state of Florida, and the Texas Coast, as well as certain snow regions.

3. Specified test standards—Often times, you may need to specify UL 580 or Factory Mutual Insurance Design.

4. Engineering Design—Due to the roof pressure acting on the buildings, engineering design factors eliminate some products because they’re simply not strong enough. This is an area that needs true technical expertise. For that reason, make sure to get a professional engineer to design the roof system in order to determine the correct panel for the project. Also, check with the manufacturer to determine if they have panels that have been tested to certain test standards. If they do not have the testing on a product, that in itself can exclude a particular panel.

5. Geometry—In its most basic terms, roof geometry is an overview of what the finished roof will look like, including special conditions, such as hips, valleys and ridges. The various conditions that go along with specific roof types will determine if a roof geometry is simple or complicated—which will affect the type of panel that can—and can’t—be used. For instance, a Double-Lok® roof panel can be used on a low slope roof—it can go down to 1/4:12. However, if a low roof slope condition has a valley, you may want to avoid a Double-Lok® panel since this product is more difficult to use in a valley situation.
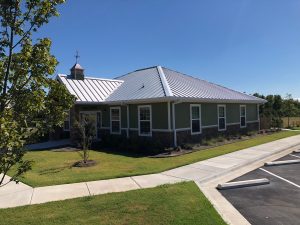
Standing Seam - LokSeam
The LokSeam® roof pictured above is a standing seam roof, one of the two main types of roof systems.

6. Panel type— Panel types can be broken out into two main types: standing seam and through-fastened. The choice of specific product within these general categories depends on a number of considerations, including aesthetics and weathertightness warranties. If your project calls for either standing seam OR through-fastened, that will eliminate about half the types right off the bat.

  • Standing Seam Roof Systems
    In basic terms, there are four unique styles of metal standing seam panels: Double lock seam, symmetrical seam, one-piece snap-lock interlock and two-piece snap-lock interlock. These styles can be further delineated by seam shape or profile, i.e. trapezoidal rib, vertical rib, square rib and tee rib.
  • Through-Fastened Roof Systems
    Exposed, or through-fastened panels, are available in a variety of widths, usually from two to three feet wide. They also come in various rib shapes, heights and spacings. Typical gauges are 29 and 26, but they also come in 24 and 22 gauge. There are also structural and non-structural through-fastened panels. Structural panels are capable of spanning across purlins or other secondary framing members such as joists or beams. Non-structural panels must be installed over a solid deck. Through-fastened roofs are best suited to small- and medium-sized metal buildings and residential applications. In both instances, the panel runs are limited to shorter lengths where thermal movement is typically not a problem.

7. Substrate— Examples of substrates are open framing, plywood, and metal deck. Some panels can’t be attached, for instance, to open framing but almost every type of panel can attach to plywood.

8. Required Weathertightness Warranties— If a weathertightness warranty is a requirement, your options are down to the only panels offered with that guarantee—eliminating all the through-fastened panels.

Looking to the Manufacturer for Help

While specifiers need to take that initial look at all the determining factors, the choices can still feel overwhelming. Once you’ve eliminated the panels that surely won’t work, you will still likely be left with many strong choices. The metal panel manufacturer can guide you to that decision. We encourage you to contact the MBCI team of experts to help further narrow down the choices in order to finalize what is the best metal roof panel for your project. For more guidance on finding the right roof panel for your project, stay tuned for our white paper coming soon.
Proper Fastening Helps Prevent Leaks and Callbacks

Installing metal roofing and siding requires placing and aligning metal panels over the structural supports. But ultimately it requires installers to spend a fair bit of time fastening them in place, typically using a great many fasteners. It is easy to get complacent about this repetitive activity, but the reality is that every fastener plays a crucial role in the integrity and longevity of the installation. Properly selecting, installing, and using the right tools, allows for a proper fastening process that assures a weathertight installation. But if a few fasteners are installed poorly, causing water or air leaks, then the installer is called back to correct the condition. Do a lot wrong, and warranties can be void, with the durability of the building left compromised, possibly requiring a total do-over.

What’s the difference between a good fastening installation and a problematic one? Here are some of the things to pay attention to onsite:

Fastener Types:

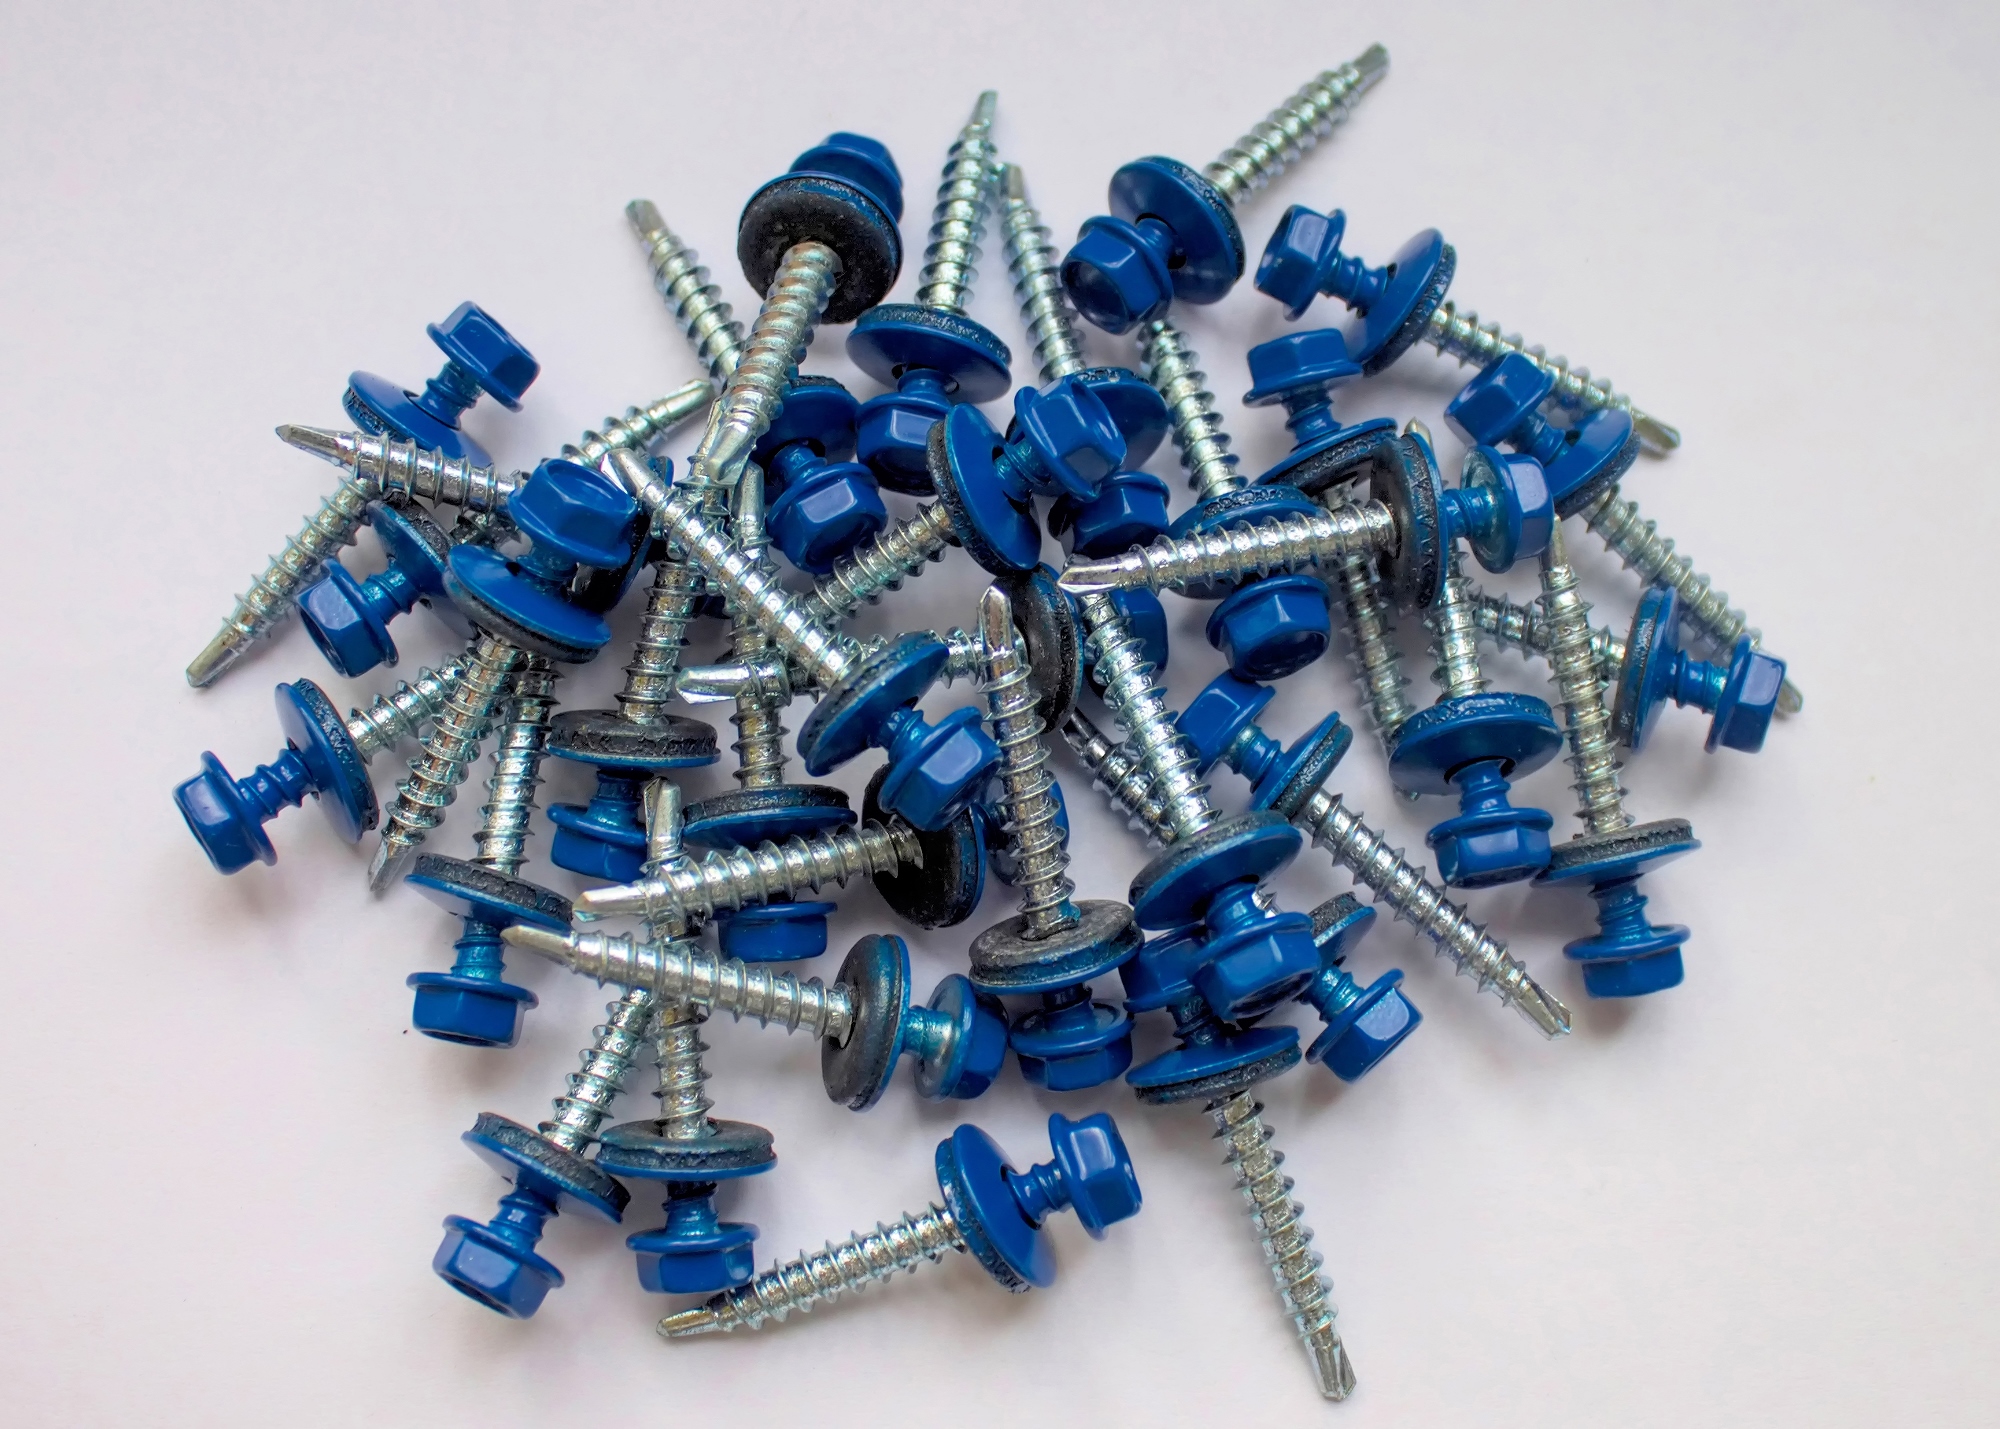
The most common type of fasteners used in metal buildings are self drillers, which vary based on diameter, length, head shape, and material. They are also specifically designed for use in metal substrates. Different fasteners are also available for wood versus metal, and either type can be sized for different substrate and panel thicknesses. Zinc alloy or stainless steel fasteners are common choices for durability, longevity, and avoiding galvanic action with other metal products. Selecting and using the right fastener type for each of the different locations on a metal building begins with determining what is being attached and what is it attaching to.

Fasteners
Fasteners can also be colored to match the roof or wall panel.

Weathertightness:

Fasteners of any type cannot be relied upon by themselves to keep out the elements. Instead, a sealing washer is used that is compressed between the fastener head and the metal panel as the fastener is tightened to form the weathertight seal. High-performance or long-life fasteners may be required for a durable approach to weathertightness and/or may be required by the metal building manufacturer to receive a weathertightness warranty.

Installation Process:

With the right fasteners onsite, the success of the installation now rests with the field crews. A few minutes to review the different fasteners and match them with the right tools and settings for installation is time very well spent. Since electric screw guns with or without impact drivers are common on the jobsite, it’s easy to think any tool will do, when it probably won’t. The wrong tool at the wrong setting can place too much torque or other force on the fastener, causing it to crush or damage washers or even the metal panels. Impact drivers are rarely needed in most cases and, while the fastening needs to be tight, overtightening is never a good thing.

Fastener Locations:

In addition to weathertightness, fasteners provide a structural function as well. Their location and spacing will directly correlate to the ability of a panel to resist wind and other forces after installation. Therefore, it’s always best to use information prepared by a professional engineer on the proper fastening locations, spacing, and sizes. The calculations behind such information can prove to be the difference between a successful installation and one that creates problems.

Understanding the importance of fasteners and the role they play in the integrity of the building, and corresponding warranties, allows installers to see beyond the repetitive task of fastening and into the craft of assembling a durable, long-lasting building. To find out more about fasteners for metal products and systems for your next project, contact your local MBCI representative.

Proper Cutting and Cleaning of Metal Building Panels

Metal building panels, whether for roofing or walls, are manufactured with a long-lasting and durable finish of different types and in many colors, allowing the panels to hold up and look great for decades. However, once they get to the building they may need to be cut to fit a field condition, or they may need to be cleaned either during or after installation for any number of reasons. Innocently doing either, without understanding that doing it the wrong way could compromise the integrity of the finish, can be disconcerting at best or warranty-buster at worst. Here are a few tips for the proper cutting and cleaning of metal panels.

Cutting Metal Panels:

Field cutting of panels is certainly allowed and acceptable to manufacturers and is common, particularly at framed openings. However, there are two things to pay attention to here:

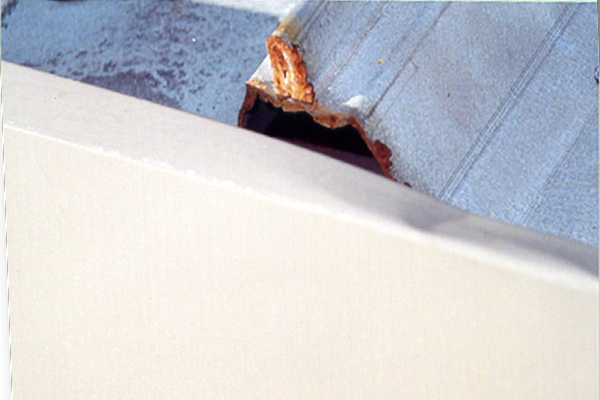
  • Cutting Method: If field cutting is required, the panels must be cut with nibblers, snips or shears to prevent edge rusting. Do not cut the metal panels with saws, abrasive blades, grinders or torches. Abrasive saw blades, grinders and torches can leave irregular or rough edges that are no longer coated or finished, thus causing rust and corrosion.
Metal
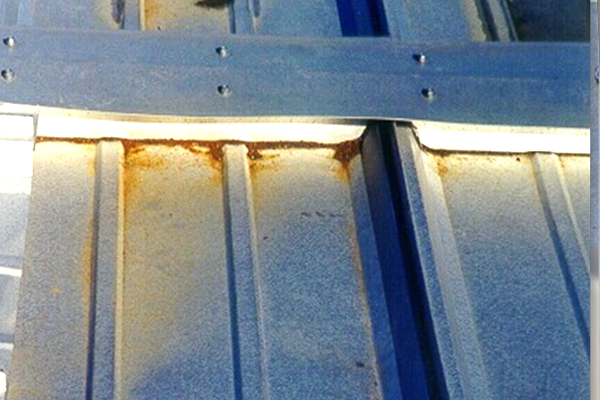
Corrosion on this panel edge is due to an abrasive saw blade cut.
  • Cutting Location: All cutting of metal will produce fine particles, or swarf, that will fall from the cut. If this swarf falls on the roof, it can cause permanent staining and, if enough of it accumulates in one place, it could rust completely through the metal roof panel. Therefore, never cut metal panels on the roof or over other metal panels. It is best to cut the panel down on the ground where the swarf can be captured and disposed of.
Metal
Accumulated swarf from cutting is staining this metal panel.

Cleaning Metal Panels:

Metal panel manufacturers will usually provide information and directions for cleaning. A typical set of cleaning recommendation follows, based on a progression of cleaning levels—start with number 1 and work your way down the list for tougher jobs.

  1. For simple cleaning, water and mild detergent will often be all that is needed. However, bleach should never be used, since it can change the finish color or interact disastrously with certain metals.
  2. For water-soluble dirt or other deposits requiring more complete cleaning, a solution of hot or cold water mixed with detergent is appropriate. In a container of water, use a 5 percent solution of commonly used commercial (non-industrial, non-bleach) mild detergent, so as not to have any deleterious effect on the painted metal surface. Use a cloth or a soft-bristle brush for application of the cleaning solution, followed by an adequate rinse with clean water. Alternatively, pressure-washing with a 40° tip is also an option.
  3. For non-water-soluble deposits such as tar, grease, oil and adhesives, a solvent or alcohol-based cleaner may be required. In this case, since most organic solvents are flammable and/or toxic, they must be handled accordingly. Generally, keep them away from open flames, sparks and electrical motors. Use adequate ventilation, protective clothing and goggles, and read the manufacturer’s Material Safety Data Sheet (MSDS) of any solvent used for any other specific safety details. The following are among the cleaners recognized by manufacturers for this type of non-water-soluble cleaning:
    1. Alcohols
      1. Denatured alcohol (ethanol)
      2. Isopropyl (rubbing alcohol)
    2. Solvents
      1. VM&P naptha
      2. Mineral Spirits
      3. Kerosene
      4. Turpentine (wood or gum spirits)

Regardless of the level of cleaning required, never use wire brushes, abrasives, or similar tools that will abrade the surface coating and leave scratches or other finish damage and lead to corrosion. Further, keep in mind that any misuse or abuse of any of the acceptable cleaning agents will automatically void any manufacturer’s warranty for the affected surfaces.

By using the tips above to properly cut and clean metal panels, installers can avoid the problems of corrosion, staining or other surface damage. Thus, the integrity and beauty of the finish is maintained without any impact on the warranty. To learn more about metal panel finishes, cutting, cleaning and warranties, contact your MBCI representative.

The Case for Day One Weathertightness Warranties

Once upon a time, a “standard warranty” was indeed the industry standard for weather tightness warranties in the metal roofing realm. To make a long story short, this meant that manufacturers supplied a “manufacturer’s standard warranty” based on an initial review of the details to ensure that the roof could be properly installed but left it up to others to ensure that the details were followed. If the roof was not properly installed and resulted in a leak then the manufacturer’s warranty did not cover it. At this point, the project had been closed out and the installer was long gone, sometimes even out of business. The owner, architect, general contractor, installer and manufacturer were then at odds with each other leading to dissatisfaction and frustration all around.

Warranty Evolution

In the mid ’90s, the Single Source or Day One warranty was born and quickly caught on throughout the metal roofing industry. Generally, this warranty required that the roofing contractor come to the manufacturer’s training course to be trained in the proper installation of their roof system(s). In addition, the manufacturer typically required inspections at the beginning, middle of the roof installation with a final inspection just before the crew demobilized from the project. Once the warranty was issued, the manufacturer was responsible to the building owner from the date of substantial completion for the weathertightness of the roof. To be sure, there are still terms and conditions to the warranty, just like with any type of product warranty. For instance, the warranties don’t cover leaks caused by natural disasters or damage caused by other trades on the roof. These warranties provide very good coverage and the best part is that the inspections greatly reduce the chance of a leak in the first place, which is what any building owner would want.

Warranties
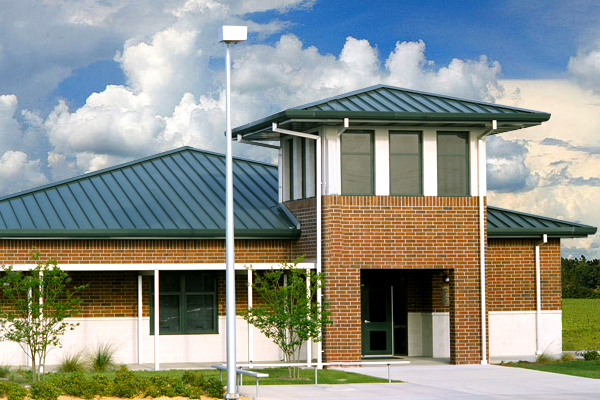
Chain of Lakes Elementary School featuring Hunter Green SuperLok® Metal Panels

There is an overwhelming agreement on all sides that the evolution toward the Day One warranty has been a good thing for the industry. It has forced installers to do things right from the outset and has compelled manufacturers to come up with good, clear details for some of the more complex architectural elements that architects want to use such as dormers, hips, etc.

Conclusion

Manufacturers all want their roof installations to go smoothly, to look good, be trouble-free and perform as expected for many years. To that end, they are willing to work with specifiers, roofing contractors and others to provide assistance, training and job specific help as needed. To ensure that the roofs are properly installed, the specifiers and contractors need to work together with the manufacturers to ensure good communication about the requirements for the specific project and what each party needs to make the project successful.

Roof Penetrations Made by Non-roofing Contractors

In our last two posts, we have looked at the proper ways for roofing contractors to address different types of penetrations in metal roofing in order to assure that a watertight seal is achieved from the outset, as well as over the life of the roof. But what happens when another contractor, such as a plumber, electrician, or other trade needs to penetrate the roof? How is the watertightness of the roof assured then?

Warranty Control for a Metal Roof

Most metal roofing warranties are very specific about what is included or not included should a roof leak occur. Therefore, the manufacturer’s warranty should be the first thing that is checked for a particular project to determine whether a seemingly innocent bit of work on the roof has the potential for a loss of warranty coverage. Commonly, qualified roofing contractors need to do the work and it needs to be inspected, but in some cases, supervised work may be acceptable too. Either way, any penetration installed by a trade contractor other than a roofing contractor should be fully coordinated with the architect or owner’s representative, the roofing manufacturer’s representative, the general contractor, and the roofing contractor. Once reviewed, there may be several options on how to proceed.

Guided Installation

For a single or simple penetration, say for a single small mechanical or electrical line, it may be possible to simply work with the trade contractor on the location of the penetration, review in advance that the proper materials are being used, and check the quality of the work for water tightness when complete. (Note: following the guidelines in our prior post on Pipe and Flute Penetrations will provide a good checklist of things to cover.) If everything is appropriately done, then it may be possible to have the roofing manufacturer add the new penetration to the list of items covered under the warranty.

Lightning Rod
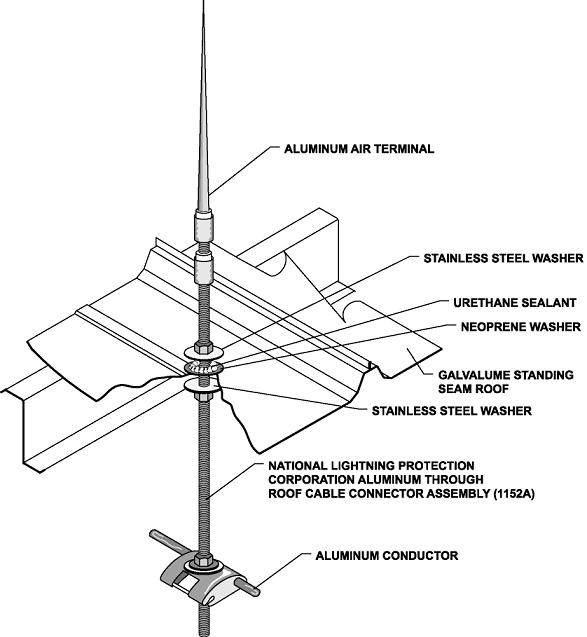
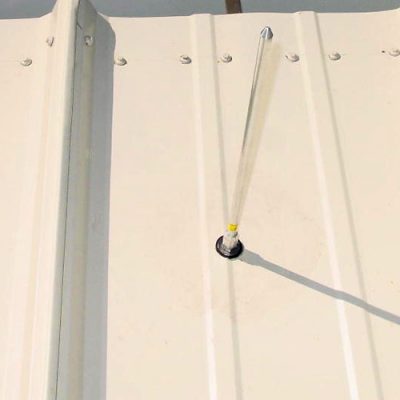
Lightning Rod Application for Metal Panels

Coordinated Installation

In some cases, numerous penetrations may be required, such as the installation of multiple lightning rods across a roof. In this case, it might be more prudent to consider a coordinated, cooperative effort to allow each trade to do what it does best and keep the warranty in effect. Instead of an electrician being responsible for the roof penetrations and for lightning rods, let him focus on the lightning protection and wiring aspects of the work. But first, bring in a roofing contractor to advise on the proper locations of the lightning rods and to be the one responsible for the watertight seal. Location advice would include things like avoiding valleys, standing seams, or other areas that are difficult to seal or flash around. The electrician could then make the needed lightning rod penetrations in the agreed-upon locations and complete his work. Following right behind, the roofing contractor could install retrofit rubber roof jacks around the lightning rods and assure that they are sealed properly. Alternatively, the roofing contractor could make the penetration and allow the electrician to install the lightning rod, while the roofing contractor installs an appropriate rubber roof jack over or around it. Either way, the two trades need to  review the process ahead of time and be sure that everyone is on board to produce the best results for everyone involved.

Bottom Line: Think Through Penetrations

roof penetrations
Standing Seam Roof Penetration

Standing seam metal roofs have become more complex in recent years, with more and varied types of roof penetrations. This simply magnifies the need for better communication between the design professional, roof manufacturer, general contractor, roofing contractor, and any of the various trades that might be working on the roof.

When everyone takes the time to plan up front and think through their own needs and the options to get there, everyone wins. The architect/owner representative can ensure that his or her clients get a roof that will perform long-term. The roof manufacturer is able to provide expertise that has been gained over a long period of time through working with similar details on roofs all over the country. The roofing contractor can leave the project knowing that the details are long-term and will mean little chance for leak callbacks. Plus, the general contractor and the building owner can quickly resolve any arguments over which trade is responsible for repairing a roof leak.

Find a sales representative