Standard Testing For Metal Roofing – Part 2: Air and Water Resistance

In a prior post, we discussed the importance of independent (i.e. third party) standardized testing as a means of verifying the performance of metal roofing, and specifically looked at structural and wind uplift performance. In this post, we will similarly look at testing standards but focus on metal roofing tested for air leakage and water penetration.

Air Leakage and ASTM E1680

Keeping air from passing through a building system from the exterior to the interior (i.e. drafts) is a fundamental role of any building envelope system, including roofing. It is also important in controlling the flow of harmful airborne moisture into a roof assembly. Hence, testing a roofing panel for its ability to control air leakage is critical to the long-term success of the roofing system, and ultimately, the building.

ASTM E1680 “Standard Test Method for Rate of Air Leakage Through Exterior Metal Roof Panel Systems” is used to determine “the resistance of exterior metal roof panel systems to air infiltration resulting from either positive or negative air pressure differences”. It is a standard procedure for “determining air leakage characteristics under specified air pressure differences”. The test is applicable to the field portion of any roof area including panel side laps and structural connections but not at openings, the roof perimeter, or any other details. The test is also based on constant temperature and humidity conditions across the roofing specimen being tested to eliminate any variation due to those influences.

The standard test procedure consists of “sealing and fixing a test specimen into or against one face of an air chamber, supplying air to or exhausting air from the chamber at the rate required to maintain the specified test pressure difference across the specimen, and measuring the resultant air flow through the specimen”. Basically, the test is meant to reveal the ability of the selected roofing panel to resist the difference in air pressure between the two sides and thus demonstrate its air tightness.

The beauty of this standardized test is that different metal roofing products can be tested under the same conditions and compared. The standard calls for a pressure differential between the two sides of positive and negative 1.57 foot pounds of pressure per square foot of panel (75 paschals of pressure) and can be tested in the negative pressure mode alone if the roof slope is less than 30 degrees from horizontal.
MBCI's metal roofing products are tested to confirm airtightness and water permeability.
MBCI’s metal roofing products are tested to confirm an air tight and water-resistant roof.

Water Penetration and ASTM E1646

In addition to air leakage, water leakage in roofing systems is obviously not desired. To test the performance of metal roofing products in this regard, ASTM E1646 titled “Standard Test Method for Water Penetration of Exterior Metal Roof Panel Systems by Uniform Static Air Pressure Difference” is the norm. This standard laboratory test is not based solely on free running water, but on water “applied to the outdoor face simultaneously with a static air pressure at the outdoor face higher than the pressure at the indoor face, that is, positive pressure”. This pressurized testing is intended to simulate wind-driven rain and flowing water that can build a head as it drains. The test measures the water-resisting properties of the roofing in the field of the roof panels including panel side laps and structural connections. Just like air testing, it does not include leakage at openings, perimeters, or other roofing detail areas.

The test method itself consists of “sealing and fixing the test specimen into or against one face of a test chamber, supplying air to or exhausting air from the chamber at the rate required to maintain the test pressure difference across the specimen, while spraying water onto the outdoor face of the specimen at the required rate and observing any water leakage”. Hence, it requires the air and water to be supplied simultaneously and for the testers to observe and document the rate of water leakage under the test conditions.

The test parameters typically require at least 20 gallons of water per hour (gal/hr) overall with between 4 – 10 gal/hr in any quarter section of the tested specimen, all at specified air pressure differentials. Given that this is a fairly stringent test, it is fair to say that metal roofing that holds up under these test conditions will likely perform well under most weather conditions when installed on a building. Typically, manufacturers have developed metal roofing products with seaming and connection methods that allow them to pass this test with virtually no observable water penetration.

To find out more about the tested results of metal roofing products you may be considering, contact your local MBCI representative or see the MBCI website and select the “testing” tab under a selected product.
Roof Penetrations Made by Non-roofing Contractors

In our last two posts, we have looked at the proper ways for roofing contractors to address different types of penetrations in metal roofing in order to assure that a watertight seal is achieved from the outset, as well as over the life of the roof. But what happens when another contractor, such as a plumber, electrician, or other trade needs to penetrate the roof? How is the watertightness of the roof assured then?

Warranty Control for a Metal Roof

Most metal roofing warranties are very specific about what is included or not included should a roof leak occur. Therefore, the manufacturer’s warranty should be the first thing that is checked for a particular project to determine whether a seemingly innocent bit of work on the roof has the potential for a loss of warranty coverage. Commonly, qualified roofing contractors need to do the work and it needs to be inspected, but in some cases, supervised work may be acceptable too. Either way, any penetration installed by a trade contractor other than a roofing contractor should be fully coordinated with the architect or owner’s representative, the roofing manufacturer’s representative, the general contractor, and the roofing contractor. Once reviewed, there may be several options on how to proceed.

Guided Installation

For a single or simple penetration, say for a single small mechanical or electrical line, it may be possible to simply work with the trade contractor on the location of the penetration, review in advance that the proper materials are being used, and check the quality of the work for water tightness when complete. (Note: following the guidelines in our prior post on Pipe and Flute Penetrations will provide a good checklist of things to cover.) If everything is appropriately done, then it may be possible to have the roofing manufacturer add the new penetration to the list of items covered under the warranty.

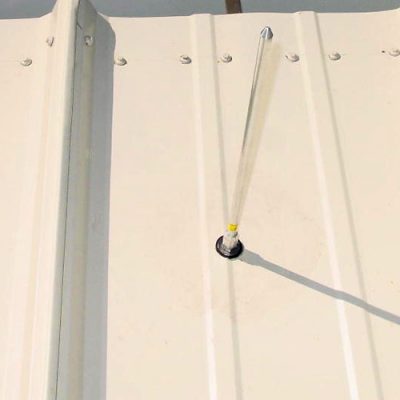
Lightning Rod
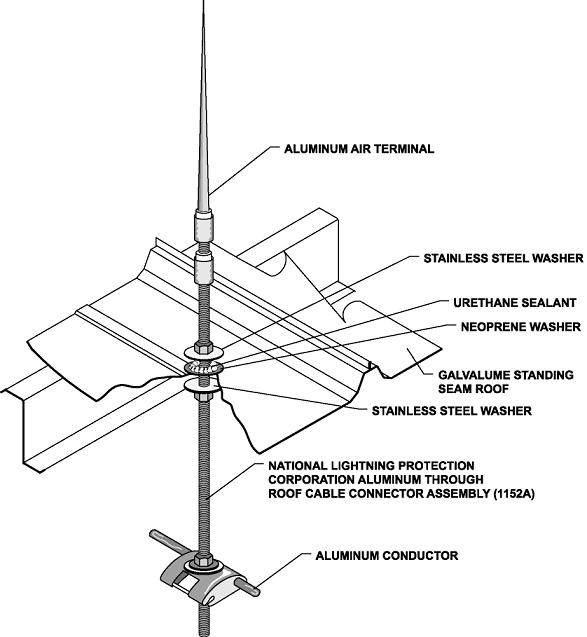
Lightning Rod Application for Metal Panels

Coordinated Installation

In some cases, numerous penetrations may be required, such as the installation of multiple lightning rods across a roof. In this case, it might be more prudent to consider a coordinated, cooperative effort to allow each trade to do what it does best and keep the warranty in effect. Instead of an electrician being responsible for the roof penetrations and for lightning rods, let him focus on the lightning protection and wiring aspects of the work. But first, bring in a roofing contractor to advise on the proper locations of the lightning rods and to be the one responsible for the watertight seal. Location advice would include things like avoiding valleys, standing seams, or other areas that are difficult to seal or flash around. The electrician could then make the needed lightning rod penetrations in the agreed-upon locations and complete his work. Following right behind, the roofing contractor could install retrofit rubber roof jacks around the lightning rods and assure that they are sealed properly. Alternatively, the roofing contractor could make the penetration and allow the electrician to install the lightning rod, while the roofing contractor installs an appropriate rubber roof jack over or around it. Either way, the two trades need to  review the process ahead of time and be sure that everyone is on board to produce the best results for everyone involved.

Bottom Line: Think Through Penetrations

roof penetrations
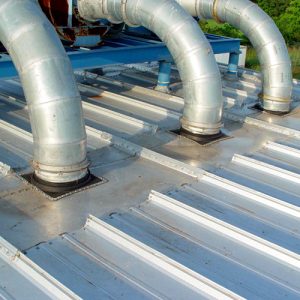
Standing Seam Roof Penetration

Standing seam metal roofs have become more complex in recent years, with more and varied types of roof penetrations. This simply magnifies the need for better communication between the design professional, roof manufacturer, general contractor, roofing contractor, and any of the various trades that might be working on the roof.

When everyone takes the time to plan up front and think through their own needs and the options to get there, everyone wins. The architect/owner representative can ensure that his or her clients get a roof that will perform long-term. The roof manufacturer is able to provide expertise that has been gained over a long period of time through working with similar details on roofs all over the country. The roofing contractor can leave the project knowing that the details are long-term and will mean little chance for leak callbacks. Plus, the general contractor and the building owner can quickly resolve any arguments over which trade is responsible for repairing a roof leak.

Structural Penetrations in Standing Seam Metal Roofs

In our prior post on “Pipe Penetrations in Standing Seam Metal Roofs,” we identified important guidelines for when pipe penetrations are made to metal roofing systems, typically after the metal roofing is installed. That means an opening is cut in the metal roofing, it is properly flashed or sealed, and the penetrating member is passed through it. However, some penetrations are already in place before the roofing contractor shows up. These can be things like vertical members resting on the building structure that support a platform for HVAC equipment above the sloped roof. Or, it can be parapet wall with offsets or other conditions that are already in place. In cases like this, a different approach is needed to assure that the roof remains watertight.

Equipment Platforms for Structural Penetrations

Penetrations
Structural Penetrations in Standing Seam Metal Roofs

From the standpoint of a roofer, a structural equipment platform is a pre-existing condition. The metal roofing industry already recognizes the need to address such situations, particularly on existing buildings, by offering retrofit flashing and curb products. The same, proven approach can be used when pre-existing conditions are encountered on new buildings as well. For example, when structural posts for equipment platforms are encountered running up through the roof plane, roof jacks and curbs specifically designed for retrofit applications should be used. The retrofit roof jack, or boot, should be made out of rubber and be designed to install around the penetration, rather than over it. The boot should ideally rest on a two-piece retrofit pipe curb which can span across one or more standing seams and create a smooth, flat surface for the boot to be attached and sealed. The two-piece design allows for the pipe curb to be properly shingled on the up slope and down slope side of the roofing, thus preventing a “backwater lap,” which will leak. Trying to use only products intended for new construction on such conditions will require unwarranted field modifications or an over-reliance on caulking and sealant, all of which can be prone to problems and failure of the watertight abilities of the roofing.

Parapets

The use of parapet walls around some or all of a perimeter of a building is a common condition. However, if the building shape varies, and the parapet along with it, then there may be some rather uncommon conditions in which the roofing meets an offset or irregularly shaped parapet walls. The issue is that water coming down the sloped roof runs into the offset or other obstruction, causing a buildup of water and a potential leak. The typical approach is to provide a cricket, which is flashed into the parapet wall and diverts water away from the corner created by the offset. It is important, in this case, to be aware that standard sheet metal crickets have not proven to be effective. Instead, welded aluminum crickets and fixtures are recommended to create a truly watertight seal. Also, the welded cricket can be “shingled” into the roof to prevent “backwater laps.” The key is to provide a complete seal at the corners by welding the material, which cannot be done with sheet metal crickets.

Design Planning

The best way to address all of the structural roof penetration issues described here is with proper upfront planning. Avoiding any of these conditions would of course be ideal, and perhaps they can be designed out of some projects. However, if they’re unavoidable, then the roofing contractor and the design professionals need to review the conditions together ahead of time. This advance design planning is the best way to assure that the best, most effective detailing is employed and the proper materials are available on site.

Snow and Metal Panel Roofs: Part 2


In part I of this blog, we discussed what to consider when deciding the roof material and roof slope to build with in snowy conditions. If you have decided to design a roof with metal panels, it is important to use the correct panel seams, evaluate the roof layout and consider long-term weatherproofing, and ensure your roof design fits the needs and function of the building.

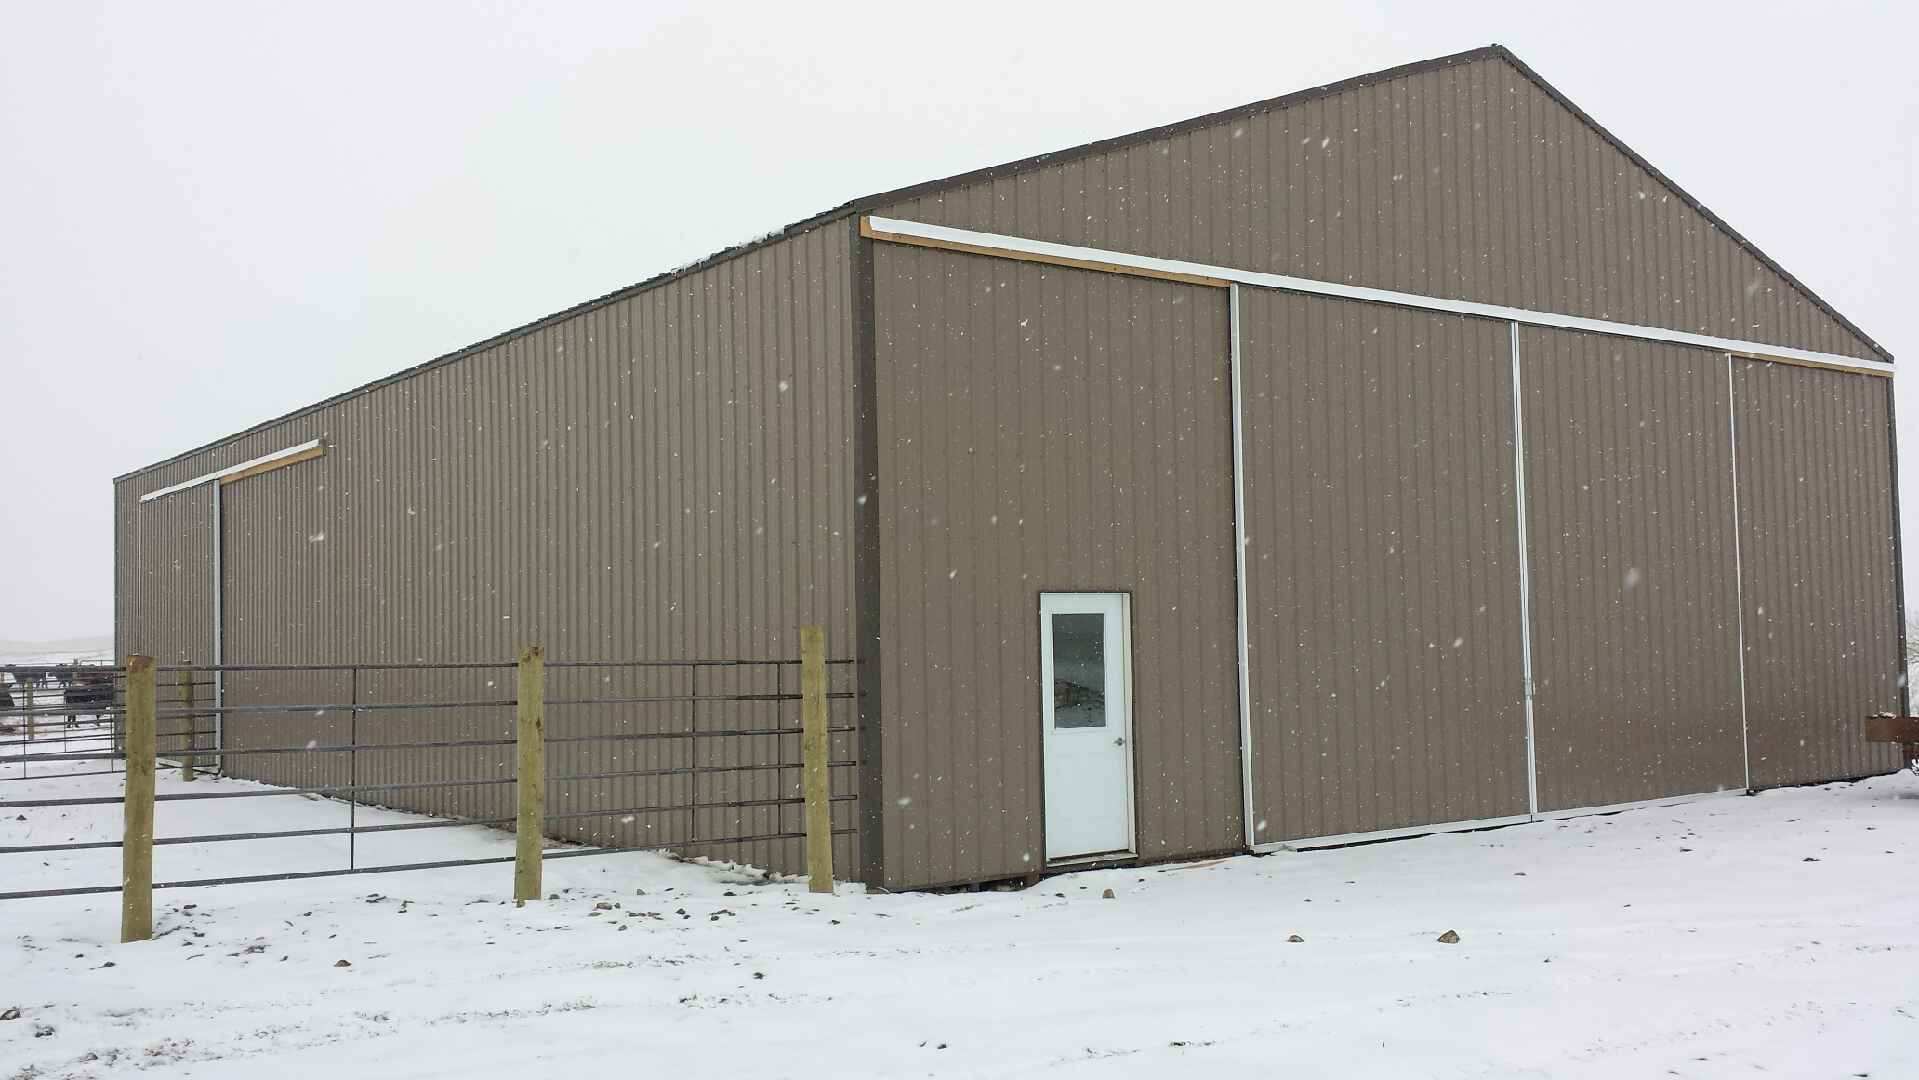
Metal Building in Snowy South Dakota

Weathertight Panel Seams

For metal panel roofs less than 3:12 (i.e., low-slope roofs), the panel seams should be watertight. A watertight seam resists water intrusion, so snow on a roof should not become a leakage issue. For metal panel roofs with slope greater than 3:12, the steeper slope means liquid water (e.g., rain) drains very quickly off the roof. Because of this, many seams used for steep-slope metal panels are not watertight. Non-watertight seams can be problematic where snow stays on a roof. Architects should consider using watertight seams (e.g., double lock) and highly water-resistant underlayments in snow areas for all roof slopes.

Roof Layout

A designer should also consider the layout of the roof. Valleys collect snow. Valleys in which one roof area is significantly larger than the other (e.g., a dormer extending from a large roof area) are vulnerable to unbalanced sliding snow. A large snow slide can move across the valley and literally tear open the standing seams and displace panels.

Drifting snow can occur behind HVAC units, at perimeter walls and behind rooftop solar thermal and PV panels. Where a roof transitions from a lower low-slope roof area to an upper steep-slope roof area, snow will collect. Consider the potential snow load and entrapped moisture at these locations; the transition detail becomes critical to long-term weatherproofing.  And, depending on the orientation (e.g., north facing), areas with drifted snow may not see much sunlight, so snow is more likely to stay on the roof for a longer time.

Building Function

As the roof designer, design the building and site to account for the roof’s function. Many designers turn to snow retention devices to keep snow on roofs, especially above pedestrian areas, such as entrances and outdoor seating areas, or adjacent buildings.   Some of these devices rely on adhesive attachment to the panel, which means they rely on the adhesion of the paint to the metal. But physical attachment—e.g., snow fences clamped to the standing seams—is always a more confident, long-term approach than adhesive attachment when it comes to resisting shear/sliding loads. Using.multiple rows of snow fences, sometimes double in height, may be needed in areas that get large and prolonged amounts of snow (e.g., ski resorts), or where the eave to valley length is long, or where the slope is very steep.  Each increases the shear loads.

Designing a Snow Retention System

Snow retention systems need to be engineered, not guesstimated! Use online models to assist with designing snow retention devices. Input your snow load, roof slope, panel width, roof length (measured horizontally), overall width of the roof area, and the manufacturer and panel type. These inputs are needed to adequately engineer a snow fence assembly.  And remember, the snow loads are transferred from the fence to the panel seams, then to the panel clips and to the deck/structure.  The entire load path needs to be designed to handle the snow load.  Here is one model: http://www.s-5.com/calculator/index.cfm

For more tips on designing a snow retention system, read “The Art of Properly Specifying Snow Retention Systems.”

Designing a metal roof for snow is a mix of logic, experience and engineering. We can design roofs in snow because of our everyday observations of roofs with snow on them. Stay observant; design well.

Find a sales representative