Design and Performance Benefits of Insulated Metal Panels

In a prior post on insulated metal panels (IMPs) we reviewed some of the basic things everyone should know about this versatile and lightweight metal building component. In this posting, we will drill down a bit more on the benefits of incorporating IMPs into a new or retrofit construction project. Here are some of the top reasons they are so popularly used in both walls and roofs:
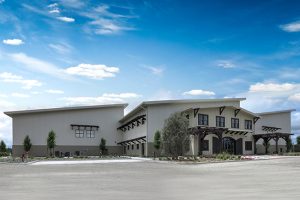
Insulated metal panels (IMPs) are a popular choice for walls and roofs for their energy conservation, durability, longevity and cost-savings.

Energy Conserving, Space Saving Insulation

Foam plastic insulation is used between the metal skins of IMPs. Such insulation has been accepted for use by building codes for quite awhile provided it meets certain conditions. IMPs have been tested and shown to meet or exceed all code requirements for construction and for energy conservation too. Part of their appeal over other ways to insulate is that they can achieve high performance in a thinner wall or roof assembly than would be required with other types of insulation, such as fiberglass. IMPs are available in thicknesses that range from 2 to 6 inches and have corresponding R-values from R-14 to R-46 allowing design professionals to select the thickness that matches the energy performance level sought in a particular building. Other insulation types would require thicknesses of at least twice as much to approach the same R-values as IMPs. Further, the metal interior and exterior skins are the only finish material needed so the total panel thickness is very space efficient. Thinner IMPs in the walls and roofs can save space in the building or on the site all while achieving high energy performance.

Durability, Longevity, and Low Maintenance

The manufactured panels are rigid and quite strong. They have been tested for compression, tensile, and shear strength with impressive numbers that come about because of the combination of the rigid foam and steel properties. The surfaces are made from the same long-lasting galvanized and factory finished steel used in other metal wall and roof panels so their resistance to weather, abuse, and even harsh conditions has been proven, making them very easy to maintain. In locations where severe weather and storms are a concern, they can also be specified to meet requirements for heavy winds, hail, and similar concerns. Plus, since the skins of the IMPs are made of noncombustible steel, they provide an ignition barrier as part of an overall fire protection scheme for the building.

Cost Saving Construction

IMPs are an “all-in-one” product that takes the place of many other products and components used in traditional construction. Instead of requiring multiple trades and materials to be installed individually over some number of weeks, IMPs are installed by a metal building contractor and allow the walls and roof to be completely closed in with a single trade. The use of concealed fasteners in the side joint of the panels makes installation quick and easy. Unlike other construction systems, the inherent strength and resiliency of IMPs means that work doesn’t need to stop over weather concerns. All of this saves a considerable amount of labor costs and can also save a lot of time meaning buildings can be completed quicker and more economically. It could also mean that an owner is able to occupy and use the building sooner, thus reducing construction financing costs and allowing operations to begin more quickly.

Versatility for Use in Many Building Types

IMPs can be used in virtually any type of new construction and for many retrofit applications too. There is a range of modular panel sizes that can work successfully with different structural elements of the rest of the building. The finished profiles and colors can all be selected to match the design needs of the building with edges, corners, and trim details all based on simple, appealing aesthetics. There are even IMPs specially designed for cold storage or refrigerated space applications. These panels may be part of the building exterior or create an isolated space within a larger building. Either way, they are designed for the rigors of a high use installation.

With such a broad range of benefits and capabilities, you owe it to yourself to check them out for a building project that you may be involved in. The best place to start is by contacting your local MBCI representative, and by signing up for our newsletter to subscribe to our blog.
Proper Fastening Helps Prevent Leaks and Callbacks

Installing metal roofing and siding requires placing and aligning metal panels over the structural supports. But ultimately it requires installers to spend a fair bit of time fastening them in place, typically using a great many fasteners. It is easy to get complacent about this repetitive activity, but the reality is that every fastener plays a crucial role in the integrity and longevity of the installation. Properly selecting, installing, and using the right tools, allows for a proper fastening process that assures a weathertight installation. But if a few fasteners are installed poorly, causing water or air leaks, then the installer is called back to correct the condition. Do a lot wrong, and warranties can be void, with the durability of the building left compromised, possibly requiring a total do-over.

What’s the difference between a good fastening installation and a problematic one? Here are some of the things to pay attention to onsite:

Fastener Types:

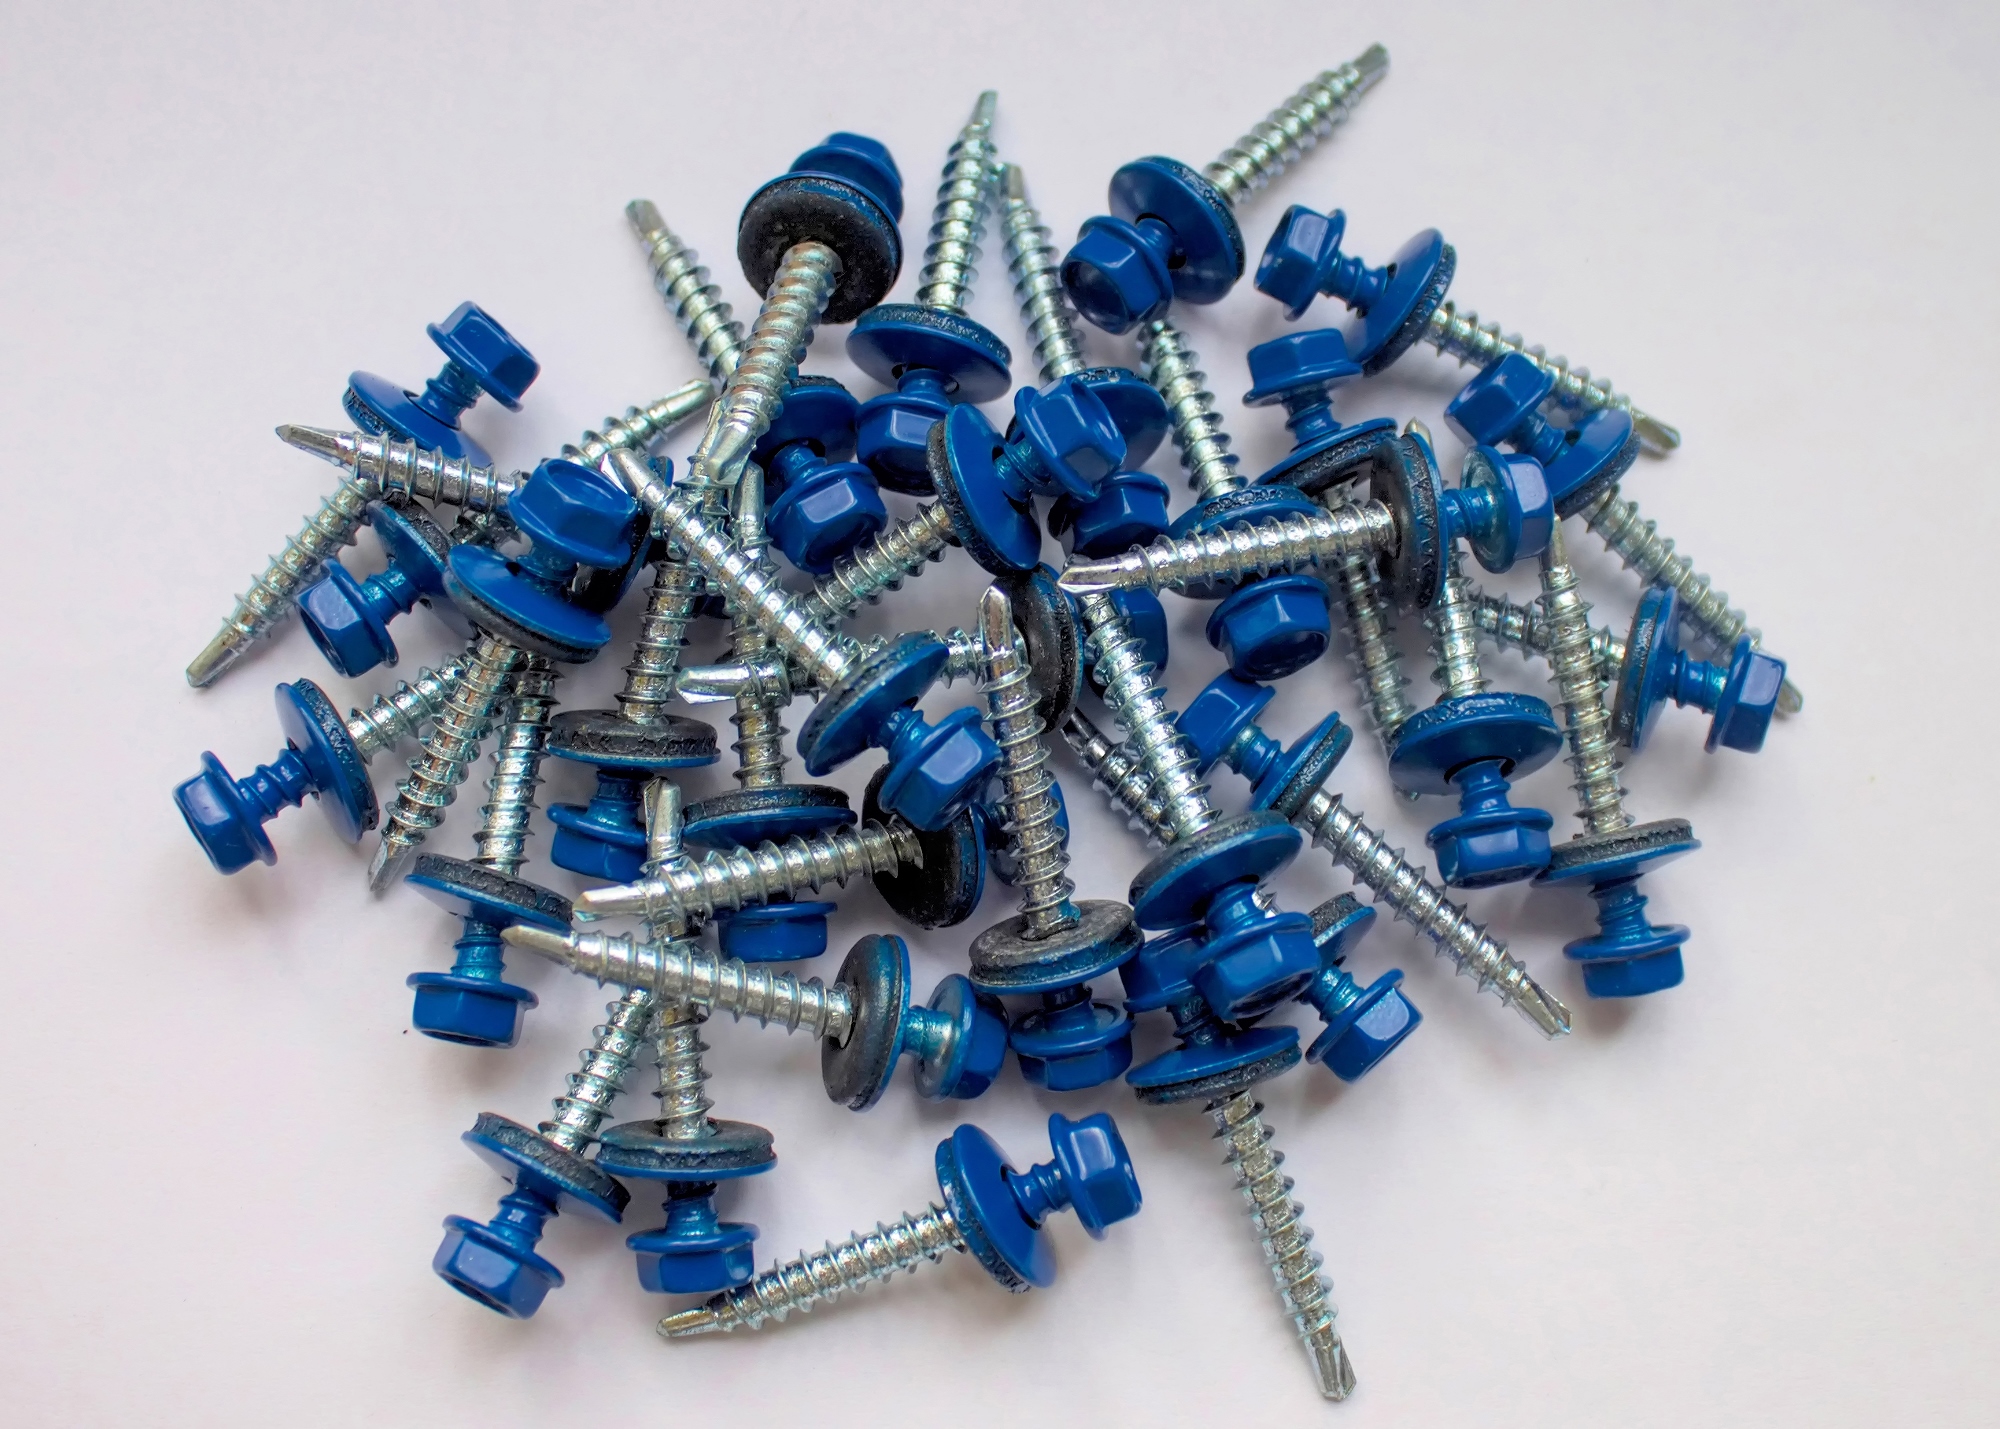
The most common type of fasteners used in metal buildings are self drillers, which vary based on diameter, length, head shape, and material. They are also specifically designed for use in metal substrates. Different fasteners are also available for wood versus metal, and either type can be sized for different substrate and panel thicknesses. Zinc alloy or stainless steel fasteners are common choices for durability, longevity, and avoiding galvanic action with other metal products. Selecting and using the right fastener type for each of the different locations on a metal building begins with determining what is being attached and what is it attaching to.

Fasteners
Fasteners can also be colored to match the roof or wall panel.

Weathertightness:

Fasteners of any type cannot be relied upon by themselves to keep out the elements. Instead, a sealing washer is used that is compressed between the fastener head and the metal panel as the fastener is tightened to form the weathertight seal. High-performance or long-life fasteners may be required for a durable approach to weathertightness and/or may be required by the metal building manufacturer to receive a weathertightness warranty.

Installation Process:

With the right fasteners onsite, the success of the installation now rests with the field crews. A few minutes to review the different fasteners and match them with the right tools and settings for installation is time very well spent. Since electric screw guns with or without impact drivers are common on the jobsite, it’s easy to think any tool will do, when it probably won’t. The wrong tool at the wrong setting can place too much torque or other force on the fastener, causing it to crush or damage washers or even the metal panels. Impact drivers are rarely needed in most cases and, while the fastening needs to be tight, overtightening is never a good thing.

Fastener Locations:

In addition to weathertightness, fasteners provide a structural function as well. Their location and spacing will directly correlate to the ability of a panel to resist wind and other forces after installation. Therefore, it’s always best to use information prepared by a professional engineer on the proper fastening locations, spacing, and sizes. The calculations behind such information can prove to be the difference between a successful installation and one that creates problems.

Understanding the importance of fasteners and the role they play in the integrity of the building, and corresponding warranties, allows installers to see beyond the repetitive task of fastening and into the craft of assembling a durable, long-lasting building. To find out more about fasteners for metal products and systems for your next project, contact your local MBCI representative.

Tips for Installing Metal Roof Curbs

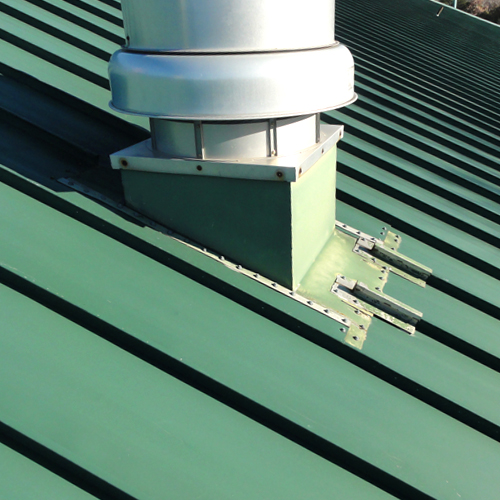
Metal roofs made from galvalume-coated steel provide great corrosion resistance and can readily satisfy a 20-year weather-tightness warranty. However, when a large penetration in the roof is needed, such as a large exhaust fan or other equipment, the integrity of the roof can be compromised if not addressed properly. The common method of dealing with large penetrations (i.e., spanning over one or more standing seams) is to install roof curbs that form the transition between the roof and the equipment being installed.

Of course, like most aspects of building construction, there are choices available in materials, methods, techniques, and styles of installing a roof curb. When the key objective is to provide a curb that will perform for the entire life of the standing seam roof, there are four key points to keep in mind.

Roof Curbs
Roof Curbs for Standing Seam Metal Roofs

Pick the Proper Material:

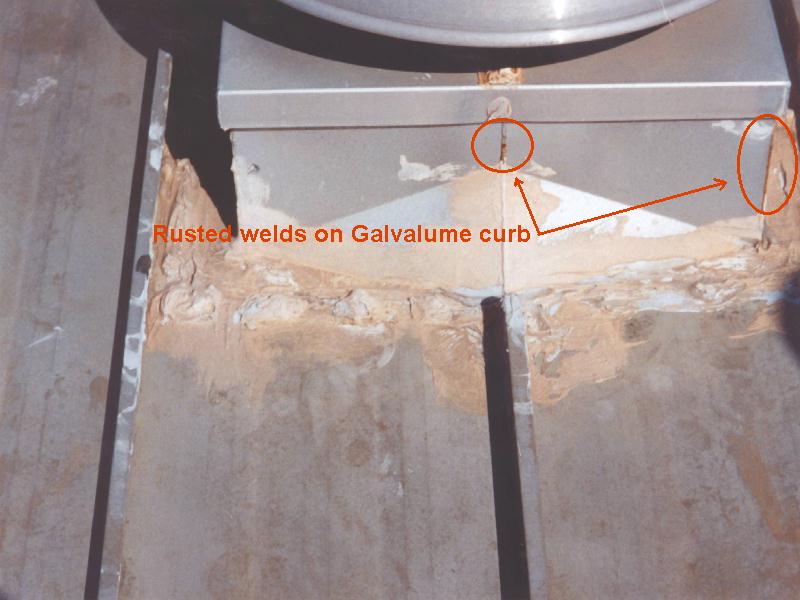
A galvalume-coated roof doesn’t mean that a galvanized steel roof curb is the best thing to use – in fact, galvanized roof curbs are known to rust, corrode, and leak, particularly along weld joints, as soon as a year after installation. Instead, a curb made from aluminum (preferred) or stainless steel should be used to prevent premature corrosion. To put any concerns about dissimilar materials and galvanic corrosion to rest, keep in mind that galvalume is approximately 80 percent aluminum by volume, so they are highly compatible.

Rusted Roof Curbs
Rusted Welds on a Galvalume Roof Curb

Use the Proper Roof Curb Type:

It is not uncommon for a roofer to choose a curb type referred to an an “over/over” curb, meaning that, after the opening is cut, the curb is installed over the roofing on both the upslope and the downslope sides. This might be the easiest to install during construction, but it will very likely create more work and callbacks when the upslope side starts to get water into or under the joint, and leaks. Instead, it is well worth taking a few extra minutes to install an “under/over” curb, which places the upslope side under the roofing in a true shingled lap between the curb and the roof. This way, the upslope edge is much more protected and less likely to leak using the same shingled condition occurring on the downslope side – all creating a properly water-shedding, weathertight condition.

Provide the Proper Water Flow Clearance:

We all know that water seeks the path of least resistance, so the key to keep water flowing down a roof is to avoid creating pockets of resistance. This is particularly true on the upslope end of a curb as well as on the two sides parallel to the slope of the roof. A curb with a minimum clearance of 12 inches between it and any other object on the upslope end will give water enough room to flow around the curb easily. Similarly, once the water reaches the two sides, at least 6 inches of free clearance is needed (i.e., without being encumbered by standing seams or other features) to allow the water to keep going and not back up to create a water head at the upslope end of the curb. Simply put, clearance means free-flowing drainage; lack of clearance can mean water buildup and leaks.

Install Roof Curbs Rib to Rib:

Installing curbs that rest in the flat, lower, panel area of metal roofing invites water tightness problems since the curb now has to be installed and sealed in the most vulnerable area – the surface where rainwater flows. Instead, coordinating the curb size with the rib spacing to provide a rib-to-rib curb eliminates fasteners down both sides of the curb in the pan of the roof panels. Placing the curb on and attaching it to the ribs also allows better transitioning from under the roofing on the upslope end to cover the roof on the downslope end. This type of curb has the added benefit of being able to be installed either during the roof installation of after the roof is finished.

Taking these four points into account in your next metal roofing project where roof curbs are required will help assure a well-installed, weathertight condition that should last just as long as the metal roofing system itself.

Roof Penetrations Made by Non-roofing Contractors

In our last two posts, we have looked at the proper ways for roofing contractors to address different types of penetrations in metal roofing in order to assure that a watertight seal is achieved from the outset, as well as over the life of the roof. But what happens when another contractor, such as a plumber, electrician, or other trade needs to penetrate the roof? How is the watertightness of the roof assured then?

Warranty Control for a Metal Roof

Most metal roofing warranties are very specific about what is included or not included should a roof leak occur. Therefore, the manufacturer’s warranty should be the first thing that is checked for a particular project to determine whether a seemingly innocent bit of work on the roof has the potential for a loss of warranty coverage. Commonly, qualified roofing contractors need to do the work and it needs to be inspected, but in some cases, supervised work may be acceptable too. Either way, any penetration installed by a trade contractor other than a roofing contractor should be fully coordinated with the architect or owner’s representative, the roofing manufacturer’s representative, the general contractor, and the roofing contractor. Once reviewed, there may be several options on how to proceed.

Guided Installation

For a single or simple penetration, say for a single small mechanical or electrical line, it may be possible to simply work with the trade contractor on the location of the penetration, review in advance that the proper materials are being used, and check the quality of the work for water tightness when complete. (Note: following the guidelines in our prior post on Pipe and Flute Penetrations will provide a good checklist of things to cover.) If everything is appropriately done, then it may be possible to have the roofing manufacturer add the new penetration to the list of items covered under the warranty.

Lightning Rod
Lightning Rod Application for Metal Panels

Coordinated Installation

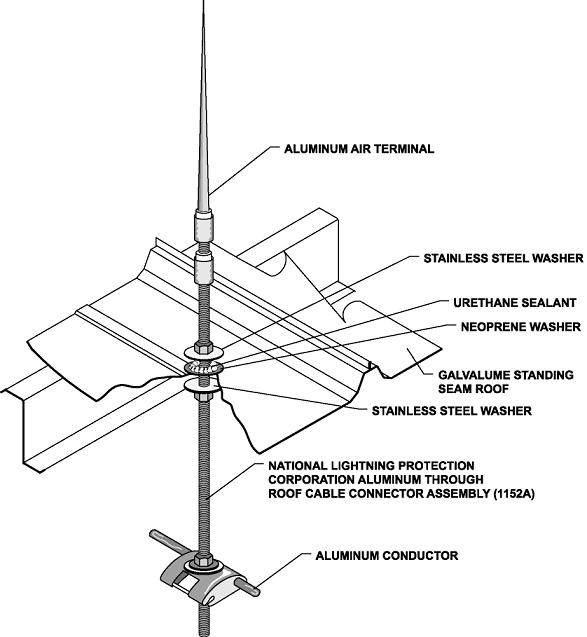
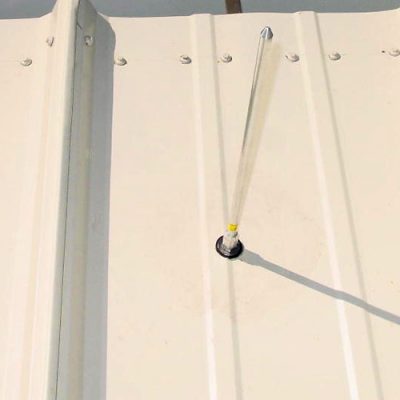
In some cases, numerous penetrations may be required, such as the installation of multiple lightning rods across a roof. In this case, it might be more prudent to consider a coordinated, cooperative effort to allow each trade to do what it does best and keep the warranty in effect. Instead of an electrician being responsible for the roof penetrations and for lightning rods, let him focus on the lightning protection and wiring aspects of the work. But first, bring in a roofing contractor to advise on the proper locations of the lightning rods and to be the one responsible for the watertight seal. Location advice would include things like avoiding valleys, standing seams, or other areas that are difficult to seal or flash around. The electrician could then make the needed lightning rod penetrations in the agreed-upon locations and complete his work. Following right behind, the roofing contractor could install retrofit rubber roof jacks around the lightning rods and assure that they are sealed properly. Alternatively, the roofing contractor could make the penetration and allow the electrician to install the lightning rod, while the roofing contractor installs an appropriate rubber roof jack over or around it. Either way, the two trades need to  review the process ahead of time and be sure that everyone is on board to produce the best results for everyone involved.

Bottom Line: Think Through Penetrations

roof penetrations
Standing Seam Roof Penetration

Standing seam metal roofs have become more complex in recent years, with more and varied types of roof penetrations. This simply magnifies the need for better communication between the design professional, roof manufacturer, general contractor, roofing contractor, and any of the various trades that might be working on the roof.

When everyone takes the time to plan up front and think through their own needs and the options to get there, everyone wins. The architect/owner representative can ensure that his or her clients get a roof that will perform long-term. The roof manufacturer is able to provide expertise that has been gained over a long period of time through working with similar details on roofs all over the country. The roofing contractor can leave the project knowing that the details are long-term and will mean little chance for leak callbacks. Plus, the general contractor and the building owner can quickly resolve any arguments over which trade is responsible for repairing a roof leak.

Snow and Metal Panel Roofs: Part 2


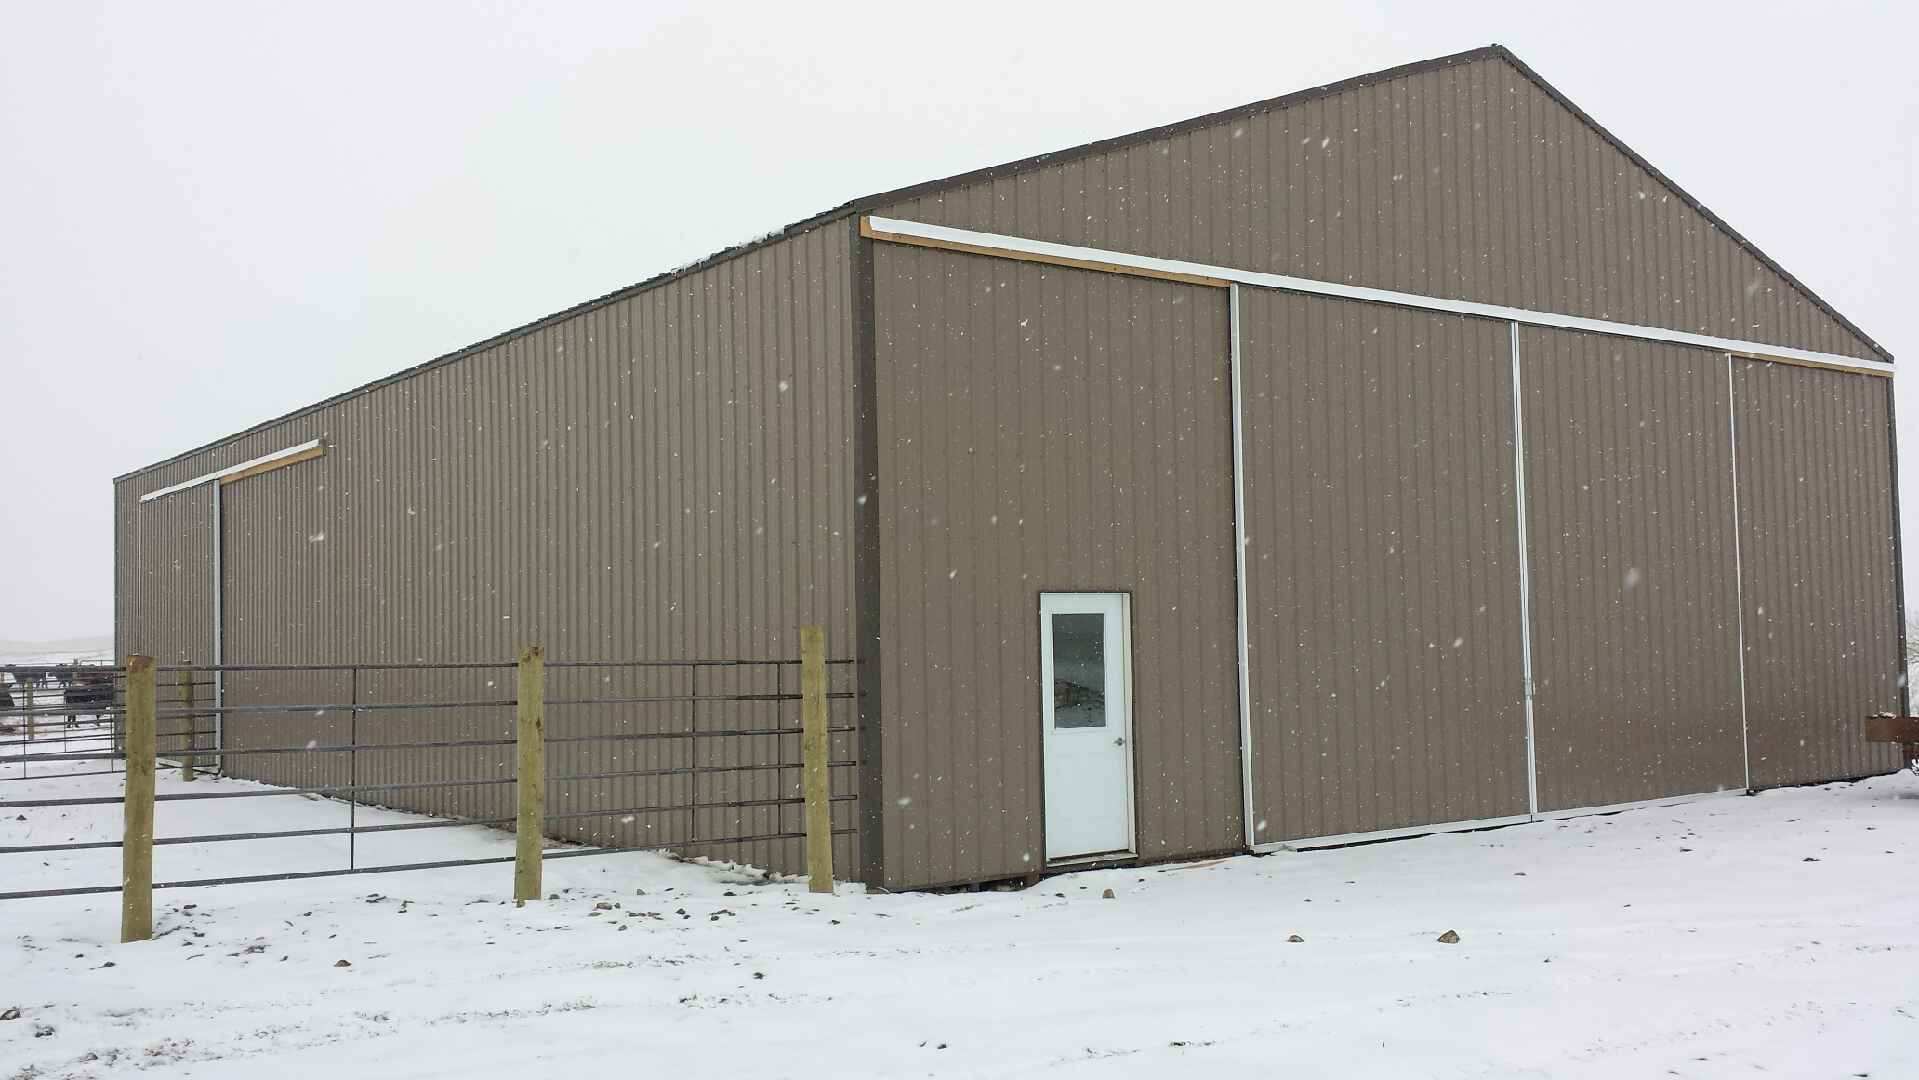
In part I of this blog, we discussed what to consider when deciding the roof material and roof slope to build with in snowy conditions. If you have decided to design a roof with metal panels, it is important to use the correct panel seams, evaluate the roof layout and consider long-term weatherproofing, and ensure your roof design fits the needs and function of the building.

Metal Building in Snowy South Dakota

Weathertight Panel Seams

For metal panel roofs less than 3:12 (i.e., low-slope roofs), the panel seams should be watertight. A watertight seam resists water intrusion, so snow on a roof should not become a leakage issue. For metal panel roofs with slope greater than 3:12, the steeper slope means liquid water (e.g., rain) drains very quickly off the roof. Because of this, many seams used for steep-slope metal panels are not watertight. Non-watertight seams can be problematic where snow stays on a roof. Architects should consider using watertight seams (e.g., double lock) and highly water-resistant underlayments in snow areas for all roof slopes.

Roof Layout

A designer should also consider the layout of the roof. Valleys collect snow. Valleys in which one roof area is significantly larger than the other (e.g., a dormer extending from a large roof area) are vulnerable to unbalanced sliding snow. A large snow slide can move across the valley and literally tear open the standing seams and displace panels.

Drifting snow can occur behind HVAC units, at perimeter walls and behind rooftop solar thermal and PV panels. Where a roof transitions from a lower low-slope roof area to an upper steep-slope roof area, snow will collect. Consider the potential snow load and entrapped moisture at these locations; the transition detail becomes critical to long-term weatherproofing.  And, depending on the orientation (e.g., north facing), areas with drifted snow may not see much sunlight, so snow is more likely to stay on the roof for a longer time.

Building Function

As the roof designer, design the building and site to account for the roof’s function. Many designers turn to snow retention devices to keep snow on roofs, especially above pedestrian areas, such as entrances and outdoor seating areas, or adjacent buildings.   Some of these devices rely on adhesive attachment to the panel, which means they rely on the adhesion of the paint to the metal. But physical attachment—e.g., snow fences clamped to the standing seams—is always a more confident, long-term approach than adhesive attachment when it comes to resisting shear/sliding loads. Using.multiple rows of snow fences, sometimes double in height, may be needed in areas that get large and prolonged amounts of snow (e.g., ski resorts), or where the eave to valley length is long, or where the slope is very steep.  Each increases the shear loads.

Designing a Snow Retention System

Snow retention systems need to be engineered, not guesstimated! Use online models to assist with designing snow retention devices. Input your snow load, roof slope, panel width, roof length (measured horizontally), overall width of the roof area, and the manufacturer and panel type. These inputs are needed to adequately engineer a snow fence assembly.  And remember, the snow loads are transferred from the fence to the panel seams, then to the panel clips and to the deck/structure.  The entire load path needs to be designed to handle the snow load.  Here is one model: http://www.s-5.com/calculator/index.cfm

For more tips on designing a snow retention system, read “The Art of Properly Specifying Snow Retention Systems.”

Designing a metal roof for snow is a mix of logic, experience and engineering. We can design roofs in snow because of our everyday observations of roofs with snow on them. Stay observant; design well.

Find a sales representative