Roof Membrane Wind Uplift Testing

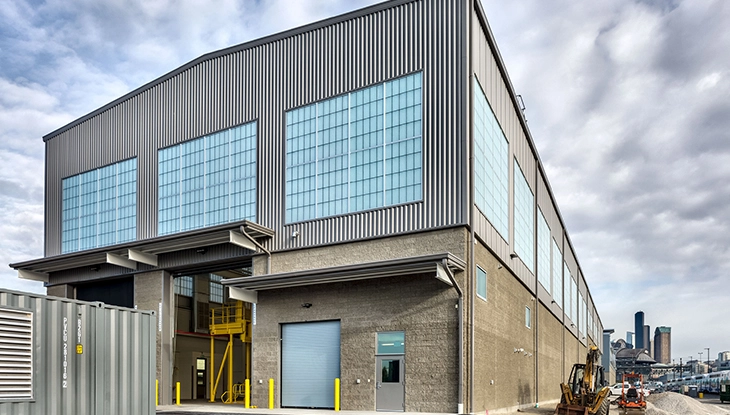
A meticulously designed and installed standing seam metal roof system provides the building owner with long-term dependability against harsh weather conditions. To do so, manufacturers must conduct a series of extreme weather or wind uplift test requirements for durability and protection against various weather situations involving high winds.  

Roof Uplifting Standards

  • Underwriters Laboratories (UL) 580
  • Underwriters Laboratories (UL) 1897
  • Factory Mutual (FM) Global Standard 4471
  • American Society for Testing and Materials (ASTM) E 1592

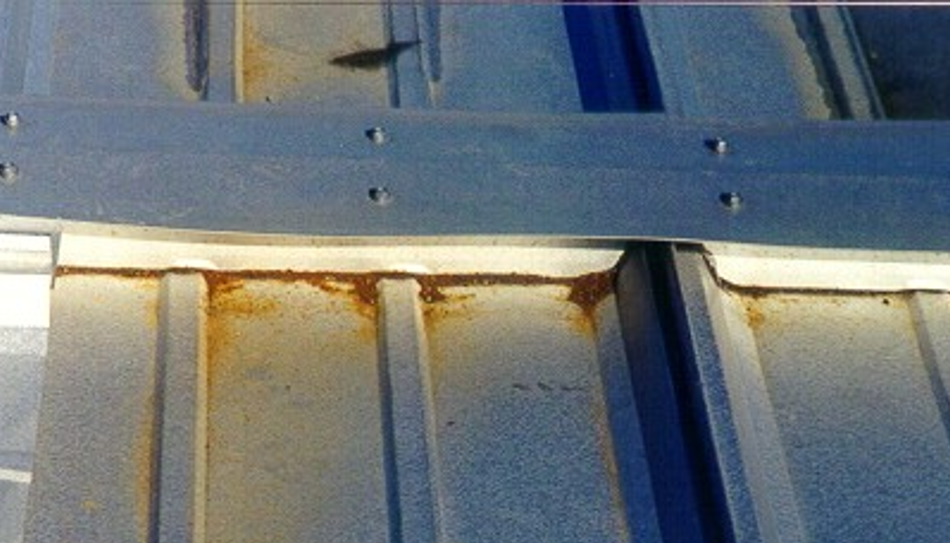
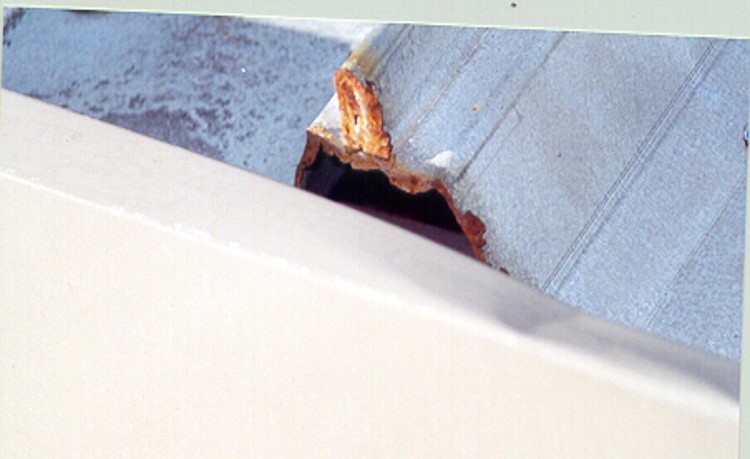
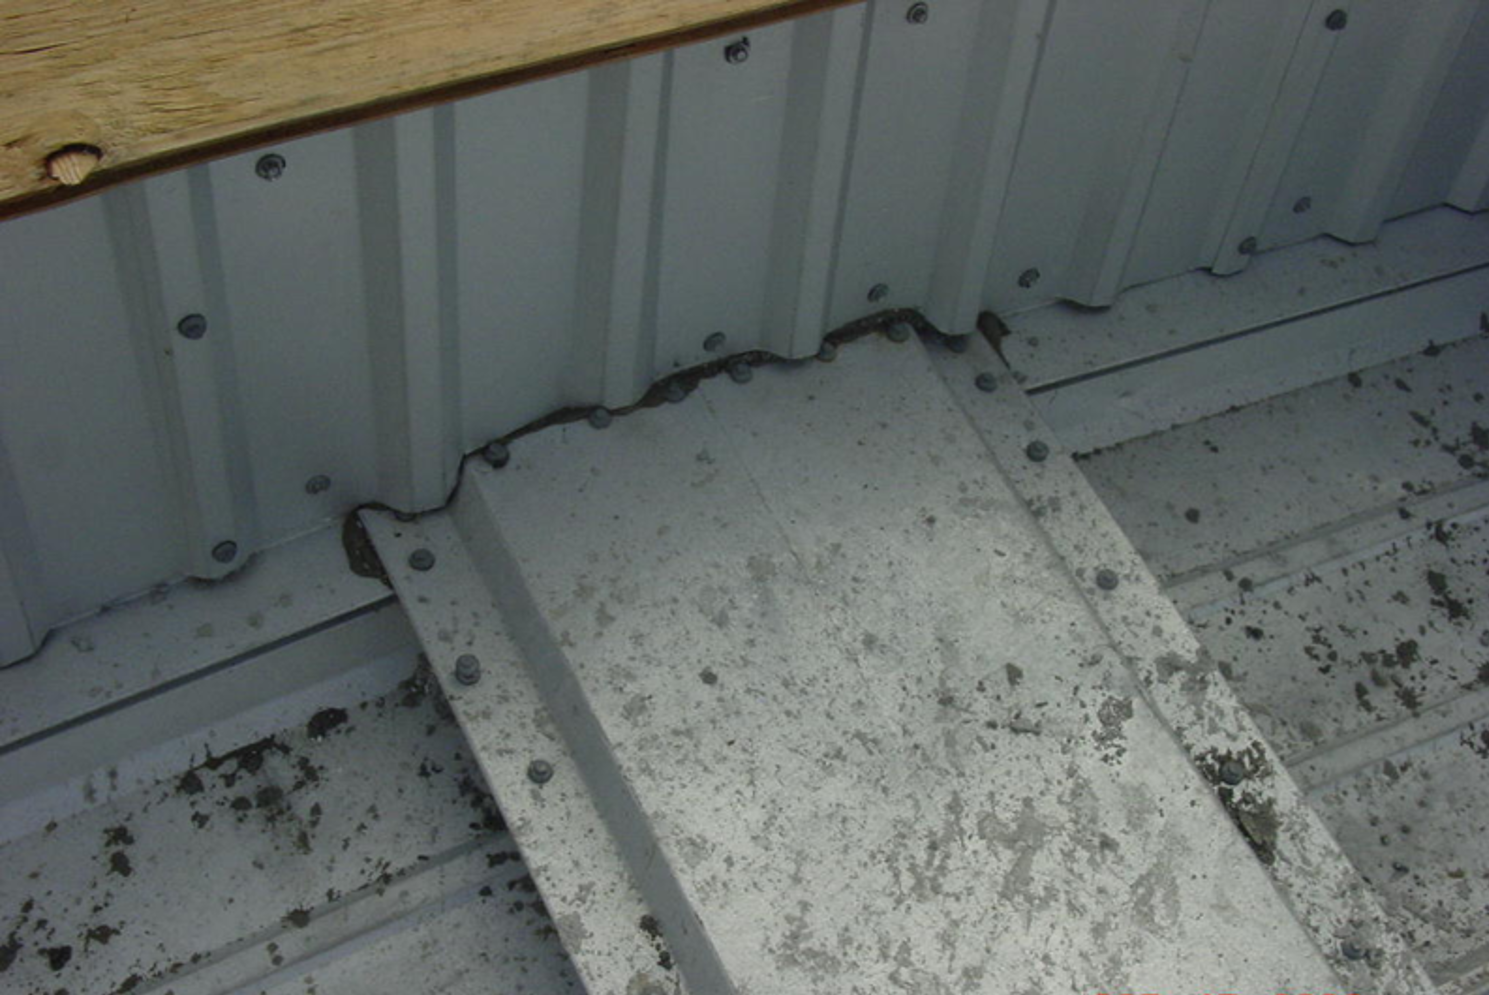
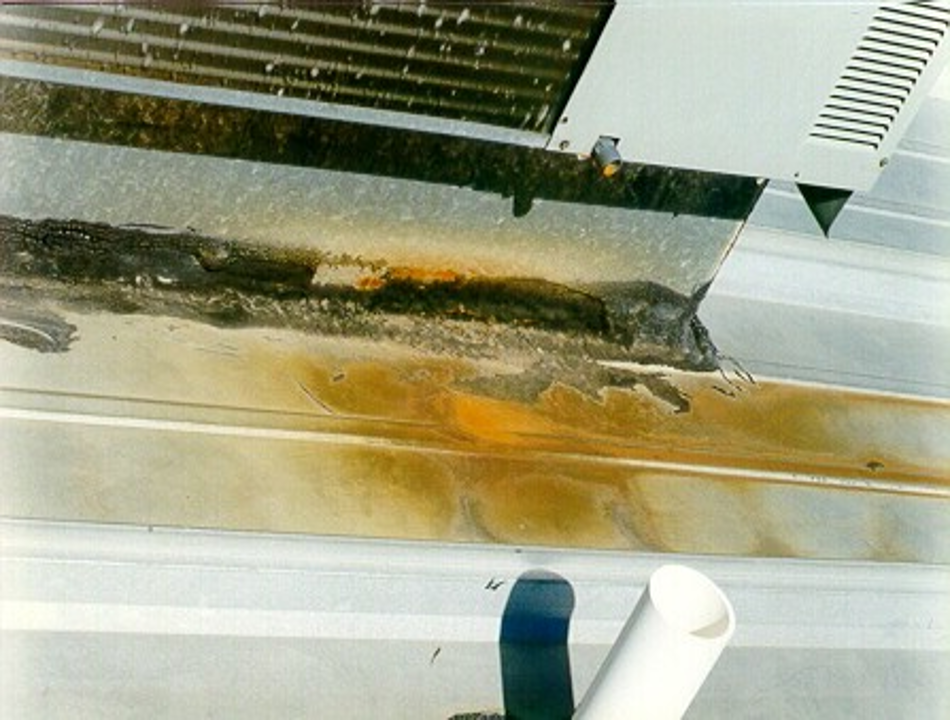
In the most severe weather conditions, metal roofs that have not been rigorously tested will succumb to wind pressure that can force panels to deflect. Causing seams to open and the panels to shift into failure mode at the corners and edge zones. Manufacturers will conduct roof uplift testing to ensure the typical corner and edge zone failure is passed.  

The most reliable standing seam roof uplift test is the ASTM E 1592. It is the standard wind uplift test method for the structural performance of sheet metal roof and siding systems by uniform static air pressure differences. Below is a list of critical roof uplift standards we meet to provide our clients with the optimal metal roof design. 

engineers conducting UL 580 Wind Test
Uplift resistance testing with UL 580 test platform.

Underwriters Laboratories (UL) 580 Roof Uplift Test Method

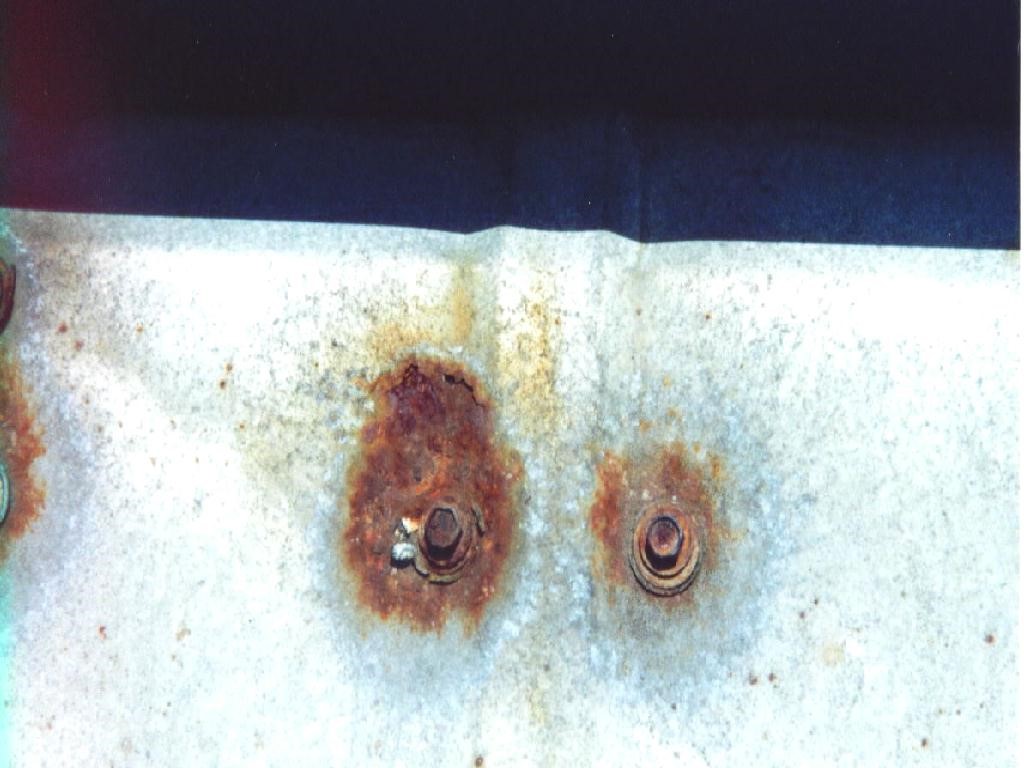
The UL 580 rating determines the uplift resistance of roof assemblies. The wind uplift test evaluates the roof panel, panel clips, fasteners, and substrate. 

  • To test, a 10-foot by 10-foot sample of roofing material is installed onto a test platform. The edges are then sealed with closely spaced fasteners and two purlins in the interior. 
  • Next, the sample is subjected to a static uplift pressure for a 5-minute period and an oscillating pressure in 10-second intervals over a 60-minute period. 

Underwriters Laboratories (UL) 580 Roof Uplift Test Considerations 

  • UL 580 is a pass/fail test and does not specifically determine the wind resistance of the panel assembly. 
  • It only tests over a specific substrate at a certain clip/fastener spacing. 
  • The test standard will not indicate how strong the panel assembly is under load. 
  • Most importantly, the test does not simulate real conditions. 

Underwriters Laboratories (UL) 1897 Roof Uplift Standards Test Method

The UL 1897 wind uplift test is a continuation of UL 580 and is the standard for uplift tests for the roof covering systems. The purpose of this roof uplift standards test is to gain uplift resistance data for the panel assembly and evaluate the attachment of the roof covering systems to the roof decks.

  • Utilizing a test chamber, this test is conducted by either pulling a vacuum above the assembly or by pressurizing an air bag placed loosely between the deck and the roof covering. 
  • The test is run to failure, and the results are reported as the highest uplift pressure achieved prior to failure (in psf). 
Underwriters Laboratories (UL) 1897 Considerations 
  • UL 1897 does not consider the strength of the roof deck. 
  • The method does not necessarily simulate the actual dynamic uplift pressures encountered by roofing systems. 
Factory Manual (FM) Global Standard 4471 Test Method

FM 4471, Approval Standard for Class 1 Panel Roofs, states the requirements for meeting the criteria for fire, wind, foot traffic, and hail damage resistance. 

This roof uplift standards test sets performance requirements for panel roofs, which includes all components necessary for installation of the panel roof assembly. This includes the potential for fire spread on the underside and exterior of the roof panel. It also measures the ability to resist simulated wind uplift resistance while maintaining adequate strength and durability. 

  • FM 4471 utilizes a 12-foot by 24-foot section, including the connecting fasteners and clips used in the field. The panels are subjected to increased wind pressures until the assembly fails.
  • The ratings are stated as 1-60, 1-90, 1-120, and so on, referring to wind pressure in pounds per square foot (psf).
  • This rating is used to apply a classification to roof panels. Class 1 roof panels are rated at 1-90. A safety factor of 2 means the maximum allowable design load is 45 psf.
  • FM Global is a non-profit scientific research and testing organization that deals with commercial and industrial property insurance.
  • For roofing projects where FM insurance is required, project designers should work closely with the roofing manufacturer to ensure the roofing system complies with FM requirements.
American Society for Testing and Materials (ASTM) E 1592 Test Method

This roof uplift test method provides a standard for structural performance under uniform static air pressure differences and is run to failure to find the ultimate uplift load capacity. This roof uplift standards test measures both panels and anchors. ASTM E 1592 is not a pass/fail test; it merely shows how a roof performs under uniform static load. 

Test Method
  • A 5-panel-wide sample (10 feet) by 25-foot length is subjected to pressure from underneath to imitate wind load. The sample has intermediate purlin support at varied intervals and covers several spans.
  • The pressure is applied to identify slowly developing failures such as seam separations, and to determine the ultimate failure load of the standing seam roof system.
ASTM 1592 Wind Uplift Testing
MBCI research and development team performs ASTM 1592 wind uplift tests. The wind pressure forces the panels to deflect, pushing the center of the panel above the seams.

Roof Uplift Standard Testing for Reliable Design  

ASTM E 1592 was developed to account for the many complexities of evaluating uplift properties of metal roofing. The test method “provides a standard procedure to evaluate or confirm structural performance under uniform static air pressure difference. This procedure is intended to represent the effects of uniform loads on exterior building surface elements.” (https://www.astm.org/Standards/E1592.htm)

In conclusion, while all the standardized test protocols mentioned above were established to determine the uplift capacities of roof assemblies, only the ASTM E 1592 test is reliable enough for the design of standing seam roof panels. Among its key differentiators, the test considers the roof’s flexibility and changes in shape occurring under air pressure, and it measures both metal panels and their anchors. 

Market Update: June 2022

Market Update: April 2022

Looking Ahead: 2022 Trends at a Glance

Market Update: January 2022

Against the Wind: MBCI’s Wind Rating Dominance

After a major, damaging storm, such as hurricanes and tornadoes, many things happen at once. Rescue efforts begin. Shelters open to house the displaced. Cleanup gets underway. But one thing that happens in the aftermath of such an event is a little harder to see – unless you’re looking for it.

MBCI_LokSeam_Brownstone_St. Clare of Assisi Church_CSM_Ext_011_0215 (1)

The Building Material Post-Mortem

The Roofing Industry Committee on Weather Issues, Inc. (RICOWI) gathers experts and an army of volunteers to spend time on the ground at the disaster site, documenting damage. They take careful notes and photographs, looking closely at how different building methods, materials and ages withstood the storm. What they observe helps inform product development and ensure both installation standards and roofing products can stand up better to the next storm.

Unabbreviated

As the Metal Construction Association’s technical director Robert Zabcik said in a recent white paper, “Engineering professionals go through great efforts to make sure the public is protected.” All this research is integrated into regular updates to the tests, ratings and codes applied to building products across the country. These can become an alphanumerical soup, but here are the most prominent, along with differences between them:

Model Codes (Codes) provide a minimum baseline of performance needed to protect property and the public. These are the barebones building basics.

Underwriter’s Laboratories (UL) is a consortium of test labs and research companies which maintain test standards, as well as product listings which meet certain performance criteria. These are usually superior to those required by code.

Factory Mutual Insurance Company (FM Global) is comparable to UL but funded by a consortium of insurance underwriters.

Since the Miami-Dade area has suffered some of the worst hurricane damage, they have some of the most stringent codes and test protocols, so those are among many that MBCI uses to test our products. Jason Allen, MBCI research and development engineer, explained what some of these are and how they’re used. The UL 580 rating is based on tests for uplift resistance of roof assemblies. While materials can receive a class 30, 60 or 90 rating, MBCI uses class 90 as a standard. We also maintain class four impact ratings under UL 2218 for hail and projectiles, as well as the UL 790 Class A fire rating.

Any Way the Wind Blows

But these ratings and classifications get very complicated. You won’t find MBCI materials themselves listed as withstanding certain windspeeds or projectile damage. Allen explained, “It’s dependent on several things: building codes, roof pressures, eave and building height, facing attachments, roof slope and wind speed – just to name a few.” There are differences based on locality, storm threats and codes. It takes a qualified engineer to calculate all of it for an entire project. But that’s the only way to be sure of safety. “It’s going to cover all scenarios,” said Allen.

During a hurricane or tornado, wind is just part of the problem. “Performance during these events must consider both water tightness and wind applied at the same time,” said Zabcik. “Wind-driven rain can force water into places it would not normally go … This is yet another reason why details are so important and why manufacturers work so hard to ensure the systems they produce meet stringent standards for performance.”

In conditions like these, traditional building methods have a difficult time comparing to metal. They suffer from softer connections, more porous materials, and less stringent assembly designs. “Shingles last 15 to 20 years,” said Allen. “A metal roof can last 40 to 60 years.” Across the nation, wherever post-storm studies and material testing have occurred, metal stands out. In Florida Building Commission, FEMA and NIST studies, metal buildings performed exceptionally well.

Second Wind

Whether standing seam, insulated metal panels, exposed fastener or concealed fastener roof solutions are chosen, metal roofing’s strength and durability keeps out rainwater and withstands windspeeds that devastate other types of construction. Standing-seam roof systems and IMP façades remained intact during Hurricane Katrina even as winds hit 120 mph. “Industry experts have found that metal panel roofs can withstand wind gusts as strong as 140 mph or more due, in part, to their large interlocking panels,” said Zabcik. “Metal panel systems provide not only the weather resistive barrier,” he said, “but can also provide diaphragm stability to both the underlying framing and sometimes, the building as a whole, because they can transmit shear from one panel to the next.”

Riders on the Storm

What about hail raining down from the sky, windborne projectiles, lightning, and everything else that severe storms hurl at buildings? Though they may suffer some cosmetic damage, metal construction such as standing seam roofs and IMPs are often able to absorb impact, remain functional and keep their protective metal layers intact. That can make all the difference in a hurricane when the wind can blow away other roofs and dump untold gallons of stormwater and debris inside. Somewhat counterintuitively, metal buildings also perform very well during lightning strikes.

Batten Down the Hatches. Then Batten Them Again

Before you assume that selecting an engineer’s recommended, rated, and tested metal roof will be a sure-fire protection against all nature’s hazards, there’s one more thing to understand. All the ratings and tests mentioned here are performed with a specific assembly procedure. It is absolutely critical that the same procedure is followed – to a T – to ensure your building will enjoy the same protection its ratings guarantee. Allen recommends that you “look at the company you want and make sure they have statewide approvals,” and make sure your installer reads the manual, then re-reads it, then re-reads it a final time. It’s no exaggeration to say that lives are at stake.

Zabcik sums it up nicely: “With proper preparation, a solid knowledge of metal roofing options, an understanding of the latest standards and codes – not to mention a willingness to strictly adhere to tested quality control methods – today’s metal roofing is a strong choice for even the most vulnerable structure.”

To learn more about MBCI roofing solutions, to retrofit a current building or to get an engineer started on designing out your project in a storm-prone area, get in touch with an MBCI representative today.

Hip Roof vs. Gable Roof: What to Consider & How to Choose

Metal roofing is a great option for both residential and commercial structures, but beyond just choosing panel type, roof shape options also come into play. Among the most common roof styles in the U.S are a gable and a hip style.

Here we’ll take a quick look at these two distinct styles, explaining key features and differences, and identifying reasons you might want to consider one over the other for a given metal roofing project, depending on your performance or structural needs as well as aesthetic preferences.

Hip Roof

A hip roof can easily be identified by the fact in most cases it has slopes of equal length on all four sides, which come together at the top to form the ridge. In many cases, two sides form a triangle shape and the other two sides form a trapezoid shape (e.g., a pyramid shape). A hip roof does not have any vertical ends.

Hip 3

Among the key advantages of hip roofs are they:
• provide greater stability and are more durable than gable roofs due to the inward slope of all four sides.
• do well in areas prone to high wind and rain.
• are typically seen with lower roof slopes.
• allow for more appealing roof lines to be achieved.
Note: For high wind or strong storm-prone areas, proper engineering design, construction and roof system maintenance are especially critical in order to prevent major problems.

Gable Roof

Marked by two sloping sides that come together at a ridge, which creates end walls with a triangular extension, a gable roof, also known as a pitched or peaked roof, is easy to spot with its iconic pointed shape.

Gable 1

Among the key advantages of gable roofs are they:
• easily shed water and snow; there is nowhere for water to pool.
• provide more space for an attic or vaulted ceilings.
• allow for more air ventilation.
• are easier and more affordable to build than more complex designs as they need less building materials.
Note: It is recommended to use a steeper slope, for snowy regions.

Breaking Down the Key Considerations

Aesthetics: What architectural look are you trying to achieve? For instance, with more industrial architecture, trapezoidal panels are more common and therefore, a gable roof is a likely choice. In residential situations, where there are more hips and valleys, a hip roof may be a good option.

Building shape may play a role in why you would select a type of roof. If you have a change in building direction, such as an angle, (like an L-shaped building), that’s going to automatically create a valley and a hip on the other side. In this case, you may want to keep that appearance uniform, so you’d put a hip on each end of the building as well.

Also, are you trying to cover up equipment on top of a roof? If so, height differences might play into your decision.

Wind Pressures: On a hip roof, you may have lower wind pressures versus the gable, especially at the corners.

Labor and Materials Cost: The more cost-effective choice would be gable; it is the least costly to install because you’re going to have less material to fabricate a gable roof frame and less waste than with a hip roof. A hip roof is going to utilize more material and more labor because you are going to have more cuts involved.

Panel Profiles: The profile of the panel you’re going with can affect the roof shape choice. For example, for a trapezoidal panel, a gable roof would be a lot simpler to install. Less cutting of the panels is involved and will be easier to seal off the ends of the panels. With a vertical rib or flat pan style panel, it is easier to install on a hip roof application.

Slopes: In general, gable roofs are more likely to be found on lower sloped roofs (less than 3:12) where there are fewer valleys, etc. and therefore, less complicated. Hip roofs, on the other hand, will usually have additional conditions going into them. Valley conditions require a minimum of 3:12 slopes.

In Summary…

When looking at hip roof versus gable, there are obviously a host of factors that will go into that decision. To summarize the differences:

Hip roofs have four faces, are pyramid shaped, and are more complicated to build. They are shown to have higher wind force values. Upfront costs of hip roofs are greater.

Gable roofs have two faces, are triangular in shape, and are easier to build. Upfront costs are lower.

In many cases, it should be noted, most roofs feature numerous details and can include both hip and gable roofing.

To learn more about hip and gable roofs for your next metal building panel project, contact your MBCI local sales representative.

Protecting Metal Panels from Rust

One of the many benefits of metal panels that contributes to their strengths is the fact that there are so many rust-resistant coating options with different levels of protection, making them a great option for virtually any environment or any budget. That said, though, missteps during storage, as well as during and after installation, can leave you with unwanted corrosion, i.e. rust. Factors such as improper storage, improper cutting, or other elements the metal might come in contact with can wreak havoc that are beyond the manufacturer’s control.

Regardless of the finish you have—painted, unpainted, high-end coatings or standard coatings—here are some simple installation and care instructions that can help further maintain the longevity of your metal panel product.

Preventing Rust When Materials Are Delivered

Proper material delivery/site storage is the first step to preventing rust. Be certain to check your panels while uncrating after storage on site for any early signs of corrosion, such as black discoloration or white rust/residue on them. This is a sure sign that that panel has been improperly stored and water has not been able to properly evacuate the panel bundles. Do not install any panel on which this has occurred, as the panel finish has most likely been compromised due to improper storage. If you go ahead and install it, that panel is going to continue to corrode and eventually lead to further rust/corrosion.

Make sure that you’re not trapping any sort of moisture in between the metal panels or restricting them from being able to drain when stored on site. Although the panel itself is corrosion-resistant, if you subject it to repeated and significant water being trapped in between the sheets by either not storing the material out of the mud and ground water, or if you’re not sloping the material bundles in such a manner that they can drain, then the result can yield “wet storage stains.” Therefore, if you want to prevent any sort of damage due to improper site storage, you must make sure that the panel is able to drain while stored and, if possible, tarp to resist heavy moisture concentrations such as snow and ice during inclement weather if necessary.

Preventing Rust During Installation

Next, let’s look at some installation no-no’s that WILL most definitely eventually lead to rust—and things to avoid. The first is the accumulation of drill shavings. Whether it’s a roof panel or a wall panel, when you’re installing the screws, even if you’re pre-drilling for the screws, you’re going to generate metal shavings. If those metal shavings are not removed and left to sit or cling to the sheeting those shavings will rust and will stain the roof or wall sheets. The shavings are uncoated/raw metal with no corrosion protection that can and will rust quickly. Eventually, the shavings may wash off or be blown off the roof or wall, but might not be until after they’ve stained the sheeting, thus leaving you with an issue to remedy and, since the “culprit” is gone, questioning if it’s just a stain or something more serious.

Drill shavings
Drill shavings

Remove the shavings as soon as you can to mitigate this issue. Additionally, if you’re going to do any field cutting, you need to do so via a shearing process utilizing the proper tools, such as electric nibblers, hand snips or electric shears. Any other type of cutting can cause the edge of the base material to become exposed and no longer protected by the Galvalume and painted coatings as they become disrupted. Using tools such as a “hot” saw, abrasive blades or even a reciprocating saw leads to a tearing motion rather than shearing motion, which will strip the metal of that protective coating; over time it can start to rust.

Improper field cutting of panels with abrasive blade

Graphite is another corrosive element that should be avoided as it is not a friend to Galvalume metals. Therefore, stay away from writing on your Galvalume material with pencils because over time the graphite will react, break down that protective layer, and lead to corrosion. If you do write on the panels with a pencil, make sure you clean it off. The best solution is to use permanent markers/Sharpies or dry erase markers.

Graphite
Graphite

Watch out for overspray from any adjacent wall coatings or finish systems like Stucco or similar masonry products, which can also damage panels if not removed promptly. And be certain not to rest the base of any metal panel in direct contact with material that is corrosive, such as concrete, or in such a manner that water can become trapped behind the panel and not able to drain. Industry recommendation is to maintain an eighth of an inch to a quarter-inch gap at the base of all your wall panels for not only expansion/contraction but for proper drainage and to prevent contact with dissimilar/corrosive materials.

Masonry products
Masonry products

Preventing Rust After Installation

Although Galvalume—whether bare or painted—is highly corrosive-resistant by nature, it too has its Kryptonite. Post-installation, the most important thing is to make sure you’re not adding something to the roof that’s going to react chemically/negatively with the Galvalume finish/coatings. For instance, many people don’t recognize that if they have mechanical units on a roof, the condensation that comes out of those mechanical units, when deposited directly onto a Galvalume panel over time, will lead to corrosion and rust. This condensate should either be filtered before exited onto the roof panel or drained via piping and not directly onto the sheeting.

Contact with dissimilar metals, whether it be via incorrect type or method attachment from metal signage, solar panels and snow retention can be another major factor in post-installation corrosion. Panels must not come in contact with or be exposed to the runoff from the following metals: copper (lightning arrest systems, flashing, roof jacks, HVAC drainage); lead (roof jacks, pipe flashing); iron (pipes or soil); and, as previously noted, metal shavings.

Copper
Copper

Post-installation, panels must also not come in contact with or be exposed to the runoff from chemicals, such as acid from batteries and acid washing brick, and even pressure-treated lumber.

Treated lumber
Treated lumber

What To Do In Case of Rust

Let’s face it. Sometimes, despite all your efforts…someone didn’t get the memo and rust happens. Now what do you do? How can you safely can attempt to repair it or remove it without causing more damage?

First off, here’s what NOT to do. Heavy solvents that are meant to remove paint or stains can/will adversely affect the metal. If you witness a rust stain on the roof, don’t go up there with paint remover, acetone or any other toxic solvents and start scrubbing on it because you most likely could make matters worse. You might remove the stain along with the finish entirely, leading to bigger problems. (If you’re an end user, check your finish warranty and manufacturer maintenance documentation supplied to you by your builder/installer for guidance on cleaning and repairs.)

The key is to identify if the rust is just a stain /discoloration or it’s more systemic. Is the catalyst (ex.: a shaving) causing the rust still present? If it’s just a surface stain and the coating hasn’t been damaged, it might just be a matter of getting some mild detergents or something else to remedy the situation. Some good options are Formula 409 or Simple Green and Soft Scrub without bleach or something similar. and it may require a trial and error process to determine which is most effective based on the condition you’re trying to remedy. Products such as Rid O’ Rust or similar whose key ingredient is oxalic acid can be used diluted with water. With any of these products, test a small area first and wait to see results before proceeding to larger areas. And always be certain to fully rinse/flush areas of cleaning products to ensure no residues /films remain.

Always start light. Don’t break out any steel wool and/or metal grinders and start trying to get the rust off the panel that way. If it looks to be more than just a stain—perhaps you clean it and a few weeks later it comes back—that most likely means that the panel has actually been damaged and you’re not just going to get rid of the “stain” by cleaning it as it’ll return. It may require touchup paint or even a panel replacement. It depends on the severity of the damage. If this is the case, be certain to check with your installer, maintenance manual, and panel supplier for further instructions on how to address.

For more information on panel maintenance and warrantiessee the MBCI website resource center.  

Metal Roofing Considerations for Coastal Areas

Whether it is wind speed, sun exposure or the proximity to a coastline, these factors would be the major considerations when choosing metal roofing for a project in coastal areas. The good news is that metal panels can be used in just about any coastal area so long as you find the right product profile and finish that meets your specific requirements to maximize performance given the variables of the environment.

There are a number of special considerations given the environmental conditions inherent to a coastal area, including the impact to paint systems and certain unique maintenance requirements, wind ratings, hurricane conditions and certifications/regulatory product approvals that will limit the panels you can you use within specific coastal areas, for instance Dade County, the state of Florida, and the Texas Coast.

5vcrimp_residence_forrestalBpk02_resized2

Finishes: The 1,500-Foot Rule

Metal components can be a great roofing choice, even in a coastal area, whether a bay, gulf, or ocean water. Key is how you manage the finish on the products and how close you are to the actual salt environment. Simply stated, if you’re outside of a 1,500-foot range from the coastline or salt water, then standard metal roofing would be suitable, but if you’re closer to the coastline there are special paint options or finishes you’d need for the product to withstand the coastal environment.

At MBCI, we use Flurothane Coastal coil coating system* as our standard solution to the challenge of salt spray and harsh coastal environments. This coating is a premium fluoropolymer (PVDF) system developed for use in the most extreme coastal environments. This system is unique in its use of an innovative thick film primer. The two-coat system has a total dry film thickness (DFT) of 1.7 to 2.0 mils.

Choosing an appropriate coastal finish can also affect your product’s warranty. If, for example, your project is within the 1,500-foot range and you don’t choose the required coastal finish, if the panels were to rust there would be no warranty offered and it could affect your warranty for weathertightness as well.

Suitable Panel Types and Additional Coastal Conditions

Overall, roof failures are the largest hurricane loss due to wind and water damage. For this reason, metal roofing is a highly recommended option for coastal regions where hurricanes and high force winds are prevalent. The appropriate metal panel type for these areas is mainly contingent upon what you want to accomplish. Because MBCI does have high wind ratings for most of our panels, whether it be a screw down (aka through-fastened) panel or a standing seam profile panel, selections should be determined by the complexity of the roof itself and the roof conditions. There are standing seam panels and through-fastened panels that can be approved for both roof and wall applications in many coastal areas.

Also, of note, different types of coastal areas may receive higher wind speeds. There is obviously a wide difference in wind speeds between the East Coast and the West Coast, for example, although both are coastal communities. In an area with higher wind speeds and/or hurricane conditions, you would want to consider panels that achieve higher wind ratings. Since there are many different panel options, and some may not be able to achieve as high wind ratings as others, you should look at what those values would be for wind and what testing has been done. MBCI’s metal wall panels and roofing systems are able to resist and withstand extreme environmental conditions, such as those in Florida or the Texas coast where strict product approval and testing processes are required.

MBCI has panels that meet requirements for Florida Approval, Dade County and Broward County for instance, where you need to have an NOA (Notice of Acceptance) for those county areas, as well as products that are TDI approved (Texas Department of Insurance), which is usually seen in the Texas coastal area.

Additionally, sun exposure and color can have an impact as far as solar reflectance, so that is another consideration. Somewhere like Florida gets a lot of sun yet a coastal area in Washington State would be mostly cloudy. If you are in an area that has more sun, then you may want to consider a panel with a higher solar reflectance value.

Maintenance Requirements

If you have metal roofing in a coastal area, you’re going to follow much of the same maintenance as you would on any metal roof, but you would want to inspect it for damage, especially after a wind event or storms. One of the main differences, though, especially if you’re within the 1,500-foot limit where you needed a special finish, is that you’re going to have to do a fresh water rinse regularly on the panels a couple of times a year. What this means is you are basically hosing it off with fresh water to get the potentially corrosive salt spray residue off of it.

For more on metal roof and wall panels and finishes for use in coastal areas, contact your local MBCI representative.


* (1) All substrates must be properly pretreated. (2) American Society for Testing and Materials. (3) Flurothane Coastal system is not designed to bridge cracks in the substrate. (4) Varies by color. (5) Flurothane Coastal system will generally meet the requirements for most post-painted fabrication processes. However, variations in metal quality, thickness or cleaning/pretreatment applications can lead to diminished flexibility.
SOURCE: Valspar Corporation

Long-Life Fasteners: A Key Component of a Properly Installed Metal Roof

As the saying goes: “It’s the little things.” While metal roof fasteners may seem like just a minor aspect of a big system—in both cost and size—they are quite literally what holds it all together. In that respect, the fasteners used to attach a metal roof system are a significant part of the roof performance and, in turn, of the whole building. A leak-free roof will save time, money and avoid headaches for contractors, installers, owners and occupants over the long term. After all, if this small, inexpensive part fails, it can result in costly issues down the road. That said, make sure that all exposed fasteners are long-life, which is an important factor for a properly installed metal roof; it will make all the difference.

Why Choose Long-Life Fasteners?

According to a recent study conducted by the Metal Construction Association, a properly installed Galvalume roof can be expected to last upwards of 60 years.

The key phrase in that last sentence is “properly installed.” While the meaning of proper installation will vary based on a number of different factors, such as the roof type, roof geometry and geographic location, there is one common element to any proper roof installation, and that is the use of long-life fasteners at exposed locations.

Fastener life, in fact, is key and should match (or exceed) the life expectancy of the panel where it is being used. Not only that, but with the fasteners being such a critical component to the metal roof’s overall performance, the contractor must be well versed in selecting the right fastener.

Whether your roof is a through-fastened roof, such as R panel, or a standing seam roof panel, it will have some exposed fasteners. It is imperative that these fasteners be long-life to prevent perforation of the roof panels at the exposed fastener locations. A non-long-life fastener will eventually begin to rust, even if it is painted. This rust “virus” will transfer down to the roof panel and rust a hole in the roof panel.

These fasteners have transferred the rust to the panel and perforated it.

To prevent this from happening to your roof, always specify that long-life fasteners be used in all exposed fastener locations. To ensure that you have long-life fasteners in your roof, perform an inspection. Long-life fasteners for Galvalume coated steel will either be stainless steel, stainless steel capped or have a zinc/aluminum cap.

Long-life fasteners zinc/aluminum capped head (left) and stainless steel capped head (right).

Oftentimes, installers will use long-life fasteners during the roofing process but inadvertently use the wrong fastener at some other locations, perhaps due to fasteners being mixed up in their tool bag.  Other times, the misuse may be due to the need for a different fastener at a specific location.

The fastener attaching the panel to the substructure is a long-life fastener. However, the lap fastener, which has a different drill point, is not a long-life fastener.

If non-long-life fasteners are found, they can be replaced with long-life fasteners of the same type. Long-life “oversized” fasteners are available to use in any locations where a fastener may be stripped out. Regardless of the installer’s intent or the fastener’s location, all exposed fasteners should be long-life. Failure to adhere to this could reduce the service life of your roof by 40 or more years.

To help maximize metal roof performance, MBCI’s long-life metal building fasteners are manufactured to work seamlessly with our metal panels and improve the installation process. For more information, refer to MBCI’s fastener catalog at www.mbci.com.

Find a sales representative