Standard Testing for Metal Roofing – Part 1: Structural Performance and Uplift Resistance

When selecting a metal roofing product, there is an expectation that it will perform as intended over the life of the building. But what assures building owners, code officials, or design professionals that a product will in fact perform as promised? This question often comes up in building product discussions and the accepted way to answer it is to subject the products to physical testing. The type of testing is usually very specific to the product based on protocols and procedures developed by independent agencies such as Underwriters Laboratories (UL), ASTM International, or others. Manufacturers typically submit their products to independent testing labs who follow these standard test procedures. Once testing has concluded, they report the results back to the manufacturer. These results then show whether the product meets stated performance criteria or not. If not, the manufacturer can re-design and re-test until it does and then make the final results available to the public.

For metal roofing, a series of relevant and important tests are typically performed. In this blog, we will look at two of them related to structural performance and wind uplift.

ASTM E1592

The structural integrity of metal roofing is crucial given the various natural forces that can be imposed on the materials. Effects from wind, snow, or other conditions can compromise its integrity. Accordingly, the ASTM Committee E06 on Performance of Buildings (including sub-committee E06.57 on Performance of Metal Roof Systems) has developed ASTM E1592 “Standard Test Method for Structural Performance of Sheet Metal Roof and Siding Systems by Uniform Static Air Pressure Difference”. While the standard acknowledges the use of computation (i.e. calculations) to determine the basic structural capacity of most metal products, it also points out that some conditions are outside of the scope of computational analysis and hence need to be tested.

The standard describes a test method with “optional apparatus and procedures for use in evaluating the structural performance of a given (metal) system for a range of support spacings or for confirming the structural performance of a specific installation”. As such, it is very specific both to metal roofing and its installation. This test method uses imposed air pressure not to look at air leakage but simply to determine structural reactions. It consists of three steps:

1. Sealing the test specimen into or against one face of a test chamber

2. Supplying air to, or exhausting air from, the chamber at the rate required to maintain the test pressure difference across the specimen

3. Observing, measuring, and recording the deflection, deformations, and nature of any failures of principal or critical elements of the panel profile or members of the anchor system

The test needs to be performed with enough variation to produce a load deformation curve of the metal and account for typical edge restraint (fastening) representative of field conditions.

Manufacturers need to submit different products that are tested at least once at two different span lengths between supports. Standing seam roof panels are typically tested at a 5’-0” and 1’-0” span. Spans between the two tested spans can be interpolated. The result is a table of tested loading results that can be compared to code required or engineered design loading to then determine if the selected material and spacing are adequate for the project needs or if another product or spacing is needed.
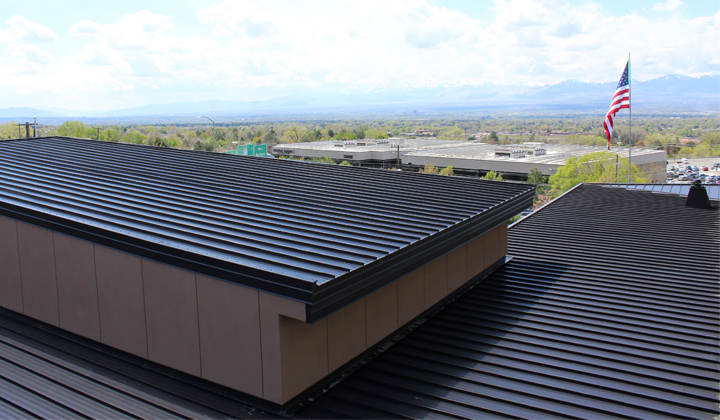
MBCI's metal roofing products undergo a series of tests to ensure maximum resistance and performance.
MBCI’s metal roofing products undergo a series of tests to ensure maximum resistance and performance.

UL 580

The ASTM E1592 test is focused on the structural integrity of metal panels. It also uses positive and negative air pressure in a static (i.e. non-moving) condition to determine performance. There is also a separate concern about how metal roofing will perform in a dynamic condition as would be expected in a windy condition where wind gusts can ebb and flow erratically. In that regard, a separate test developed jointly between Underwriters Laboratories (UL) and the American National Standards Institute (ANSI) looks at the ability of roofing to resist being blown off a building due to wind. Known as ANSI/UL 580 “Standard for Tests for Uplift Resistance of Roof Assemblies”, it has become the recognized means to identify and classify the suitability of roofing for different wind conditions – low to high.

This test is also specific in its scope and intent stating that it “evaluates the roof deck, its attachment to supports, and roof covering materials”. It also points out that it is not intended to test special roof conditions, main or secondary structural supports, or deterioration of roofing. The standard prescribes in considerable detail the type of test chamber that needs to be constructed and used for the testing which includes three sections: “a top section to create a uniform vacuum, a center section in which the roof assembly (i.e. deck, attachment, and roofing) is constructed, and a bottom section to create uniform positive pressure”. The test procedure is then based on placing the roof assembly into the test chamber and subjecting it to a prescribed sequence of 5 phases of oscillating positive and negative pressure cycles (simulating dynamic wind conditions) over 80 minutes of total testing.

There are four wind uplift classifications obtainable for a tested assembly based on the test assembly retaining its attachment, integrity and without any permanent damage. These include Class 15, Class 30, Class 60, and Class 90. Each class has its own requirements for test pressures with increasing pressure as the class number increases. Higher class numbers indicate increasing levels of wind uplift resistance. Note, that to obtain a Class 60 rating, the tested assembly must pass the Class 30 test then be immediately subjected to the Class 60 test sequence. Similarly, to obtain a Class 90 rating, the tested assembly must first pass both the Class 30 and 60 tests. Metal roofing manufacturers who want their roofing products tested and classified under UL 580 must pair them with standard roof deck and fastening materials. Hence most have many different tests performed and results reported accordingly.

When reviewing metal roofing options, it is comforting to know that most manufacturers have tested their products and designed them to meet or exceed minimum requirements. To find out more about tested results of products you may be considering, contact your local MBCI representative or see the MBCI website and select the “testing” tab under a selected product.
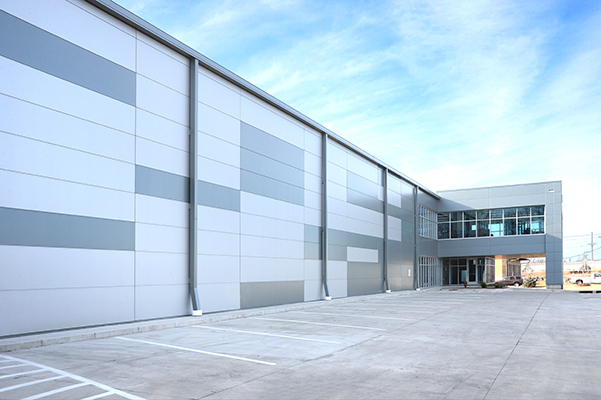
Sealing the Deal: The Importance of Properly Sealing the Building Envelope Using IMPs and Single-Skin Panels

The primary purpose of a building’s envelope (roof and walls) is to protect the building’s interior spaces from the exterior environment and provide the desired exterior aesthetics. Whether choosing insulated metal panels (IMPs) for their superior performance or, instead, looking to the wide range of aesthetic choices available with single-skin panels—or some combination of the two—the common goal must always be to protect the building from the potential ravages of water, air, vapor, and thermal/heat. By ensuring proper installation of metal panels and, thereby, properly sealing the building envelope, problems can be mitigated, efficiencies maximized, and the integrity of the building protected.

Here, we’ll briefly consider the benefits of each panel, and some key considerations relative to their sealant needs and capabilities.

Insulated Metal Panels (IMPs)

IMPs are lightweight, composite exterior wall and roof panels that have metal skins and an insulating foam core. They have superior insulating properties, excellent spanning capabilities, and shorter installation time and cost savings due to the all-in-one insulation and cladding. In effect, IMPs serve as an all-in-one air and water barrier, and are an excellent option for retrofits and new construction. With their continuous insulation, roof and wall IMPs provide performance and durability, as well as many aesthetic benefits.

IMPs offer excellent R-value and improve energy efficiency to the building envelope.

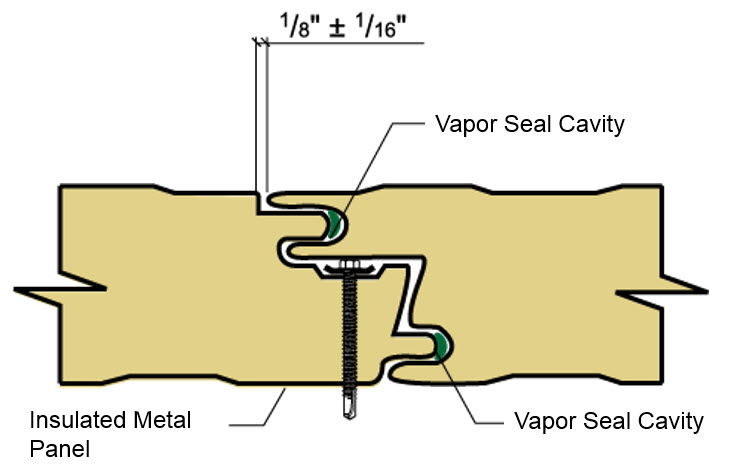
Generally speaking, because of the nature of the joinery, it is easier to get a good seal in place with IMPs given their relative simplicity (i.e., putting the two pieces together with the sealant). They require great attention, though, in terms of air and vapor sealing—aspects largely controlled by the installers on a given project. As an example, vapor sealing in cold climates or applications is critical to the overall soundness of a building. Consider the damage a building could incur if moisture seeps into a panel and becomes trapped; it if freezes, it could push panels out of alignment. This would result in not just an unattractive aesthetic, but a performance failure as well. In order to be effective, all sealant and caulking must be fully continuous.

Single-Skin Panels

Single-skin panels, alternatively, offer the advantage of an expansive array of colors, textures and profiles. They are also thought to have more “sophisticated” aesthetics than IMPs. Single-skin panels are available in both concealed fastener and exposed fastener varieties, and are part of an assembly. They can be used alone or in combination with IMPs, and as long as the needed insulation is incorporated, single-skin panels can meet technical and code requirements, depending on the application. Single-skin products offer a wide range of metal roof systems and wall systems as well.

Getting the proper seal on single-skin panels may require extra sealants or closures, and have more parts and pieces that have to come together to create the seal. However, when properly installed and sealed, they can provide excellent performance in their own right. Some key caveats include ensuring panel laps are properly sealed with either tape or gun butyl sealants, and carefully inspecting air and water barriers for proper installation as well as penetrations through the wall for sealing/fire caulking prior to panel.

In most cases, following the details for the most common conditions will give you a successful and high-performing outcome.

Regardless of the type of metal panel used, taking the time and effort to ensure the sealing and caulking details are properly handled, metal buildings can protect the built environment and provide long-lasting quality and performance.

The Importance of Roof Installer Training and Certification

Many metal roofing installers may think that their years of experience on the job is enough. But even for those who have been putting up metal roofs for a long time, the truth is that if they haven’t put up a particular brand’s roof before, they need to go through that manufacturer’s installer training and get certified. There are several reasons for this.

  • More and more, architects are starting to specify that an installer must be certified by the manufacturer of the product being installed.
  • For many manufacturers, including MBCI, in order to get a Standard III warranty with no dollar limit—or any Day One warranty—training and certification are required.
  • Installers need to know the proper technique and protocols—for a particular manufacturer’s product! After all, you don’t make any money by going back and fixing leaks.

There are many other standing seams that are very similar to those that MBCI sells, and while they may look similar, there will be a number of small differences, such as the way panels are notched or the way sealants are put in. Even the way companies test panels can be different. For instance, if you have a Florida or Dade County approval or an FM approval, that’s all tied into the way the roof system is tested. So, if someone has a project where one of those things is required, it is imperative to make sure the installer is using that brand’s system of doing things, down to every last detail. These are some of the things covered in certification courses.

Certification Courses and Installer TrainingInstaller Training

At MBCI, we offer a three-day course that covers all of our standing seam panels, and have a separate two-day course for insulated metal panels, which provides advanced installer training in metal roof installation through classroom lecture and hands-on application in a variety of MBCI’s products, assembling roof systems on a mockup to reinforce what was learned from the presentations. Courses take place once a quarter in different locations throughout the United States.

In terms of who should attend certification courses, generally speaking, it’s the person from the company who will be doing the actual work since a certified installer needs to be on the roof any time any work is being done on the roof. He or she is the one we train. And that installer is tied back to the company in order for them to receive certification. That company has to have workman’s comp and general liability insurance. If the certified person leaves the company to go elsewhere, the first company needs to certify someone else.

The Bottom Line of Certification

From a bottom line perspective, it’s important for companies to be proactive in making sure there is always someone on their team who is a certified installer for the products they use—or might use. Not only will they learn tips and tricks for proper installation, but it will also avoid a situation where you have a job, the panels are being delivered the next week and you realize you need someone to be certified. Maybe it’s three weeks until the next certification opportunity. You’ll want to have all that settled before you need it.

Just because you’ve been installing roofing for 30 years, doesn’t mean installer training and certification isn’t necessary. Our best advice is to come to the class and learn all the little idiosyncrasies about whatever manufacturer’s roofing panels you’ll be installing. This is a case where even a little knowledge goes a long way.

Reducing Peak Demand Costs with Cool Metal Roofs

Among the many benefits offered by cool roofs—including a decrease in urban heat island effect or increased roof system longevity—perhaps the most significant is a reduction in peak demand energy usage which directly affects building expenses.

Peak demand is the highest point in the day at which a building draws electrical consumption. A facility’s monthly utility rates are largely determined by the power usage level at this time, so anything that can be done to drive usage down will significantly reduce utility costs. As evidenced by their test values, cool roofs are an effective way to decrease air conditioning loads during peak demand times.

Cool roof values are expressed in terms of solar reflectance and thermal emissivity. The combination of these values is used to determine how hot a surface will become by its ability to reflect solar energy and radiate heat away from itself. Cool roofsare capable of reflecting solar heat away from a building by more than 70 percent. In fact, the U.S. Environmental Protection Agency estimates that ENERGY STAR® qualified roofing products can lower roof surface temperatures by up to 50°F.

According to Jeff Steuben, executive director, and Carolyn Richter, communications manager, Cool Roof Rating Council (CRRC), in a recent Florida Roofing article, “Building occupants can experience improved comfort as compared to a conventional dark roof, as the building’s interior is subject to less thermal flux and stays cooler during warm seasons,” and, “Reduced indoor temperatures lead to energy savings from reduced cooling energy loads.”

Along these lines, contractors can also access a CRRC-provided listing of cool roof rebates, codes and voluntary cool roof programs at: www.coolroofs.org/resources/rebates-and-codes.

Cool Roofing Longevity

In addition to energy efficiency, cool metal roofs are known for extended durability and longevity, with most products offering a 40-year finish warranty.

In fact, a well-noted extensive study, Natural Exposure Testing in California, conducted by the Oak Ridge National Laboratory, found that pre-painted metal roofing maintained higher levels of reflectance, over a three-year period, due to its ability to shed particulate matter, as compared to conventional roofing materials. Further, pre-painted metal roofing has been found to retain 95 percent of its initial solar reflectance over this same three-year period.
Increasing performance and energy savings, solar reflective pigments in cool metal roofs offer higher total solar reflectance and thermal emittance, even in darker colors. With cool roof technology, the ability for the roof to store heat and radiate that heat into the building after sundown is dramatically reduced.

Cool Roofs
Heitmann Residence featuring a Cool Metal Roof

Cool metal roofs are proven to deliver environmental and performance benefits, of which the most significant to building owners is their contribution to the bottom line. Although savings will vary based upon geography, materials and insulation, the U.S. Environmental Protection Agency estimates that reflective roofs can save up to 40 percent of a building’s cooling energy costs.

When utilizing the U.S. Department of Energy’s Cool Roof Peak Calculator, contractors will discover that the total value of energy savings offered by a cool roof averages more than $1,000 annually in most climate zones for a typical commercial building. Furthermore, this applies to both cool roofing installed over both existing roof insulation and new insulation.

Proven Strategy

As established by documented study and significant heat build-up reduction levels, cool roofs are a proven strategy for supporting longer lasting roofs, reducing both utility costs and decreasing a building’s environmental footprint as Steuben and Richter conclude, “cool roofs are one of the most effective ways to obtain energy savings and environmental rewards through building envelope design and re-roofing projects.”

Knowing When to Call the Metal Manufacturer: Part 2

As stated in Part 1 of this series, the success of a metal roof or metal wall project can rest on the installer knowing when something isn’t working or just doesn’t seem right. When that happens, a call to the manufacturer is not just suggested but is really imperative to ensure any potential problem is averted before it’s too late. In addition to the previously discussed scenarios, such as damage to the physical panel or problems with the fasteners, let’s take a closer look at a few other common circumstances under which MBCI recommends immediately reaching out to the manufacturer:

Alignment and Substrate Issues

It is the installer’s responsibility to verify the substrate and check for proper alignment before attaching any sheeting materials. If the installer notices any issues of this sort (either before installation or once they start putting on the sheeting), they should stop and address them immediately. This might include oil canning or other irregularity in the appearance of the panel. The installer should investigate the source. If unable to identify and properly remedy the situation on their own, then a call to the manufacturer’s support team is recommended. They may be able to suggest items to check to help locate the source of the problem—whether it be installation or manufacturing—and from there make suggestions as to the best possible means to address the situation.

Accessories

When physically getting ready to modify a panel system by adding things to the roof (such as snow guards or mechanical curbs) or to walls by installing doors, windows and louvers, these penetrations can have an impact on the system and its weather-tightness and appearance. Oftentimes, other trades—who may or may not have knowledge of the sheeting system—are coming onto the job to perform the accessory installation. It’s wise to visit with manufacturer prior to installation and/or alert the non-metal panel installer of precautions to take when adding accessories.

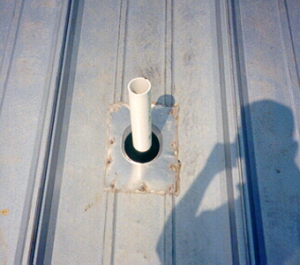
bad roof jack installation - part #2 ACCESSORIES SECTION
The pipe penetration shown here is not the correct type of piping for metal roofing, and not the correct installation. This can lead to issues with roof performance, including leaking and water damage.

Coordination regarding material types of accessories, fasteners and placement is critical. There are materials that can react negatively with the installed system and lead to damage as well as void manufacturers warranties. Accessories should always be discussed prior to installation. Read more about different types of roof accessories and penetrations in MBCI’s blog article, Roof Penetrations Made By Non-Roofing Contractors.

Panel Engagement

Panel systems have an engineered means by which the panels attach and engage one another as shown in the manufacturer’s installation manuals and project drawings. If at any point the panel will not engage as depicted in the details, installation should be halted and reviewed to determine the cause. This can require a call to the manufacturer to help determine if the matter is site and substrate related or potentially a manufacturing issue.

Do not continue to install the system if the laps are not nesting properly, clips are not engaging as detailed, panel modularity cannot be controlled or if the overall panel is not “resting” on the substrate such that there is excessive bowing and stress in the panel. This is the time to call the manufacturer, as once the material is completely installed, it is much more difficult to determine the cause of a problem and is potentially more expensive to remedy. Additionally, in many cases, full installation constitutes acceptance of the product and the manufacturer’s hands could be tied or extremely limited in being able to assist in remedying after the fact.

By knowing when to be proactive with a call to the manufacturer, installers can mitigate many types of potential pitfalls. And if you’re just not sure, it’s best to call.

For more information on metal roof and wall products and training, MBCI offers courses through its Metal Institute. These courses are available for general training purposes or for those seeking installer certification.

Combatting Thermal Bridging with Insulated Metal Panels

When using compressible insulation, say for instance fiberglass batt, consideration must be given to how that insulation is going to be deployed in the actual wall or roof. For instance, installers might place the insulation across the framing members and then smash it down with the cladding and run a screw through to the underlying structure. The problem here is that the insulation is rated with some R-value—and that R-value is determined by an ASTM procedure that also determines what its tested density is. So in essence, it’s ‘fluffy’ insulation.

One manufacturer’s insulation, however, might be thicker than another’s. The contractor is buying an R-value, not a density or a thickness. The insulation is tested to that R-value at whatever thickness and density¹ is needed to achieve it. Let’s say R-19 fiberglass batt is specified, but then it is put in an assembly and smashed down flat… now it’s not R-19 anymore; it’s now R-something else. That’s a thermal bridge—when the insulation’s R-value has been compromised.

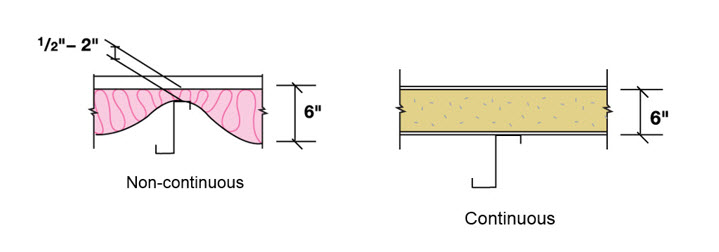
Manufacturers have the ability to run long length panels that minimize the number of end joints. This continuity provides significant advantages over traditional insulated materials when designing for energy efficiency. This image illustrates the difference between fiberglass batting made discontinuous by compression between panel and framing members and the continuous insulation provided by insulated metal panels.

Unfortunately, thermal bridging is almost impossible to eliminate. In the example above, another choice might be to put it between studs. Except in this situation, the studs break the insulation. While it’s not pinched, the studs are separating it. Whether the studs are metal or wood, in either case it’s still a significant thermal short circuit or a thermal bridge.

Even with the highest quality insulation systems—insulated metal panels, for example—a joint is required. Building is not possible without putting neighboring panels together. Therefore, insulation is discontinuous. While it’s impossible to avoid thermal bridging, there are two requirements to ensure the building performs the way it needs to perform.

  1. Thermal bridging must be mitigated. In other words, the designer or installer has to try to eliminate as much of it as possible.
  2. If thermal bridging is unavoidable, it must be accounted for in some fashion, which usually means putting more insulation somewhere to make up the difference. This is called a “trade-off” and is allowed by most building energy efficiency codes.²

Why Insulated Metal Panels?

Insulated metal panels then are the best bet, because although the joint is a thermal bridge, in effect, it is not nearly as impactful as breaking a line of fiberglass with a stud or smashing the fiberglass between the panel and a framing member. In the illustration below, R-value doesn’t just vary at that point where the panel and the stud meet. The entire insulation line gets smashed and one would have to go some distance from the stud before the insulation returns to its normal, fluffy thickness. These issues need to be mitigated and accounted for.

assembled side joint
Continuous insulation is critically important to an efficient envelope design. Insulated metal panels, with their side laps designed for concealed fasteners, eliminate the possibility of gaps in the insulation and thermal bridges. Continuous insulation is important because thermal bridges and discontinuities introduced by compressing non-rigid insulations cause the in-place R-Value of the assembly to be less than the tested R-Value of the insulation used. This effect has become a focus in newer energy efficiency codes such as ASHRAE 90.1 and IECC.

Manufacturers such as MBCI and Metl-Span publish insulated metal panels as U-factors because the joint is tested as part of the assembly (both mitigating and accounting for the aforementioned issues). These values can be found on product data sheets and technical bulletins, such as Metl-Span’s Insulation Values technical bulletin, published January 2017.

References

  1. ASTM C 665 – 12, Standard Specification for Mineral-Fiber Blanket Thermal Insulation for Light Frame Construction and Manufactured Housing, Table 1, Footnote c.
  2. ASHRAE 90.1 – 13, Energy Standard for Buildings Except Low-Ride Residential Buildings, Section 5.6
  3. High Performance Green Building Products – INSMP2A (CEU)

Tips for Installing Metal Roof Curbs

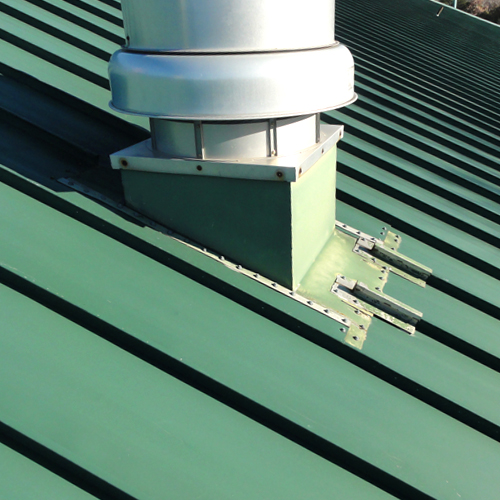
Metal roofs made from galvalume-coated steel provide great corrosion resistance and can readily satisfy a 20-year weather-tightness warranty. However, when a large penetration in the roof is needed, such as a large exhaust fan or other equipment, the integrity of the roof can be compromised if not addressed properly. The common method of dealing with large penetrations (i.e., spanning over one or more standing seams) is to install roof curbs that form the transition between the roof and the equipment being installed.

Of course, like most aspects of building construction, there are choices available in materials, methods, techniques, and styles of installing a roof curb. When the key objective is to provide a curb that will perform for the entire life of the standing seam roof, there are four key points to keep in mind.

Roof Curbs
Roof Curbs for Standing Seam Metal Roofs

Pick the Proper Material:

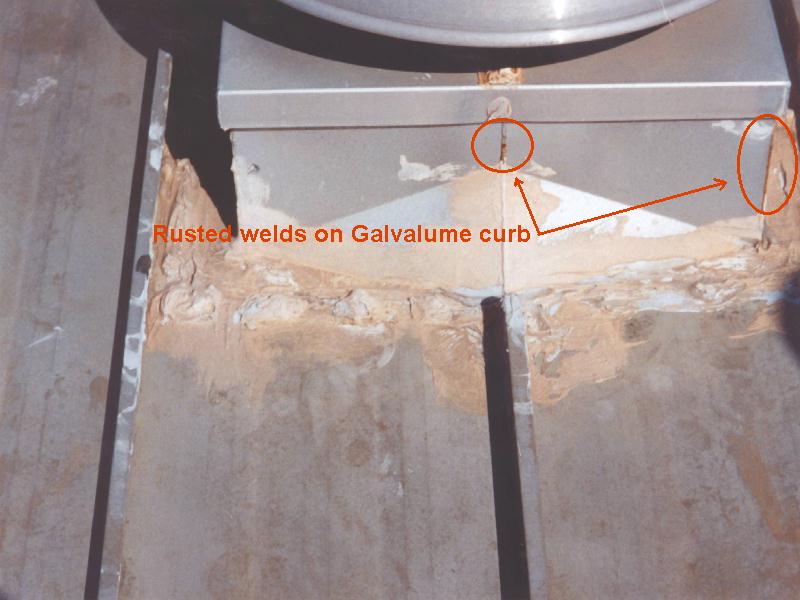
A galvalume-coated roof doesn’t mean that a galvanized steel roof curb is the best thing to use – in fact, galvanized roof curbs are known to rust, corrode, and leak, particularly along weld joints, as soon as a year after installation. Instead, a curb made from aluminum (preferred) or stainless steel should be used to prevent premature corrosion. To put any concerns about dissimilar materials and galvanic corrosion to rest, keep in mind that galvalume is approximately 80 percent aluminum by volume, so they are highly compatible.

Rusted Roof Curbs
Rusted Welds on a Galvalume Roof Curb

Use the Proper Roof Curb Type:

It is not uncommon for a roofer to choose a curb type referred to an an “over/over” curb, meaning that, after the opening is cut, the curb is installed over the roofing on both the upslope and the downslope sides. This might be the easiest to install during construction, but it will very likely create more work and callbacks when the upslope side starts to get water into or under the joint, and leaks. Instead, it is well worth taking a few extra minutes to install an “under/over” curb, which places the upslope side under the roofing in a true shingled lap between the curb and the roof. This way, the upslope edge is much more protected and less likely to leak using the same shingled condition occurring on the downslope side – all creating a properly water-shedding, weathertight condition.

Provide the Proper Water Flow Clearance:

We all know that water seeks the path of least resistance, so the key to keep water flowing down a roof is to avoid creating pockets of resistance. This is particularly true on the upslope end of a curb as well as on the two sides parallel to the slope of the roof. A curb with a minimum clearance of 12 inches between it and any other object on the upslope end will give water enough room to flow around the curb easily. Similarly, once the water reaches the two sides, at least 6 inches of free clearance is needed (i.e., without being encumbered by standing seams or other features) to allow the water to keep going and not back up to create a water head at the upslope end of the curb. Simply put, clearance means free-flowing drainage; lack of clearance can mean water buildup and leaks.

Install Roof Curbs Rib to Rib:

Installing curbs that rest in the flat, lower, panel area of metal roofing invites water tightness problems since the curb now has to be installed and sealed in the most vulnerable area – the surface where rainwater flows. Instead, coordinating the curb size with the rib spacing to provide a rib-to-rib curb eliminates fasteners down both sides of the curb in the pan of the roof panels. Placing the curb on and attaching it to the ribs also allows better transitioning from under the roofing on the upslope end to cover the roof on the downslope end. This type of curb has the added benefit of being able to be installed either during the roof installation of after the roof is finished.

Taking these four points into account in your next metal roofing project where roof curbs are required will help assure a well-installed, weathertight condition that should last just as long as the metal roofing system itself.

Beauty and Braun: The Benefits of Mixing Insulated Metal Panels with Single-Skin Panels in Commercial Design

Commercial projects aren’t one size fits all. By bringing in metal panel products to suit the individual need, designers and architects can provide custom solutions for a variety of applications. Single-skin metal panels and insulated metal panels (IMPs), if used correctly, can together add both aesthetic and functional value to your projects.

While IMPs can provide superior performance with regard to water control, air control, vapor control and thermal control, you may sometimes find your project requires—from an aesthetic perspective—the greater range of choices available in single-skin profiles. Let’s spend a little time looking at some of the reasons behind the growing trend of specifying a combination of insulated metal and single-skin panels.

Benefits of Insulated Metal Panels

Insulated metal panels are lightweight, composite exterior wall and roof panels that have metal skins and an insulating foam core. Their much-touted benefits include:

  • Superior insulating properties
  • Excellent spanning capabilities
  • Insulation and cladding all in one, which often equates to a shorter installation time and cost savings

Benefits of Single Skin

Single-skin panels, on the other hand, with their expansive array of colors, textures and profiles, may have more sophisticated aesthetics. They can be used on their own or in combination with IMPs. It should be noted, too, that single-skin panels can—in their own right (as long as the necessary insulation is incorporated) —satisfy technical and code requirements, depending on the application.

Beyond aesthetics, when it comes to design options, single-skin products offer a wide range of metal roof systems, including standing seam roof panel, curved, and even through-fastened systems. As for wall systems, those may include concealed fastened panels, interior wall and liner panels, and even canopies and soffits, not to mention exposed fastened systems. Therefore, you have a wide range of not only aesthetics options but VE (Value Engineering) options as well.

Why Mix?

So, in what situations might the designer or architect choose to combine the two panel types? Let’s examine a couple of specific scenarios related to the automotive or self-storage worlds as a means of illustration. In both of these types of applications, it is not uncommon for the designer to recognize the importance of wanting to keep the “look” of the building consistent with branding or to bring in other design elements.

Coalville Wastewater Treatment Facility
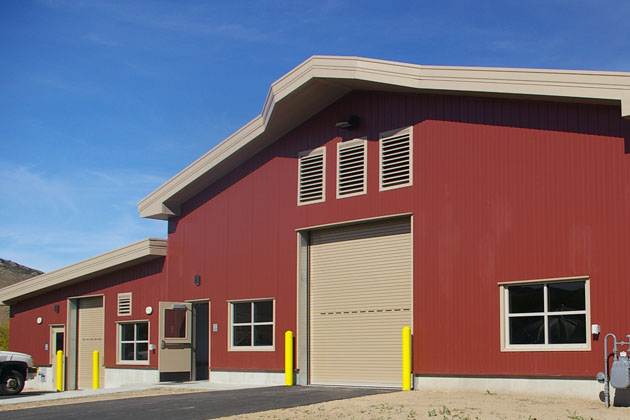
The Coalville Wastewater Treatment Facility in Logan, Utah combines the insulated CFR panel with the single-skin Artison L-12 panel.

Single-skin panels can be used as a rain screen system in the front of the building or over the office area, and would provide the greater number of design options. In the rest of the building, designers can take advantage of the strength, durability and insulation benefits of IMPs. Although you could use one or the other for these examples, the advantage of mixing the two would be achieving a certain look afforded by the profiles of single-skin, while still adhering to stringent building codes and reducing installation time—which is the practical part of using IMPs.

Focus on HPCI IMP Systems

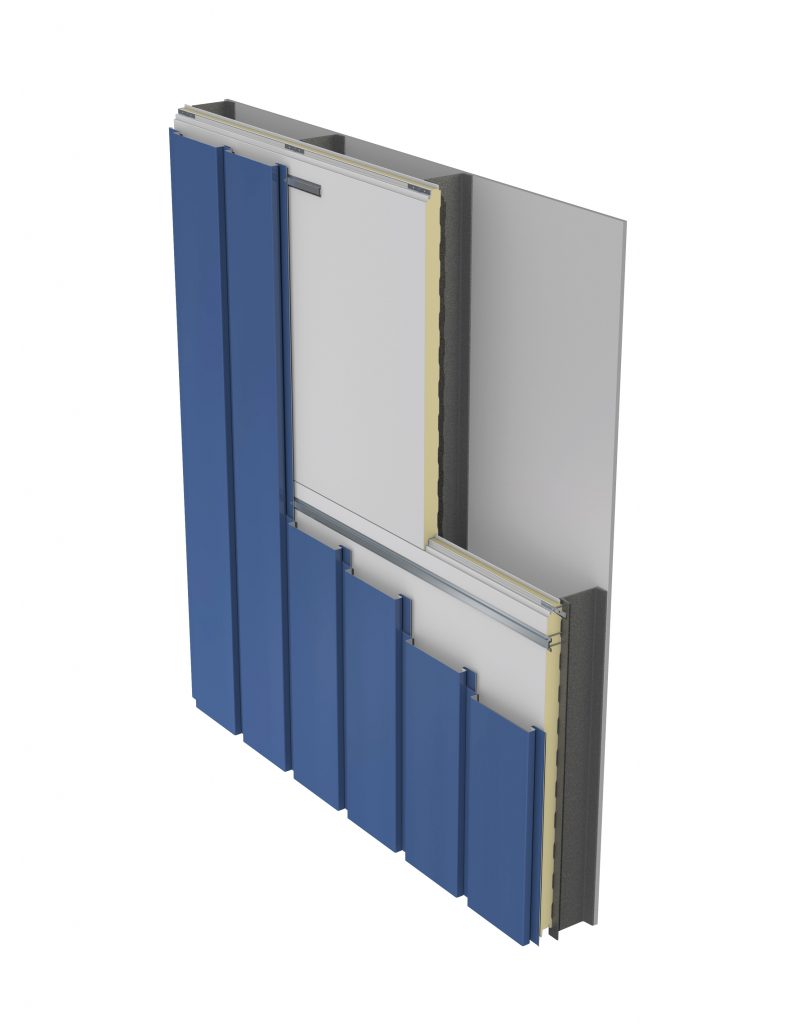
One great example of a current trend we’re seeing at MBCI is the use of the HPCI-barrier IMP system, along with single-skin panels. The High Performance Continuous Insulation (HPCI) system is a single system that is a practical and effective replacement for the numerous barrier components found in traditional building envelopes.

HPCI Insulated Metal Panels
The HPCI Insulated Metal Panel is quick and easy to install and provides an economical solution to conventional air, water, thermal and vapor control without sacrificing thermal efficiency.

A big benefit to using the HPCI system is that the barrier wall is already in place. In terms of schedule, the HPCI barrier system is typically installed by contractors who are also installing the single-skin system, eliminating the need for multiple work crews, and thereby minimizing construction debris and reducing the likelihood of improper installation. With a general lead time of four to six weeks for the HPCI and a week or two for the single-skin, the installation goes fairly quickly. Therefore, it appeals as the best of all worlds—a single system meeting air, water, thermal and vapor codes (ex.: IBC 2016, NSTA fire standards) plus the design flexibility of a single-skin rain screen product. (Note: The HPCI panel must be separated from the interior of the building by an approved thermal barrier of 0.5″ (12.7mm) gypsum wallboard to meet IBC requirements.)

Bottom line, HPCI design features and benefits include the following:

• Provides air, water, thermal and vapor barrier in one step
• Allows you to use multiple façade options while maintaining thermal efficiency
• Easy and fast installation, with reduced construction and labor costs

Conclusion

As designers, architects and owners are getting smarter about a “fewer steps, smarter dollars” concept and an increased awareness of applicable codes and standards, not to mention lifecycle costs, the trend towards maximizing the strengths of available systems will continue to grow. Whether the right choice is an IMP system, single-skin or some combination, the possibilities are virtually endless.

Selecting Metal Panels Based on Roof Slope

If you’re reading this article, then you are probably already aware that metal roofing can provide many benefits, including longevity, durability and water shedding—not to mention the aesthetic features of today’s metal roof products. When specifying a metal roof system, choosing the correct panel is a key factor. Roof slope is critical in determining that choice. Let’s take a look at some of the main things to consider when choosing a metal roof panel with regard to roof slope, including building codes, minimum slope requirements and typical applications.

Building Codes

Building codes are perhaps the most important driving force dictating the roof slope to choose. Different types of roofs have distinct specifications for installation. According to the 2012 International Building Code (1507.4.2 Deck slope), minimum slopes for roof panels need to comply with the following:

  1. The minimum slope for lapped, non-soldered seam metal roofs without applied lap sealant shall be three units vertical in 12 units horizontal (25-percent slope).
  2. The minimum slope for lapped, non-soldered seam metal roofs with applied lap sealant shall be one-half unit vertical in 12 units horizontal (4-percent slope). Lap sealants shall be applied in accordance with the approved manufacturer’s installation instructions.
  3. The minimum slope for standing seam of roof systems shall be one-quarter unit vertical in 12 units horizontal (2-percent slope).

Minimum Roof Slope Requirements

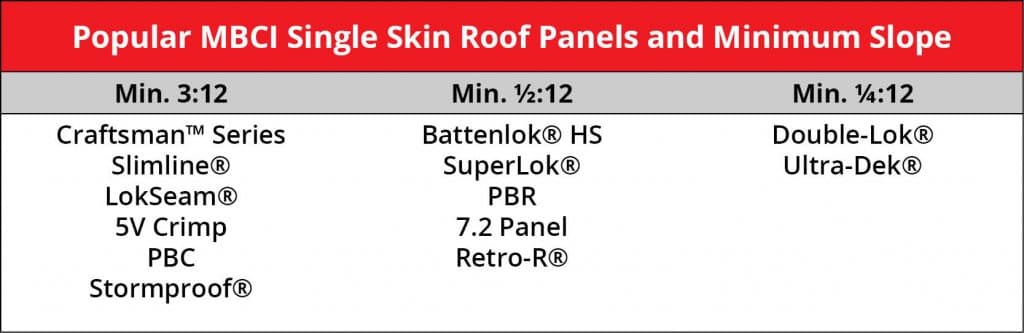
Depending on the roof profile, there are minimum roof slope requirements for each panel, which need to be considered. The profile refers to the shape the metal sheets take when they bend to form panels. Metal roof slope is expressed by a ratio indicating the roof pitch, which notes the vertical rise of the roof (in inches) for every 12 inches the roof runs horizontally—in other words, dividing the vertical rise and its horizontal span. The most common slopes are: 3:12, 1/2:12 and 1/4:12. When looking at metal roofing panel, you will need to consult with the manufacturer to ensure that the metal panel you selected will work for your application.

MBCI Roof Panels and Minimum Slopes

Applications: Low Slope or Steep Slope

Commercial Application– Low Slope Roofs

A low-slope roof is one whose slope is less than 3:12. Low slope roofs have several benefits. They have simpler geometry that is often much less expensive to construct and low slope metal roofs require fewer materials than a steep slope, which reduce material costs. Metal roofing panels are excellent solutions for roofs with low slopes. Commercial roofs are typically low slope (less than a 3:12 slope), and larger than residential roofs. This is due to low slope metal roofs being a bit easier to build on large structures.

1/2:12 Metal Roof Slope
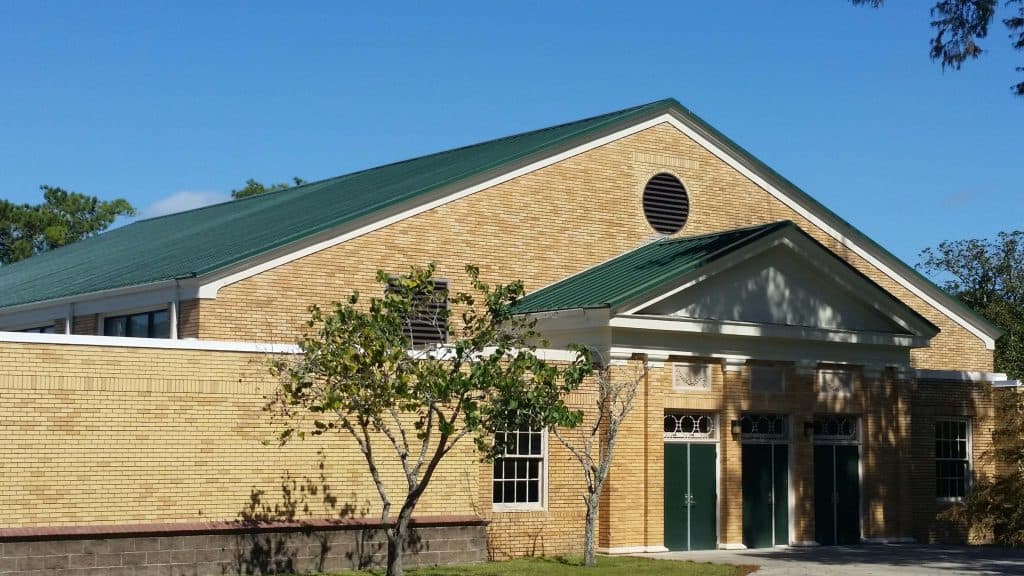
Cecilia Junior High in Cecilia, Louisiana uses 7,180 sq. ft. of MBCI’s SuperLok®. This panel requires a minimum slope of 1/2:12.
Residential Application– Steep Slope Roofs

A steep slope roof is one whose slope is greater than 3:12. Steeper slopes are ideal for areas that have higher snow loads and will also prevent the possibility of ponding water on the roof. When it comes to residential construction, your roof is a visible part of the structure. Choosing a metal roof for residential construction involves choosing a panel profile that will be aesthetically pleasing.

Steel Slope Metal Roof
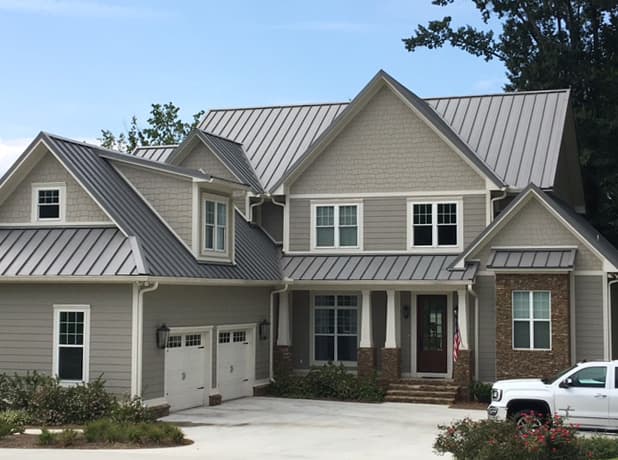
It is common to use steep slopes in residential applications, such as this home in Guntersville, Alabama that utilizes MBCI’s LokSeam® (requiring a minimum slope of 3:12).

Conclusion

Regardless of whether you’re choosing metal panels for a commercial or residential structure, slope matters. Following common standards, doing your research and paying attention to manufacturer guidelines regarding minimum slope will ensure you’re reaping the full benefit of your metal panel selection.

For More Information

To learn more about metal roof slopes, check out:

Fastener Compatibility with Metal Roof and Wall Panels

The installation of a new metal roof or wall panel on a residential home, business or commercial building takes care, precision and—of course—the right tools. Regardless of the structure, you’ll likely find that choosing the correct mechanical fastener plays a key role in the long-term performance, durability and efficacy of the project.

Many metal roof and wall panels, in fact, rely upon the use of quality mechanical fasteners to secure components to a structure. In order to guarantee a resilient and weather-tight attachment, it behooves the user to select an appropriately compatible fastener type for the specific metal construction, thereby ensuring expected benefits, such as energy efficiency, extended life cycle, and even lowering insurance bills for the owner. In other words, once the decision has been made to use metal building materials for your roof or wall project, the next step is figuring out how to hold it all together.

Know Your Fastener Options

Before selecting fasteners for the project, it is important for the designer or installer to understand the various materials and options available. Typically, this involves the following considerations:

  • What type of material and coating is appropriate?
  • What type of head do I need? Does it need to be painted?
  • Do I need a washer? If so, what material should I use?
  • Should I use self-tapping or self-drilling screws?
  • What thread count should I specify?
  • How long does the fastener need to be?
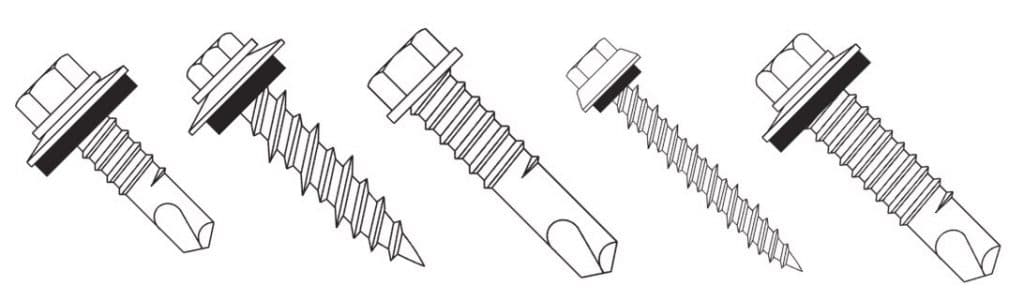
Many Types of Fasteners
The MCA provides a summary of the different types of fasteners in their technical bulletin, Fastener Compatibility with Profiled Metal Roof and Wall Panels.

Select a Fastener on the Basis of Material

Most fasteners are made from coated metal but both the type of metal and coating must be chosen on the basis of the materials the fastener is bringing together. Galvanic action between dissimilar metals can cause premature fastener failure and lead to leakage. Even stainless steel screws will corrode severely under the right (or actually wrong) conditions. In extreme exposure, sometimes the best option is to use galvanized screws and plan on replacing them at a later date with a larger screw once the zinc has been depleted.

Considerations for Self-Drilling Screws

Self-drilling screws have a drill bit built in and don’t require a pre-drilled hole. Although self-drillers save the installer the step of drilling a hole, they are not always a good idea. The available space between the back of the hole and the next physical restriction must be at least as big as the bit itself or the threads will not engage. Also, drilling a hole allows a quick inspection to ensure the hole is in the correct location and plies are aligned and parallel. Generally, self-drillers are used when going through thin gauge steel into thicker gauge steel and self-tappers are used when fastening two thin gauge plies.

Washers

Fasteners may be used with or without washers. While plastic washers help prevent leaks, they are not required on purely structural connections. When using washers, it is important to visually inspect the screw after installation to be sure they are properly compressed and not kinked. Exposed plastics generally degrade when exposed to ultraviolet light. Furthermore, use of neoprene washers may be prevented by restricted material lists, or “red lists.” Fastener heads themselves may be made of different materials than the rest of the screw, long-life ZAC heads being the most common example.

Fastener Profiles

Fasteners have different profiles. Flat or “pancake” screws are used when low profile installation is necessary and may have Philips, hex, or Torx sockets. Which socket to use is usually an installer’s preference based on accessibility restrictions. Another common feature is an over-sized dome beneath the head to encompass a larger washer. Also called shoulder screws, these screws are useful when thermal movement might distort the holes.

Colored Fasteners for Metal Roofs
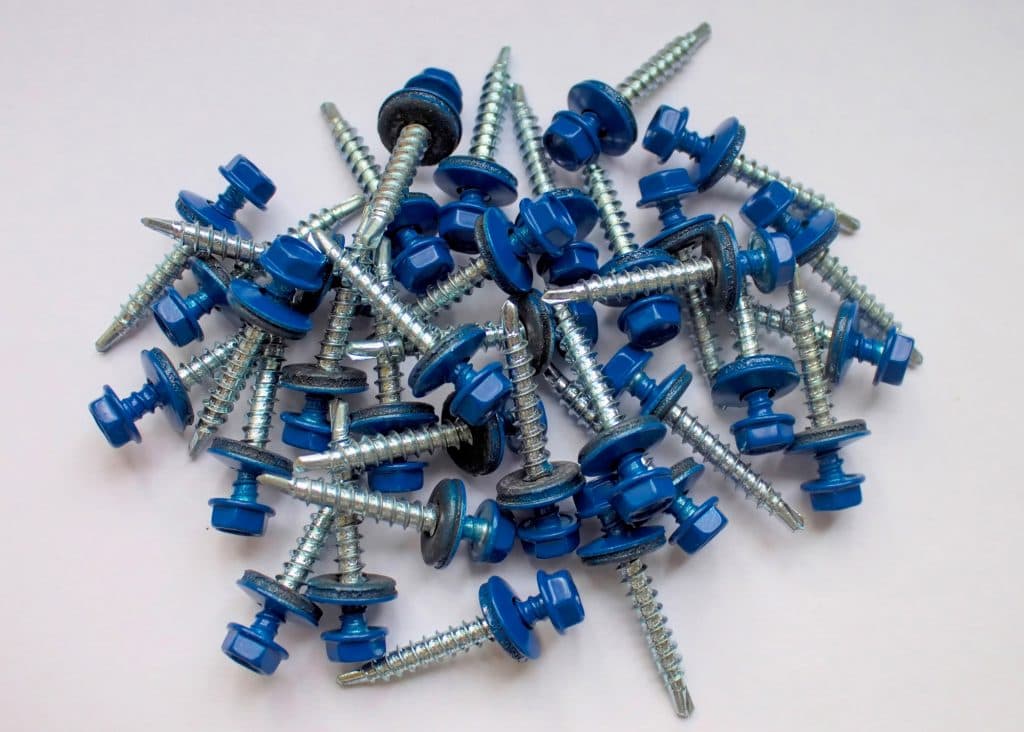
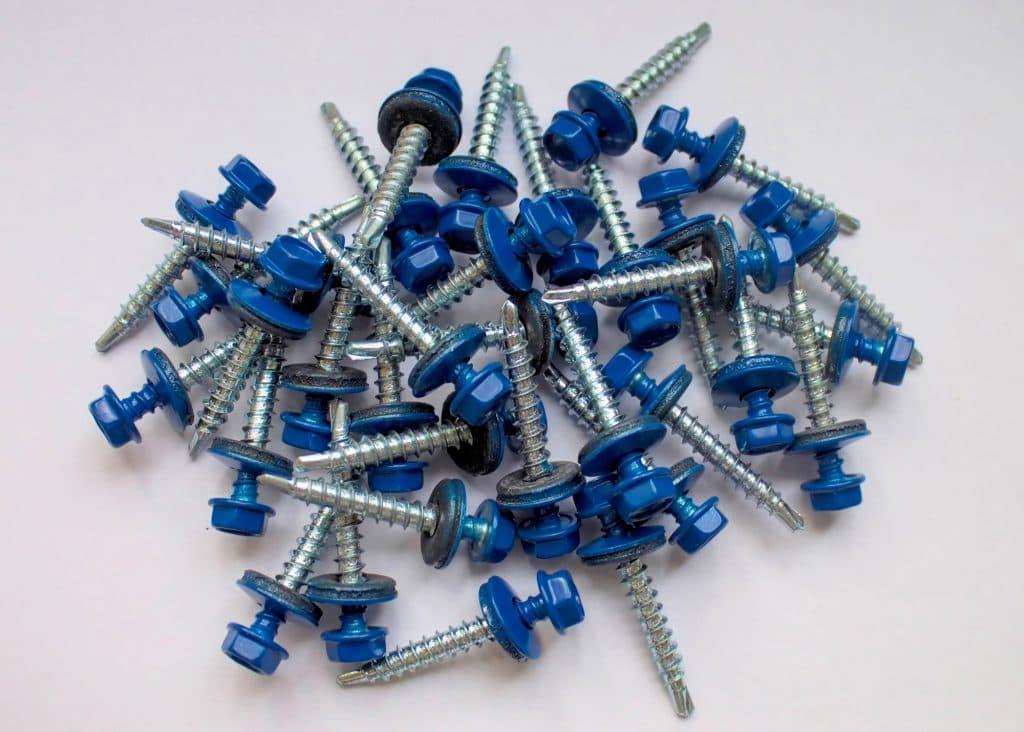
Fasteners can also be colored to match the roof or wall panel.

Thread Count per Inch

Thread count per inch, or TPI, must also be considered. Most commonly, fasteners are installed through the thinner ply first and grip in the thicker ply, pulling the plies together. Therefore, TPI selection is usually driven by the thickness of the thicker ply. Generally, the TPI is close to the gauge of the metal for gauge steel and higher for plate and sheet.

Length

The fastener must also be long enough to fully engage all plies of material, plus the length of the drill bit in the case of self-drillers. Generally, this is rounded up to the next half or quarter inch. However, the longer the screw, the more torsional strain is produced during driving and in the case of very long fasteners, this can break the fastener or introduce wobble, leading to poor installation. Therefore, stainless steel with over-sized washers is often used for long screws for added strength and protection.

For More Information on Fastener Compatibility

To learn more about fasteners and their compatibility with different types of metal roof or wall panels, check out Metal Construction Association’s recently published technical bulletin, Fastener Compatibility with Profiled Metal Roof and Wall Panels.

Find a sales representative