Design and Performance Benefits of Insulated Metal Panels

In a prior post on insulated metal panels (IMPs) we reviewed some of the basic things everyone should know about this versatile and lightweight metal building component. In this posting, we will drill down a bit more on the benefits of incorporating IMPs into a new or retrofit construction project. Here are some of the top reasons they are so popularly used in both walls and roofs:

Insulated metal panels (IMPs) are a popular choice for walls and roofs for their energy conservation, durability, longevity and cost-savings.

Energy Conserving, Space Saving Insulation

Foam plastic insulation is used between the metal skins of IMPs. Such insulation has been accepted for use by building codes for quite awhile provided it meets certain conditions. IMPs have been tested and shown to meet or exceed all code requirements for construction and for energy conservation too. Part of their appeal over other ways to insulate is that they can achieve high performance in a thinner wall or roof assembly than would be required with other types of insulation, such as fiberglass. IMPs are available in thicknesses that range from 2 to 6 inches and have corresponding R-values from R-14 to R-46 allowing design professionals to select the thickness that matches the energy performance level sought in a particular building. Other insulation types would require thicknesses of at least twice as much to approach the same R-values as IMPs. Further, the metal interior and exterior skins are the only finish material needed so the total panel thickness is very space efficient. Thinner IMPs in the walls and roofs can save space in the building or on the site all while achieving high energy performance.

Durability, Longevity, and Low Maintenance

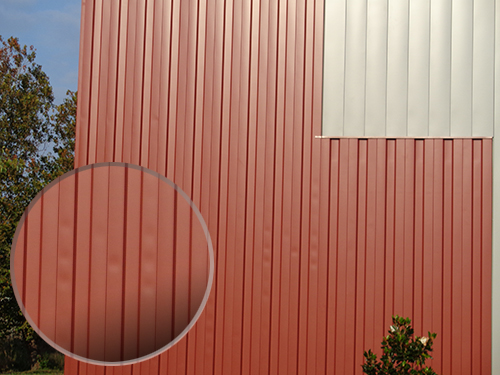
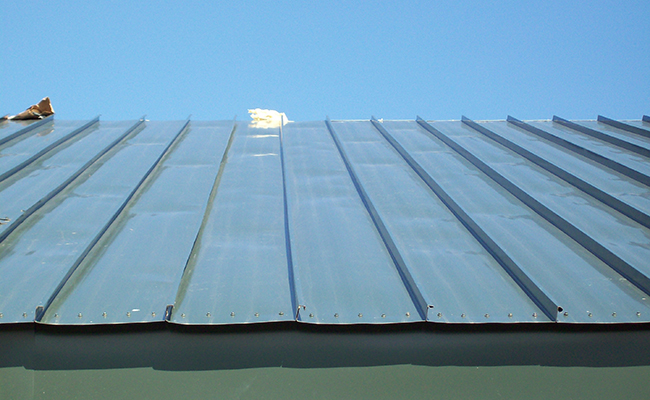
The manufactured panels are rigid and quite strong. They have been tested for compression, tensile, and shear strength with impressive numbers that come about because of the combination of the rigid foam and steel properties. The surfaces are made from the same long-lasting galvanized and factory finished steel used in other metal wall and roof panels so their resistance to weather, abuse, and even harsh conditions has been proven, making them very easy to maintain. In locations where severe weather and storms are a concern, they can also be specified to meet requirements for heavy winds, hail, and similar concerns. Plus, since the skins of the IMPs are made of noncombustible steel, they provide an ignition barrier as part of an overall fire protection scheme for the building.

Cost Saving Construction

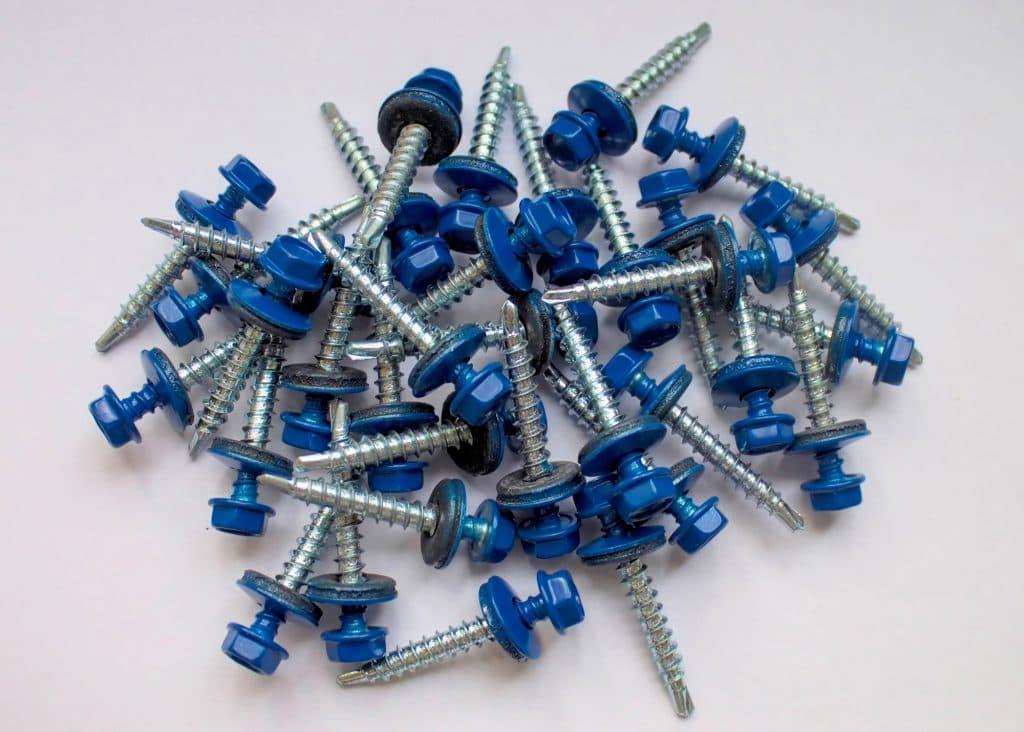
IMPs are an “all-in-one” product that takes the place of many other products and components used in traditional construction. Instead of requiring multiple trades and materials to be installed individually over some number of weeks, IMPs are installed by a metal building contractor and allow the walls and roof to be completely closed in with a single trade. The use of concealed fasteners in the side joint of the panels makes installation quick and easy. Unlike other construction systems, the inherent strength and resiliency of IMPs means that work doesn’t need to stop over weather concerns. All of this saves a considerable amount of labor costs and can also save a lot of time meaning buildings can be completed quicker and more economically. It could also mean that an owner is able to occupy and use the building sooner, thus reducing construction financing costs and allowing operations to begin more quickly.

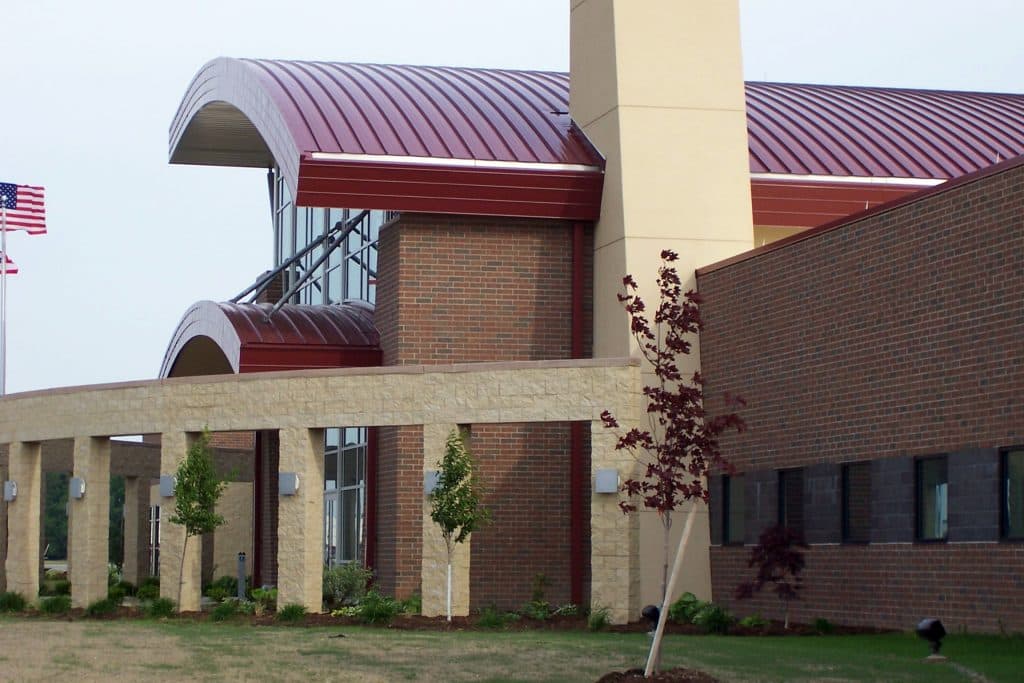
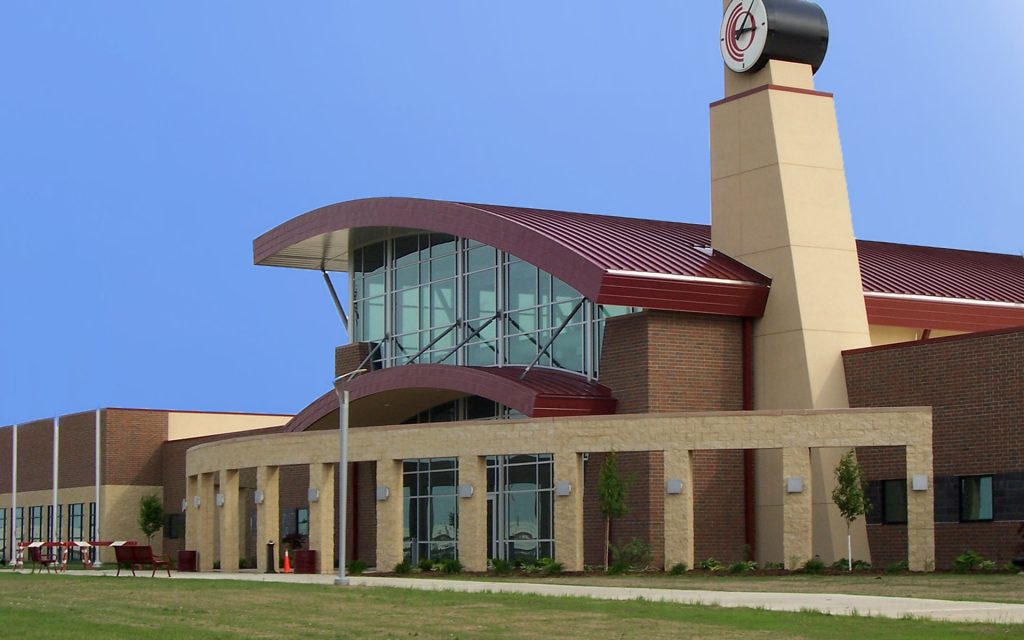
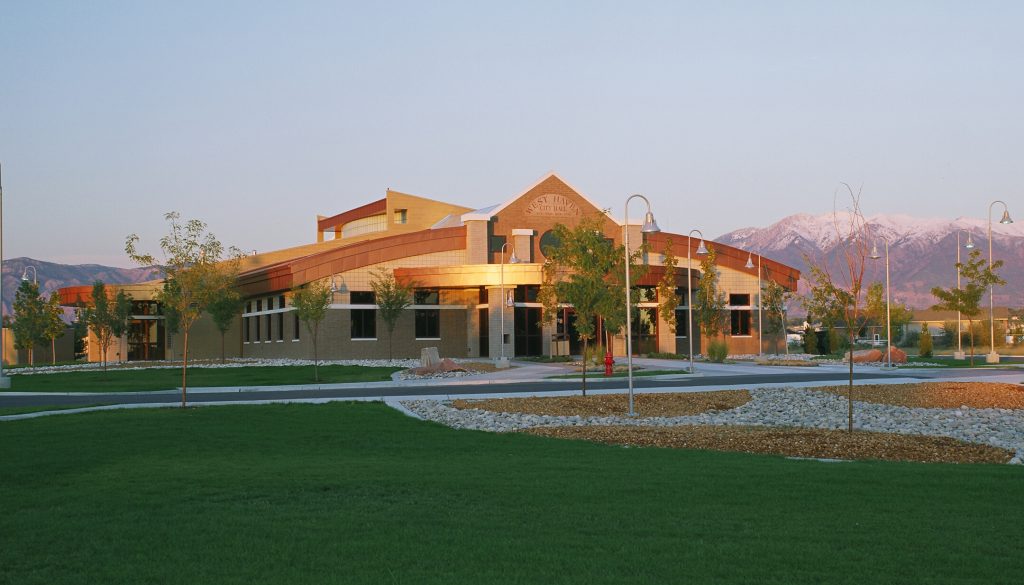
Versatility for Use in Many Building Types

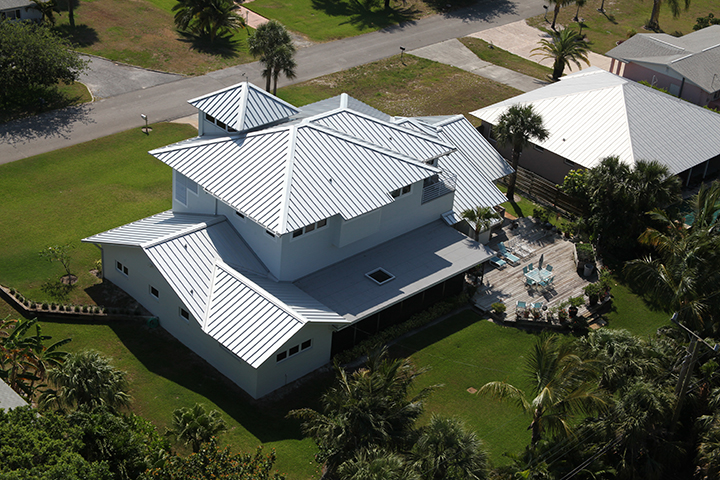
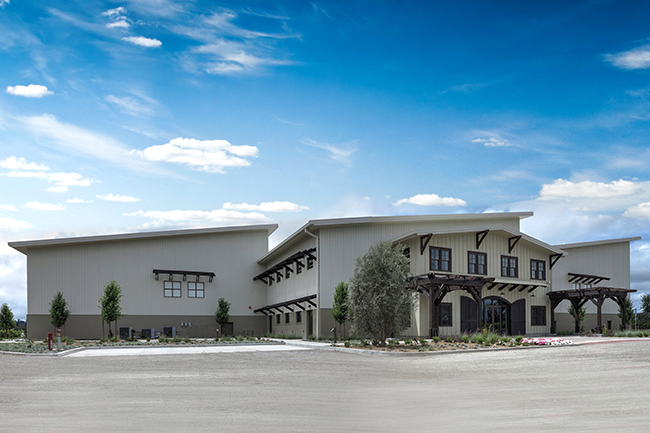
IMPs can be used in virtually any type of new construction and for many retrofit applications too. There is a range of modular panel sizes that can work successfully with different structural elements of the rest of the building. The finished profiles and colors can all be selected to match the design needs of the building with edges, corners, and trim details all based on simple, appealing aesthetics. There are even IMPs specially designed for cold storage or refrigerated space applications. These panels may be part of the building exterior or create an isolated space within a larger building. Either way, they are designed for the rigors of a high use installation.

With such a broad range of benefits and capabilities, you owe it to yourself to check them out for a building project that you may be involved in. The best place to start is by contacting your local MBCI representative, and by signing up for our newsletter to subscribe to our blog.

Oil Canning and Flush Metal Wall Panels

Oil canning is a broad term in the world of metal panel products and is considered one of the most vexing issues facing metal panel installations. The Metal Construction Association (MCA) defines oil canning as a “visible waviness in the flat areas of metal roof and metal wall panels.” Oil canning, also known as elastic buckling or stress wrinkling, occurs in all types of metal panels. While it is a common concern, there are steps you can take to minimize the problem.

Here, we’ll focus specifically on oil canning/distortion with metal flush wall systems, which for MBCI products includes our FW Panels and Designer Series. The type of oil canning that occurs with flush wall systems is not caused by anything dealing with the product itself or with how it’s manufactured. Rather, it is a consequence of what installers are putting the metal panels on and how the installation is done.

Installers must verify the substructure is in frame to prevent oil canning of panels.
Installers must correct any out-of-plane areas of the substructure to prevent metal panels from oil canning.

The simplest way to explain the phenomenon is that if the substructure is out of plane, i.e., not in alignment, stresses are put onto the panels that will create an appearance of oil canning. After all, as the old adage goes, you only get out what you put in. In the case of flush metal wall systems, the panels will look no better than what they are put on top of. If the substructure is wavy, out of plane, up or down, in or out, that condition will affect the panels’ performance and appearance.

Certain tolerances will have an effect on the panels’ appearance. With MBCI’s FW and Designer panels, tolerances would be 1/4 inch and 20 feet outward (away from two attachment points) and 0 inch and 20 feet inward. This means that if panels are forced into an inverted convex position, they will show stress rippling or oil canning more severely than when they’re stretched over a concave position, i.e., there can be some tolerance outward but zero inward.

With these types of panels, the biggest concerns with oil canning/distortion are aesthetics, but performance problems are also of concern, including possible engagement or sealing of the side joints.

Minimizing Oil Canning/Distortion of Panels

Prior to installation, installers should be checking the substructure with string lines or lasers and correcting or shimming any areas that are out of plane, especially since oftentimes substructures, such as stud walls or structural walls that the metal panels are attached to, are installed by other trades. Metal panel installers need to scrutinize each aspect for alignment and then either correct or shim to bring it within tolerance and within plane.

As is true with any metal panel product, for best results, proper handling and installation go a long way towards preventing the problem of oil canning in the field.

To find out more on how to minimize oil canning on your MBCI metal wall panels, contact your local MBCI representative, and sign up for our newsletter to subscribe to our blog.

Appropriate Standing Seam Clips for Roof Panels

Part of the beauty and appeal of standing seam metal roofs is that the fasteners holding the metal panels in place are concealed. That gives the roof its clean, continuous appearance that is often desirable, but it also avoids the issue of potential roof leaks around exposed through-fasteners. Concealed fastening doesn’t mean that there aren’t any fasteners, though, it just means they are installed out of sight – underneath the panels. The industry standard approach is to use a metal clip that fits over the edge of a panel and that is secured with a screw type fastener to the structure or substrate below. Then it is covered by an adjacent panel or trim. The important thing to know is that not all panel clips are made the same – for good reasons.

What determines the type of panel clip to use? Here are the most common things to keep in mind:

The Manufacturer

Each manufacturer of metal roofing typically has a range of metal panel types, profiles, and brands that have their own traits and characteristics. As such, they need clips to match and fit with the manufactured panels. Hence, the first place to start with panel clip selection, is for the roofing manufacturer to be clear on the options and choices available that are compatible with their roofing products.

Building Size and Type

Fixed clips (left) and floating clips (right) are two of the most commonly used types of clips.
Fixed clips (left) and floating clips (right) are two commonly used types of clips.

Manufactured metal buildings that include metal roofing commonly use very predictable, coordinated systems. Accordingly, a standard, one piece, “utility clip” is commonly used, primarily for snap together roof panels, on metal buildings that do not exceed certain widths causing undue expansion and contraction. One piece clips allow the roofing panels to expand and contract within the clip profile, but there are limits based on the amount of movement tolerated. Alternatively, in projects where the roofing is attached to something other than a metal building frame or where standing seams are used to secure the panels together, it is advisable to use a two-piece or “floating” clip. In these cases, a base piece is secured to the structure or substrate and the clip fits both into the base and over the roofing panel where it is seamed or folded into the vertical leg of the panel. Using this approach, the clip expands and contracts directly with the metal panel thus moving across the base and keeping the roofing attached.

Insulation

Roof insulation comes in different thicknesses, appropriately so for different climate zones and different roof designs. Since energy codes require at least some of the insulation to fit between the underside of the metal roofing panel and the structure (i.e. above the metal roofing purlins), the metal panel clip needs to be the right height to reach the full height of the insulation up to the top of the roof panel. Hence, manufacturers offer different sizes and heights of panel clips designed to work with different heights of insulation. In many cases, they also recommend the use of a thermal spacer underneath the clip to separate it thermally from the steel structure below. Note that the thermal spacer thickness is dependent on the insulation thickness over the steel purlin only, not the thickness of any insulation under the purlin.

A certified installer should install your standing seam roof to ensure proper installation of clips.

Other Factors

The panel clips connect the roof panels to the roof structure, so they need to be installed in a manner that allows them to do that job under normal and demanding circumstances. The driving issue in this case is not keeping the panel down, but preventing it from blowing off in a strong wind. Therefore, a structural engineer or other design professional may need to determine the proper spacing of the clips, the type and size of fasteners (i.e. screws) to use, or similar important details. Similarly, the proper installation of clips so that they seat and nest the way they are intended, means that qualified and certified installers / erectors should be used. In this way, roofing crews with the needed experience and training can help assure that the whole roofing system, including the panel clips, are installed properly.

To find out more about the most appropriate panel clips to use on a metal roof that you are involved with, contact your local MBCI representative.

Sealing the Deal: The Importance of Properly Sealing the Building Envelope Using IMPs and Single-Skin Panels

The primary purpose of a building’s envelope (roof and walls) is to protect the building’s interior spaces from the exterior environment and provide the desired exterior aesthetics. Whether choosing insulated metal panels (IMPs) for their superior performance or, instead, looking to the wide range of aesthetic choices available with single-skin panels—or some combination of the two—the common goal must always be to protect the building from the potential ravages of water, air, vapor, and thermal/heat. By ensuring proper installation of metal panels and, thereby, properly sealing the building envelope, problems can be mitigated, efficiencies maximized, and the integrity of the building protected.

Here, we’ll briefly consider the benefits of each panel, and some key considerations relative to their sealant needs and capabilities.

Insulated Metal Panels (IMPs)

IMPs are lightweight, composite exterior wall and roof panels that have metal skins and an insulating foam core. They have superior insulating properties, excellent spanning capabilities, and shorter installation time and cost savings due to the all-in-one insulation and cladding. In effect, IMPs serve as an all-in-one air and water barrier, and are an excellent option for retrofits and new construction. With their continuous insulation, roof and wall IMPs provide performance and durability, as well as many aesthetic benefits.

IMPs offer excellent R-value and improve energy efficiency to the building envelope.

Generally speaking, because of the nature of the joinery, it is easier to get a good seal in place with IMPs given their relative simplicity (i.e., putting the two pieces together with the sealant). They require great attention, though, in terms of air and vapor sealing—aspects largely controlled by the installers on a given project. As an example, vapor sealing in cold climates or applications is critical to the overall soundness of a building. Consider the damage a building could incur if moisture seeps into a panel and becomes trapped; it if freezes, it could push panels out of alignment. This would result in not just an unattractive aesthetic, but a performance failure as well. In order to be effective, all sealant and caulking must be fully continuous.

Single-Skin Panels

Single-skin panels, alternatively, offer the advantage of an expansive array of colors, textures and profiles. They are also thought to have more “sophisticated” aesthetics than IMPs. Single-skin panels are available in both concealed fastener and exposed fastener varieties, and are part of an assembly. They can be used alone or in combination with IMPs, and as long as the needed insulation is incorporated, single-skin panels can meet technical and code requirements, depending on the application. Single-skin products offer a wide range of metal roof systems and wall systems as well.

Getting the proper seal on single-skin panels may require extra sealants or closures, and have more parts and pieces that have to come together to create the seal. However, when properly installed and sealed, they can provide excellent performance in their own right. Some key caveats include ensuring panel laps are properly sealed with either tape or gun butyl sealants, and carefully inspecting air and water barriers for proper installation as well as penetrations through the wall for sealing/fire caulking prior to panel.

In most cases, following the details for the most common conditions will give you a successful and high-performing outcome.

Regardless of the type of metal panel used, taking the time and effort to ensure the sealing and caulking details are properly handled, metal buildings can protect the built environment and provide long-lasting quality and performance.

The Importance of Roof Installer Training and Certification

Many metal roofing installers may think that their years of experience on the job is enough. But even for those who have been putting up metal roofs for a long time, the truth is that if they haven’t put up a particular brand’s roof before, they need to go through that manufacturer’s installer training and get certified. There are several reasons for this.

  • More and more, architects are starting to specify that an installer must be certified by the manufacturer of the product being installed.
  • For many manufacturers, including MBCI, in order to get a Standard III warranty with no dollar limit—or any Day One warrantytraining and certification are required.
  • Installers need to know the proper technique and protocols—for a particular manufacturer’s product! After all, you don’t make any money by going back and fixing leaks.

There are many other standing seams that are very similar to those that MBCI sells, and while they may look similar, there will be a number of small differences, such as the way panels are notched or the way sealants are put in. Even the way companies test panels can be different. For instance, if you have a Florida or Dade County approval or an FM approval, that’s all tied into the way the roof system is tested. So, if someone has a project where one of those things is required, it is imperative to make sure the installer is using that brand’s system of doing things, down to every last detail. These are some of the things covered in certification courses.

Certification Courses and Installer TrainingInstaller Training

At MBCI, we offer a three-day course that covers all of our standing seam panels, and have a separate two-day course for insulated metal panels, which provides advanced installer training in metal roof installation through classroom lecture and hands-on application in a variety of MBCI’s products, assembling roof systems on a mockup to reinforce what was learned from the presentations. Courses take place once a quarter in different locations throughout the United States.

In terms of who should attend certification courses, generally speaking, it’s the person from the company who will be doing the actual work since a certified installer needs to be on the roof any time any work is being done on the roof. He or she is the one we train. And that installer is tied back to the company in order for them to receive certification. That company has to have workman’s comp and general liability insurance. If the certified person leaves the company to go elsewhere, the first company needs to certify someone else.

The Bottom Line of Certification

From a bottom line perspective, it’s important for companies to be proactive in making sure there is always someone on their team who is a certified installer for the products they use—or might use. Not only will they learn tips and tricks for proper installation, but it will also avoid a situation where you have a job, the panels are being delivered the next week and you realize you need someone to be certified. Maybe it’s three weeks until the next certification opportunity. You’ll want to have all that settled before you need it.

Just because you’ve been installing roofing for 30 years, doesn’t mean installer training and certification isn’t necessary. Our best advice is to come to the class and learn all the little idiosyncrasies about whatever manufacturer’s roofing panels you’ll be installing. This is a case where even a little knowledge goes a long way.

Fastener Compatibility with Metal Roof and Wall Panels

The installation of a new metal roof or wall panel on a residential home, business or commercial building takes care, precision and—of course—the right tools. Regardless of the structure, you’ll likely find that choosing the correct mechanical fastener plays a key role in the long-term performance, durability and efficacy of the project.

Many metal roof and wall panels, in fact, rely upon the use of quality mechanical fasteners to secure components to a structure. In order to guarantee a resilient and weather-tight attachment, it behooves the user to select an appropriately compatible fastener type for the specific metal construction, thereby ensuring expected benefits, such as energy efficiency, extended life cycle, and even lowering insurance bills for the owner. In other words, once the decision has been made to use metal building materials for your roof or wall project, the next step is figuring out how to hold it all together.

Know Your Fastener Options

Before selecting fasteners for the project, it is important for the designer or installer to understand the various materials and options available. Typically, this involves the following considerations:

  • What type of material and coating is appropriate?
  • What type of head do I need? Does it need to be painted?
  • Do I need a washer? If so, what material should I use?
  • Should I use self-tapping or self-drilling screws?
  • What thread count should I specify?
  • How long does the fastener need to be?
Many Types of Fasteners
The MCA provides a summary of the different types of fasteners in their technical bulletin, Fastener Compatibility with Profiled Metal Roof and Wall Panels.

Select a Fastener on the Basis of Material

Most fasteners are made from coated metal but both the type of metal and coating must be chosen on the basis of the materials the fastener is bringing together. Galvanic action between dissimilar metals can cause premature fastener failure and lead to leakage. Even stainless steel screws will corrode severely under the right (or actually wrong) conditions. In extreme exposure, sometimes the best option is to use galvanized screws and plan on replacing them at a later date with a larger screw once the zinc has been depleted.

Considerations for Self-Drilling Screws

Self-drilling screws have a drill bit built in and don’t require a pre-drilled hole. Although self-drillers save the installer the step of drilling a hole, they are not always a good idea. The available space between the back of the hole and the next physical restriction must be at least as big as the bit itself or the threads will not engage. Also, drilling a hole allows a quick inspection to ensure the hole is in the correct location and plies are aligned and parallel. Generally, self-drillers are used when going through thin gauge steel into thicker gauge steel and self-tappers are used when fastening two thin gauge plies.

Washers

Fasteners may be used with or without washers. While plastic washers help prevent leaks, they are not required on purely structural connections. When using washers, it is important to visually inspect the screw after installation to be sure they are properly compressed and not kinked. Exposed plastics generally degrade when exposed to ultraviolet light. Furthermore, use of neoprene washers may be prevented by restricted material lists, or “red lists.” Fastener heads themselves may be made of different materials than the rest of the screw, long-life ZAC heads being the most common example.

Fastener Profiles

Fasteners have different profiles. Flat or “pancake” screws are used when low profile installation is necessary and may have Philips, hex, or Torx sockets. Which socket to use is usually an installer’s preference based on accessibility restrictions. Another common feature is an over-sized dome beneath the head to encompass a larger washer. Also called shoulder screws, these screws are useful when thermal movement might distort the holes.

Colored Fasteners for Metal Roofs
Fasteners can also be colored to match the roof or wall panel.

Thread Count per Inch

Thread count per inch, or TPI, must also be considered. Most commonly, fasteners are installed through the thinner ply first and grip in the thicker ply, pulling the plies together. Therefore, TPI selection is usually driven by the thickness of the thicker ply. Generally, the TPI is close to the gauge of the metal for gauge steel and higher for plate and sheet.

Length

The fastener must also be long enough to fully engage all plies of material, plus the length of the drill bit in the case of self-drillers. Generally, this is rounded up to the next half or quarter inch. However, the longer the screw, the more torsional strain is produced during driving and in the case of very long fasteners, this can break the fastener or introduce wobble, leading to poor installation. Therefore, stainless steel with over-sized washers is often used for long screws for added strength and protection.

For More Information on Fastener Compatibility

To learn more about fasteners and their compatibility with different types of metal roof or wall panels, check out Metal Construction Association’s recently published technical bulletin, Fastener Compatibility with Profiled Metal Roof and Wall Panels.

Nice Curves! Stunning Architecture with Curved Roofing and Walls

Breaking away from simpler panels, more and more architects are experimenting with arched and curved metal roofing and wall panels to upgrade their designs. This enables designers to incorporate exciting elements like concave and convex curving, not as feasible with other cladding materials.

Combined with unique angles, increased edge finishing options, appealing gutter options and greater compatibility with shingle types, architects now have access to a greater assortment of mix-and-match options.

For example, at Owens Community College in Findlay, Ohio, a regal red, double-curved canopy crowns the curtainwall with 15,500 square feet of 22-gauge curved metal roof panels. Designed by Rooney Clinger Murray Architects, the structural roofing panel system, fabricated by MBCI, is ASTM tested for air infiltration and water penetration, and incorporates a 2-inch tall standing seam that was field seamed during the installation process. The contractor, Charles Construction Services, won the American General Contractors (AGC) Build Ohio Award for “New Construction Under $10 Million.”

Owens Community College
For Owens Community College, the Curved BattenLok® metal panels in red accentuate the arch of the campus, making it the focal point of the building.

Another noteworthy curved design example is the Central Los Angeles Area High School #9, designed by HMC Architects. “Metal enabled us to clad buildings of different geometries, including curved geometries, in one material, while also giving them a special appearance,” reported Kerstin Kohl, spokesperson for the project’s design architect, COOP HIMMELB(L)AU, in a Metal Construction Association case study, Steeling Art for Students.

Using CAD and BIM for Curved Metal Panels

For designing and fine-tuning curved metal creations, the latest CAD and BIM features are key tools for architects.

In creating the “geometry that has been freed from the relentlessness of the orthogonal layout,” as described by Mark Dewalt, AIA, principal at Valerio Dewalt Train, in a recent article in Metal Architecture magazine, New Trends in Metal Architecture, designers are using CAD in shop drawings to support unique façade fabrication.

“The use of computer design to warp and twist and perforate will give metal greater longevity, added Kevin Marshall, AIA, LEED AP BD+C, associate architect, Integrated Design Solutions.

Similarly, BIM software is further supporting enhanced compatibility with metal roof and wall designs with newer features such as automated light gauge steel wall framing work and the ability to more easily configure supporting structures, openings, complex L or T connections and service hole positions while providing photorealistic renderings so that the client can see exactly how their building will look once built.

West Haven City Hall
West Haven City Hall combines MBCI’s Curved BattenLok® in Copper Metallic with Artisan® Series and Flat Sheet.

Ensuring a Tight Building Enclosure with Curves

As with any roofing type, designing and installing a tight building enclosure for curved roofing and walls is essential for delivering a high performing building.

For starters, architects must choose an appropriate vapor retarder, especially in cooler climates and interior relative humidity levels of 45 percent or greater. Also, buildings with high humidity interiors and construction elements that may release moisture after the roof is installed–such as interior concrete and masonry, plaster finishes and fuel-burning heater– require special considerations when choosing vapor retarders.

With utility clips, some curved panels will lay tight to the wood deck, but if tin tabs are used to attach the moisture barrier to the wood deck, then they will need to be covered to prevent the tabs from rusting the back side of the panels. Similarly, plastic washers may not be the best option as they run the risk of impacting the panels, resulting in undesired aesthetics. Rather, peel and stick membranes are a preferred underlayment because they eliminate the potential of underlayment fasteners penetrating or dimpling the panels.

A Savvy Look for Design

Whether it’s wavy, circular or some other exciting soft geometric shape, curved metal roofing and walls open up all kinds of new design possibilities. Out of the box, literally, architects are actively producing exciting, eye-catching creations with these welcomed capabilities.

Proper Care and Usage of Roof Seamers

As more standing seam metal roofs are being installed than ever before, it is imperative for roofing contractors to have the proper tools when quoting jobs. Remember, a properly formed seam is important for aesthetics, weathertightness and wind uplift. With the right tools in hand for these complex installations, you can get the job done faster, better and with greater cost efficiency than your competitors.

Know Your Type

Seamer use depends on the type of metal standing seam panels on the project: double lock seam, symmetrical seam, one-piece snap-lock interlock and two-piece snap-lock interlock. You will need to identify the type of panel in order to choose the right seamer and confirm that you are using the right seamer for the job. The double lock seam, also known as a Pittsburgh seam, is double-folded, meaning the finishing seam is 180 or 360 degrees. This applies to MBCI’s Double-Lok® and SuperLok® panels. A single-lock seam is 45 or 90 degrees, such as MBCI’s BattenLok® HS and Curved BattenLok®.

Follow Manufacturer Instructions Explicitly

Adherence to the field manual instructions is critical to ensure proper installation that will not result in damage to the seamer and/or panels. It is critical to carefully read the manufacturer’s manual thoroughly before beginning the seaming operation, whether renting or buying the equipment. Not only will this give you the best possible result, but it can also save you the headache of incurring costs of replacing or repairing the seamer due to misuse.

Step-by-Step Guide to Pre-Seaming

  1. Locate field manual in the seamer box and review operational procedures.
  2. Locate power source and check against power requirements in field manual.
  3. Check seams for proper engagement.
  4. Clean dirt, debris and excess sealant from seams and panel surfaces to avoid interfering with the seaming operation.
  5. Panels should be seamed with an electric seaming tool as panels are being installed.

Seamer Equipment Checklist

Keys to Seaming Success

  1. The seamer should be supplied or recommended by the manufacturer. Don’t assume another manufacturer’s seamer will work on the panels you are installing. For example, other manufacturers may have a panel similar to MBCI’s BattenLok® HS but that doesn’t mean that an MBCI seamer would work on any of those panels. It is important to use the seamer recommended for the specific product. It must be the proper seam for the engineering. That is if you don’t seam it properly, the manufacturer won’t know if its load charts and tables are accurate.As previously stated, carefully read and follow seamer instructions for proper results. You will need a properly formed seam to ensure you achieve the desired aesthetics and weathertightness as well as mitigating risk from wind uplift. The seamers are miniature roll formers and need to be installed in a very specific way.
  2. Take care of the seamer—don’t leave it out in the rain or in other weather conditions where it could suffer damage.
  3. If not forming seams properly, stop immediately and call the manufacturer or company providing the seamer
  4. If renting, when returning the seamer make sure all equipment is returned, i.e. hand crimpers or hand seamers.

For more information on MBCI seamers, please review the manuals for specific panel types.

How to Help Prevent Oil Canning

Oil canning is defined as the visible waviness in the flat portion of a metal panel.  Oil canning is a visual issue, not a weatherproofing or performance issue.  However, building owners will complain about waviness in metal panels on roofs, walls, and perimeter edge metal.  Edge metal and metal wall panels are more of a concern than low-slope metal panels because edge metal and wall panels are visible from the ground.  Steep-slope metal panels and shingles are also visible, so awareness of potential oil canning is important.

Oil Canning on a Metal Roof

What Causes Oil Canning?

Oil canning can happen when unwanted stresses are introduced at fasteners, clips, and over purlins and uneven substrates.  Over-driven fasteners, clips that are slightly misaligned relative to the clip/seam interface, and too much insulation between the purlins and panels can introduce these unwanted stresses.  A misaligned panel or edge metal clip, certainly after the seam or drip edge is crimped tight, will add stresses to metal panels and edge metal

Tips to Help Prevent Oil Canning

  1. Place clips correctly: Setting clips in the proper location for edge metal and metal panels (roof and wall) is critical.  The clip needs to fit into a panel seam without forcing the vertical seam out of plane.  The clip needs to be aligned correctly and sized appropriately to not compress the vertical portion of the seam.  Clips that secure edge metal need to be positioned correctly so that crimping the drip edge won’t twist or bend the edge metal.
    Although not highly visible, low-slope structural panels can oil-can at clip locations and where insulation is draped over purlins.  Compressed insulation at purlins can “push back,” adding stress to the panel and resulting in oil canning.
  2. Consider the roof color: Sometimes oil canning is inevitable.  The color of the metal or coating won’t really make a visual difference, but darker colors panels will heat up more in direct sunlight.  This may make oil canning worse in some cases.  However, striations and small ribs (which also add strength) may help prevent or hide oil canning.
  3. Choose a thick metal: Metal thickness matters, so specify metal that’s as thick as possible to avoid oil canning.  Thicker metals are stiffer, so they may resist deformation due to unwanted stresses.  This reduces the chance of oil canning in edge metal and wall panels, which are most commonly smooth-surfaced.

For more information on oil canning and its causes, see the Metal Construction Association’s white paper on the subject, which can be found at www.metalconstruction.org.

Consider these ideas on your next job.

Rooftop Solar Energy

Solar panels on metal roof

The “Sustainability begets resilience” blog ended with a nod to rooftop energy production. So, how will you respond when, not if, a building owner asks you about rooftop solar energy? An appropriate and accurate answer is, “The combination of a metal roof and solar energy is a recipe for a long-term, high-performance roof system,” or something like that. The fact is a metal panel roof is an ideal substrate for a solar energy system.

Installation Methods

Solar energy is the broad term for two sub-categories: photovoltaic (PV) systems (electricity) and solar thermal (hot water) systems. Besides the obvious differences, the rooftop attachment concepts for both systems are quite similar. PV panels and solar thermal panels are commonly rigid with metal frames. Attachment to metal roofing panels can be direct or include rails. Both methods use a customized clip that attaches to the metal roofing panel seam; then, metal-framed PV panels or rails are attached. The need for rails (think “purlins”) depends on the seam spacing and layout of the roof panels relative to the size and layout of the PV or solar thermal panels. Overall roof slope matters, too. Directly attached solar energy systems match the slope of the roof, which is not necessarily the optimum slope for energy production.

Structural & Performance Requirements

Other considerations include the structural load, fire resistance, wind resistance and the use of code-approved materials and components. A solar energy system adds weight to the roof. Does the structure need updating to carry the gravity load as well as any increased wind uplift loads? Adding panels to the roof will increase the sliding load (i.e., drag load) on the clips holding the roof panels to the substructure. And let’s not forget about the potential for snow retention or increased snowdrifts that will add weight.

Fire and wind resistance should be discussed with the manufacturer or designer of the PV or solar thermal system. Fire and wind design are incredibly important, and there are very specific code requirements to meet.

Layout Considerations

Rooftop layout of solar systems, especially PV, should not block drainage or impede roof maintenance. Also, clearance at roof perimeters and access to critical roof areas (e.g., drains, rooftop units) is necessary. Last but certainly not least, check with the metal panel roof system manufacturer about warranty issues regarding a rooftop solar energy installation.

While there are many things to consider when installing solar energy systems on roofs, the long service life of metal panels and the ease of installation certainly make metal roofs and solar energy a great combination!

Find a sales representative