Marketing Your Roofing Company: 7 Proven Strategies That Work

Back in the days of the Wild West, “branding” meant leaving your unique mark on your cattle to claim ownership across the sprawling range. It symbolized identity and loyalty for those who rode the trails. In today’s fast-paced business landscape, branding still revolves around leaving a mark, but it’s no longer about physical property. Today, it’s about carving a lasting mental and emotional impression in the minds of your customers. For your roofing company, that means crafting a brand that reflects your values and rises above the digital noise of the crowded construction industry to get noticed. 

What Is—and Isn’t—a Brand? 

Let’s break it down. A brand isn’t your logo, your website, or even your latest roofing service. It’s not what you say it is. Instead, it’s the perception and emotional connection your customers form based on their experiences with your business. It’s the gut feeling they get when they hear your name or see your trucks roll by. Your brand is the sum of every interaction, from a quick estimate to a finished roof, shaped by how your customers feel about you.

1. Brand Awareness in 2025

Today’s data shows people encounter upwards of 10,000 brand messages daily—double what they faced in 2020—thanks to the explosion of AI-driven ads, immersive platforms, and endless scrolling. For your roofing company, standing out isn’t just about having a solid service; it’s about cutting through this clutter with a memorable brand campaign. Research still holds that people retain only 10% of what they hear after three days, but pair that with a striking visual, like a drone shot of your latest roof install, and retention jumps to 65%. 

Your brand needs to be bold, shareable, and consistent to stick in people’s minds. Studies now suggest a brand takes 7–10 impressions to register in today’s oversaturated market. Your job? Get prospects and customers buzzing about your work—liking, sharing, and talking about it across their networks. Nail that a few times a week, and you’re on track to dominate your local scene. 

Here’s how to make it happen with today’s top tools: traditional marketing, website development, search engine optimization (SEO), email marketing, social media, and cutting-edge digital strategies.

2. Traditional Marketing

Traditional channels like billboards, radio, and trade shows aren’t dead in 2025. They’ve just evolved. While print newspapers and Yellow Pages have faded into obscurity, hyper-local tactics like digital billboards with QR codes or sponsoring community events can still build awareness. The catch? They lack the real-time analytics of digital platforms and don’t let you chat directly with your audience. Pair them with online efforts for the best bang for your buck. Think of them as a supporting act, not the headliner.

3. Website Development

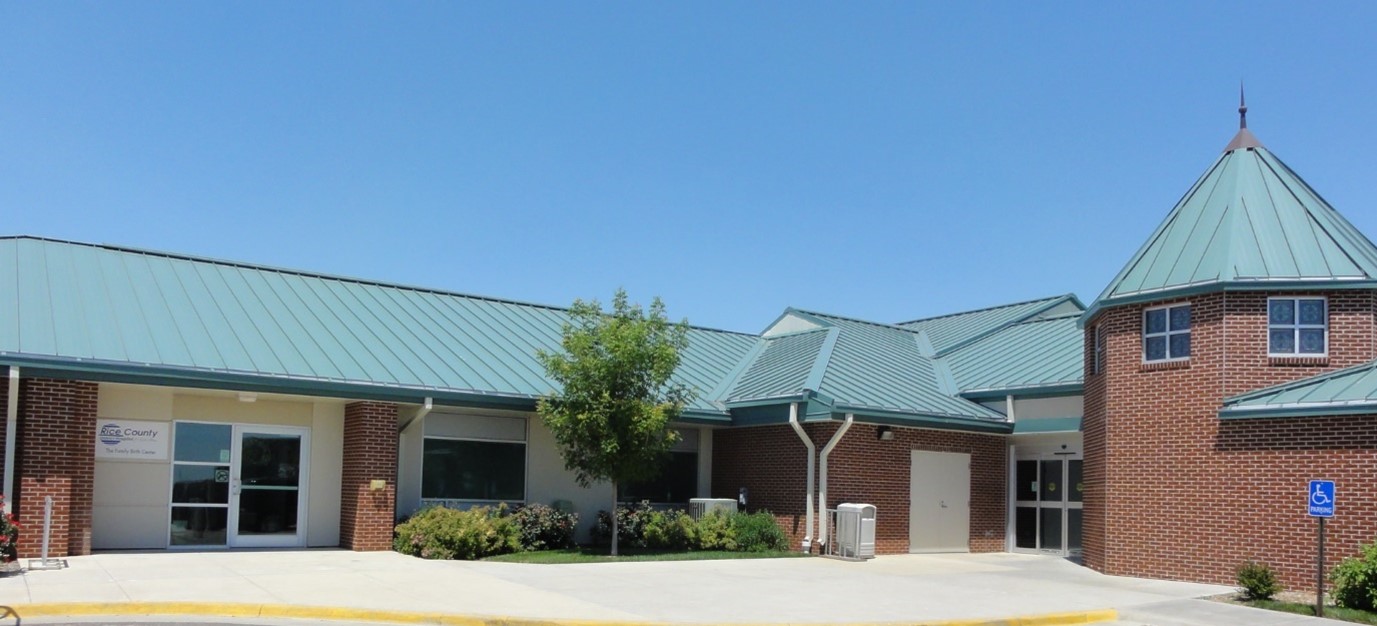
Your website is your 24/7 salesperson, and in today’s world, it’s non-negotiable for any roofing business. Why? It’s cost-effective, accessible, and builds trust. A sleek, fast-loading site signals you’re a pro. Stats show 80% of users judge a company’s credibility by its web design alone. Plus, with voice search and AI chatbots now standard, your site can answer questions like “How much for a new roof?” even while you’re asleep. Make it mobile-friendly, easy to navigate, and packed with visuals of your work. Before-and-after photos still seal the deal.

4. SEO (Search Engine Optimization)

SEO keeps your roofing company popping up when folks search “roof repair near me” on Google, Bing, or even AI-powered engines. It’s all about boosting your online visibility with smart content. Start simple: sprinkle keywords (e.g., “emergency roof repair [your city]”) into your site’s titles, headers, and pages. Share blog posts or videos that tackle common roofing questions like “Can my roof handle another storm season?” Keep navigation smooth so customers can reach you fast. Not sure where to start? Think like your client: What are they typing into their phones at 2 a.m. with a leaky roof?

5. Email Marketing

Email is still a powerhouse. Everyone’s got an inbox, and it’s a direct line to your audience. With platforms like Mailchimp, you can track opens, clicks, and even sales tied to each campaign. Personalize it: send storm prep tips to homeowners or a “thanks for choosing us” follow-up with a discount on gutter cleaning. Automation’s your friend. Set up drip campaigns that trigger when someone signs up for a quote. It’s low-cost (many plans are still free for small lists) and flexible. Tweak it if it’s not working. Just pick a provider that scrubs bad email addresses and serves up solid stats.

6. Social Media

Social media’s your megaphone, with platforms like Instagram, TikTok, and LinkedIn driving engagement and leads. It’s 100% better at closing deals than cold calls ever were. Post quick drone clips of your crew in action, share customer testimonials, or jump on trends like a “Roofing Fails” series with a humorous twist. Focus on one platform first (Instagram for visuals, LinkedIn for pros) and keep it consistent—weekly posts with punchy captions and eye-catching images. Tools like Buffer or Later can auto-post for you, and analytics will show what’s clicking. Engage back—answer comments, share others’ posts, and build a community around your brand.

7. Digital Marketing

Ready to level up? Digital ads are smarter than ever. Paid social ads on Meta (yep, still kicking with 3 billion+ users) let you target homeowners in your zip code who’ve searched “roof leaks.” Search Engine Marketing (SEM) via Google Ads puts you at the top of “roofing contractor” searches—perfect for urgent jobs. And programmatic ads? They use AI to hit the right people at the right time, no guesswork needed. Budget varies, but even $100 a month can stretch far with precise targeting. Work with a pro if you can. They’ll optimize it so you’re not just spraying and praying. 

Great Marketing Means Business 

Branding isn’t optional. It’s your roofing company’s lifeline. With a mix of sharp messaging, standout visuals, and the right tools, you can break through the noise and leave a mark as lasting as a Wild West brand. Whether it’s a killer website, a viral TikTok, or a targeted ad, now’s the time to connect with your audience and build a reputation that keeps the jobs rolling in. 

Panel Repair Technical Bulletin

Spray Foam Insulation on Interior Surfaces of Metal Panels

How to Avoid Common IMP Installation Mistakes

Insulated metal panels (IMPs) are ideal for many roofing and wall applications. They are considered a top-of-the-line choice known for their superior insulation value, high performance air barrier, design flexibility, and fast installation. The simplicity of installation creates a high-performance building envelope. The many design options provide a versatile building solution for commercial, industrial, and institutional projects.

Sounds great, doesn’t it? What’s the catch? Well, those benefits won’t mean much if proper care is not taken during the installation process to ensure you’re getting what you paid for. Potential consequences can span the gamut—from minor aesthetic headaches to extremely costly errors such as leaks and structural issues.

Here are some ways to avoid common pitfalls when installing IMP panels on your next metal wall or roof project.

MET_DoubleLok, 7.2, CFR, CF Mesa_Boston Sports Institute_BARNES buildings_Ext_021_0419_resized

1. Pay attention to the manufacturer’s product installation manuals.

Installation manuals are not just for show! Even the most experienced installer should read, review and understand the installation guide before installing IMPs, and the panels should always be installed in accordance with the project’s installation drawings.

Don’t simply rely on the “what-you’ve-done-before” mindset. Take the time to review the specifics for every individual project. In addition to providing the information needed to execute a successful install, it can also give installers an opportunity to build upon their own knowledge base. One of the most common errors is related to proper receipt and handling of the panels. Investing a few minutes before the project starts and at the start of each day to review key topics helps avoid costly errors and improves production.

If you have a question or something does not seem right stop and call the manufacturer. It is always best to address a problem up front than try and fix a problem after the building is in operation.

2. Equipment check. Do you have what you need?

To keep your IMP installation on track, it’s imperative to ensure you have the equipment you’ll need for the job. Does your project need one or two forklifts, is a crane a better option? Will your project include longer-length IMPs being installed in a vertical orientation? If so, you may need special lifting equipment so as not to damage the panels. Whatever the details, crews need to be prepared to receive a project’s specific materials on site. A little advance planning will ultimately save you time and money by reducing labor and avoiding costly mistakes.

3. Don’t assume every IMP application is the same.

All buildings are not created equal. Just because a construction crew has had experience installing insulated metal panels on past jobs, doesn’t mean they can assume the process will be exactly the same every time. There will always be specific conditions and variables that need to be taken into consideration. Techniques used for vertical industrial panels will be different for horizontal architectural panels.

The vapor barrier (a key function of an IMP) is a great example of how a miscalculation can be problematic. Depending on the panel, the vapor barrier may be applied either at the factory or at the jobsite. If the project calls for a cold storage environment, the “warm” side of the vapor barrier will be on the exterior. Alternatively, a commercial or industrial application generally calls for the vapor seal to be on the opposite side of the panel. Confuse placement of the seal and you’re bound to run into problems down the road.

4. Be on the lookout for creases, buckles and framing alignment.

A crease or buckle on the face of a panel might seem like no big deal, but that couldn’t be further from the truth. In fact, framing alignment is one of the most critical aspects to ensure a proper fit-up of the construction as a whole. In terms of the panels themselves, not only will a framing misalignment not LOOK right but can also cause numerous efficiency and performance issues. Installing inexpensive shims can avoid panels needing to be replaced.

Additionally, make sure the first panel is plum and square, if you start right it is much easier to finish right.

Purlins must be level and square and all framing and bracing should be installed before installing panels. (The IMP manufacturer should specify the amount of tolerances allowed.) Also, take care with caulking and taping, foam-to-foam connections (in order to mitigate potential vapor leaks), seaming, and lap joints.

Attention to detail will avoid costly mistakes.

5. Always think ahead.

Being proactive may be the most important piece of advice construction crews need to hear.

For one, be sure to have a panel surplus on hand. You may be of the mindset that ordering extra panels is at worst a waste or at best, not worth the effort. This is a common judgement error that often leads to installation delays. If a crew has only ordered the exact number of panels needed for a job and there is any damage to the product, whether prior to delivery, on-site or during the installation, there a risk to the project schedule. Waiting on replacement panels can wreak havoc on schedules, especially with panels that may need special manufacturing due to custom components, finishes or colors. What do you do with extra panels you don’t need on the initial installation? Building owners can hold on to any surplus panels to be used as replacements, as needed, over the lifecycle of the building. A little preparation today can go a long way.

Other best practices include understanding the project’s site conditions and ensuring crews remain crews up to date on proper installation techniques—including staying current with training and certifications.

By taking this advice to heart, you can exponentially increase your ability to enjoy the many benefits of IMPs and be confident in your investment. For more information on MBCI’s insulated metal panels and proper installation guidelines, we encourage you to contact your local MBCI representative or visit our website.

Insulation Considerations for Metal Building Projects

Once you’ve set your sights on metal panels for your next building project, insulation will be one of the first, and most important, considerations. There are so many variables, though, so how do you know what’s best?

When you’re trying to make a determination of the insulation type, you should first identify what’s driving your decision making. Are your insulation requirements based on external parameters, such as job specs or established code requirements, or is there some other self-proposed condition at play like the end-use function of your building? Do you require upfront cost savings or is long-term value what you’re after?

Here we’ll take a look at some of the most common determining factors and how they might affect your insulation choices.

Urology Medical Office_1_resized

Energy Codes

Depending on whether you’re building in the commercial or residential arena, and what the physical location of your project is, you may have to adhere to strict energy/building codes that will be an unmovable goal post in your decision making.

Are there any local code or project-specific stipulations as far as minimum R-values for the roof or for the walls? What must you be in compliance with? There can be many different aspects of an energy or building code that you will need to research. For example, there may be an envelope solution where the whole building nets out “X” R-value. Or, a prescribed method could be mandated, where each individual component (i.e., windows, doors, walls, etc.) going into that building cannot exceed (or must meet) a particular requirement.

Let’s say, as an example, you have a code that requires you to have a continuous R-value at your structural attachment point. Depending on what that requirement is, it may be harder to achieve that by using a rolled or batt fiberglass systems. You might be able to achieve it much more easily with a componentized system using metal decking/liner and rigid board insulation, or perhaps an insulated metal panel (IMP) may be better suited. In that case, you could be looking at spending more money for that panel system while saving money on the labor … which brings us to the next variable: upfront costs.

Upfront Costs

Another critical factor is the cost associated with materials and labor of the system you’re going to install. Let’s say, for instance, your needs require a higher-end type installation in order to reach higher R-values or a code-prescribed method. How are you planning to achieve that?

In some instances, you may be looking toward an insulated panel system, which can readily give you those higher installed R-values. While these are extremely efficient systems, there can be a notable bump in the panel material price to get to that same level than if you choose a single-skin approach with a fiberglass or rigid board insulation system. You would, therefore, need to accurately compare the installed costs of the two systems versus just the material alone. Which will be less expensive/more efficient: the multiple components with lower individual costs plus more labor time and expense to assemble OR the potentially higher individual IMP panel price but with less time and expense to install? You will need to look at the project holistically to determine which is more cost-efficient for the specific situation.

Long-term costs, value and end-use functionality

Oftentimes, upfront material and labor costs need to be evaluated in terms of potential long-term savings and value. Some things to consider here are what your big picture needs are for the structure, including an assessment of how it will be used now and in the future. Unlike with dictated codes and regulations, here it may be more a question of wants vs. needs or owner-occupying vs. vendor leasing.

While you might want an R-30 building, for instance, is it economically beneficial for your end use of the building? Let’s use this example: If you’re a homeowner using a metal structure to store relatively non-valuable belongings, how well does it have to be insulated? Is it worth a high price point? In this case, perhaps single layer roof and wall insulation will be adequate for your needs.

If on the other hand, you’re a builder contracted to construct a structure for which interior climate control is critical for the end use—either because of the production to occur inside or perhaps due to food storage or other temperature-sensitive contents—then you might lean more toward an insulated panel system. In another example, if there’s going to be the potential for an abundance of heat or moisture in the building, as with paper products production or wastewater treatment, then you’ll want to be certain that the insulation system you use best resists such an interior climate and doesn’t permit condensation to form. In this example, it is critical that the structure is significantly protected so that moisture cannot become trapped in the roof or wall assemblies leading to reduced building efficiency or even formation of mold.

You should also consider how long it will take to recoup your initial investment. Obviously, for instance, you may spend less money upfront by only putting 4-inch blanket in your single layer metal walls as opposed to choosing to install an insulated metal panel (IMP) system, but long-term, is the money you save by going with the lesser insulation system going to be more than what the energy savings would be over the time that you’re the occupant of the building?

If you’re only going to be in the building for one or two years, or you’re not even occupying the building, you might be tempted to install a lesser expensive system, but then you might be risking not being able to retain tenants or impacting future resale value.

What Are the Insulation Options?

Once you’ve identified what the driving factors are for your insulation system choice, you can match up your needs with most popular options, which are:

Fiberglass insulation solutions, including over-the-purlin systems; cavity fill insulation systems; batt insulation; rigid board insulation via a composite system with metal decking and vapor barrier; or spray-on insulation systems. Alternatively, if a foam core insulation is preferred, it may be worth considering the use of insulated metal panels (IMPs) that are designed, engineered, and fabricated to be compatible with metal building construction as an envelope building solution.

For more specifics on the types of insulation systems that are available, check out this MBCI blog article: https://www.mbci.com/coordinating-roof-insulation-with-metal-building-construction/

Sealing the Deal: The Importance of Properly Sealing the Building Envelope Using IMPs and Single-Skin Panels

The primary purpose of a building’s envelope (roof and walls) is to protect the building’s interior spaces from the exterior environment and provide the desired exterior aesthetics. Whether choosing insulated metal panels (IMPs) for their superior performance or, instead, looking to the wide range of aesthetic choices available with single-skin panels—or some combination of the two—the common goal must always be to protect the building from the potential ravages of water, air, vapor, and thermal/heat. By ensuring proper installation of metal panels and, thereby, properly sealing the building envelope, problems can be mitigated, efficiencies maximized, and the integrity of the building protected.

Here, we’ll briefly consider the benefits of each panel, and some key considerations relative to their sealant needs and capabilities.

Insulated Metal Panels (IMPs)

IMPs are lightweight, composite exterior wall and roof panels that have metal skins and an insulating foam core. They have superior insulating properties, excellent spanning capabilities, and shorter installation time and cost savings due to the all-in-one insulation and cladding. In effect, IMPs serve as an all-in-one air and water barrier, and are an excellent option for retrofits and new construction. With their continuous insulation, roof and wall IMPs provide performance and durability, as well as many aesthetic benefits.

IMPs offer excellent R-value and improve energy efficiency to the building envelope.

Generally speaking, because of the nature of the joinery, it is easier to get a good seal in place with IMPs given their relative simplicity (i.e., putting the two pieces together with the sealant). They require great attention, though, in terms of air and vapor sealing—aspects largely controlled by the installers on a given project. As an example, vapor sealing in cold climates or applications is critical to the overall soundness of a building. Consider the damage a building could incur if moisture seeps into a panel and becomes trapped; it if freezes, it could push panels out of alignment. This would result in not just an unattractive aesthetic, but a performance failure as well. In order to be effective, all sealant and caulking must be fully continuous.

Single-Skin Panels

Single-skin panels, alternatively, offer the advantage of an expansive array of colors, textures and profiles. They are also thought to have more “sophisticated” aesthetics than IMPs. Single-skin panels are available in both concealed fastener and exposed fastener varieties, and are part of an assembly. They can be used alone or in combination with IMPs, and as long as the needed insulation is incorporated, single-skin panels can meet technical and code requirements, depending on the application. Single-skin products offer a wide range of metal roof systems and wall systems as well.

Getting the proper seal on single-skin panels may require extra sealants or closures, and have more parts and pieces that have to come together to create the seal. However, when properly installed and sealed, they can provide excellent performance in their own right. Some key caveats include ensuring panel laps are properly sealed with either tape or gun butyl sealants, and carefully inspecting air and water barriers for proper installation as well as penetrations through the wall for sealing/fire caulking prior to panel.

In most cases, following the details for the most common conditions will give you a successful and high-performing outcome.

Regardless of the type of metal panel used, taking the time and effort to ensure the sealing and caulking details are properly handled, metal buildings can protect the built environment and provide long-lasting quality and performance.

The Importance of Roof Installer Training and Certification

Many metal roofing installers may think that their years of experience on the job is enough. But even for those who have been putting up metal roofs for a long time, the truth is that if they haven’t put up a particular brand’s roof before, they need to go through that manufacturer’s installer training and get certified. There are several reasons for this.

  • More and more, architects are starting to specify that an installer must be certified by the manufacturer of the product being installed.
  • For many manufacturers, including MBCI, in order to get a Standard III warranty with no dollar limit—or any Day One warrantytraining and certification are required.
  • Installers need to know the proper technique and protocols—for a particular manufacturer’s product! After all, you don’t make any money by going back and fixing leaks.

There are many other standing seams that are very similar to those that MBCI sells, and while they may look similar, there will be a number of small differences, such as the way panels are notched or the way sealants are put in. Even the way companies test panels can be different. For instance, if you have a Florida or Dade County approval or an FM approval, that’s all tied into the way the roof system is tested. So, if someone has a project where one of those things is required, it is imperative to make sure the installer is using that brand’s system of doing things, down to every last detail. These are some of the things covered in certification courses.

Certification Courses and Installer TrainingInstaller Training

At MBCI, we offer a three-day course that covers all of our standing seam panels, and have a separate two-day course for insulated metal panels, which provides advanced installer training in metal roof installation through classroom lecture and hands-on application in a variety of MBCI’s products, assembling roof systems on a mockup to reinforce what was learned from the presentations. Courses take place once a quarter in different locations throughout the United States.

In terms of who should attend certification courses, generally speaking, it’s the person from the company who will be doing the actual work since a certified installer needs to be on the roof any time any work is being done on the roof. He or she is the one we train. And that installer is tied back to the company in order for them to receive certification. That company has to have workman’s comp and general liability insurance. If the certified person leaves the company to go elsewhere, the first company needs to certify someone else.

The Bottom Line of Certification

From a bottom line perspective, it’s important for companies to be proactive in making sure there is always someone on their team who is a certified installer for the products they use—or might use. Not only will they learn tips and tricks for proper installation, but it will also avoid a situation where you have a job, the panels are being delivered the next week and you realize you need someone to be certified. Maybe it’s three weeks until the next certification opportunity. You’ll want to have all that settled before you need it.

Just because you’ve been installing roofing for 30 years, doesn’t mean installer training and certification isn’t necessary. Our best advice is to come to the class and learn all the little idiosyncrasies about whatever manufacturer’s roofing panels you’ll be installing. This is a case where even a little knowledge goes a long way.

The Importance of Vapor Seals in IMP Installations

Insulated metal panels (IMPs) used for building envelopes offer great simplicity in terms of enclosing a building in an attractive, energy-conscious manner. However, they require somewhat different thinking in terms of design and installation compared to conventional single skin panels on metal building with separately installed fiberglass insulation and vapor liners. That’s because, while the insulation aspect of IMPs is well controlled in the factory, the air and vapor sealing aspects are entirely in the hands of the installers in the field.

Why is vapor sealing a concern? Because it can make or break a building envelope. Airborne moisture that travels through seams, joints, or gaps between IMPs or between the panels and the structural steel can condense and wreak havoc on the integrity of the wall system. If that condensed moisture makes its way to unprotected edges of metal, then rusting, staining, and deterioration can occur. If it collects and drains out the bottom of the panel, then a building owner may mistakenly think that the IMPs are leaking water. If the moisture works its way inside a panel and becomes trapped it could freeze in cold climates or applications, and push panels enough to make unsightly or fail to perform as intended.

How does an installer of insulated metal panels avoid these issues? By properly using sealants as recommended by the IMP manufacturer to close the gaps and assure a vapor-tight installation. Here are the key things that installers need to pay attention to:

Sealant Types

In most cases, butyl caulking is the recommended sealant for panel joints and perimeter attachments, although urethane sealant may be called for in some cases. For fire-rated panels, silicone sealants are usually required. The important caveat for all of these sealants is that they are most successfully installed when they’ve been stored within acceptable temperature ranges. In cold weather, they may need to be kept in a warming bin; in warm weather they must be kept out of direct sunlight.

IMP
Apply continuous non-curing butyl sealant to the interior panel joint with a bead size of approximately 1/4″ as shown above.

Tools to Use

Applying any of the needed sealants will require using the proper tools. Manual caulking guns don’t provide the consistent quality of application needed, so electric or pneumatically operated applicators are required.

Sealant Location

For typical building applications (non-freezer/coolers), the vapor sealant is placed in the interior panel joints when IMPs are installed vertically. For refrigerated spaces, the sealant is commonly placed on the exterior. If the IMPs are installed horizontally, then it usually is sealed on both the interior and the exterior panel joints to help with weather sealing as well. Note that the final placement of the sealant, as well as type and location, is actually the responsibility of the mechanical contractor/architect and not the panel supplier as it is to be based also on the mechanical design of the building envelope. In addition, the entire perimeter of the panels where they meet the building structure needs to be sealed. This includes the base flashing, interior corner trim, and eave struts. Further, marriage beads of butyl sealant must be placed at all panel terminations.

IMP
Panel Installation – Sealant

Sealant Continuity

In order to be effective, all sealant and caulking must be fully continuous. That means that the thickness of the sealant bead must be consistent and thick enough to fully close all gaps between or around IMPs. It should not be overdone, however, since too much sealant will ooze out between panels that are pressed together, causing a bit of a mess on one side of the other. Sealant continuity also means that it can not be interrupted due to poor adhesion. Therefore, before any sealant is installed, the application surfaces must be cleaned and dry to be sure that full adhesion is achieved. Always check with the panel suppliers details for minimum bead size and critical locations.

Factory-Installed Option for IMP

Some IMP manufacturers offer the option of having sealant pre-installed along the edges of the IMPs. Since the panels are wrapped and sealed for shipping, the sealant is protected and should be ready for use onsite. However, in this case, it is incumbent on the installers to handle the panels quite carefully, since the inadvertent placement of a hand over the sealant can damage it or deform it enough to render it ineffective. This factory-installed option offers a labor saving in the field but must be checked during installation and can be impacted by time climate depending on the time of year. Field application, while requiring more labor, does provide greater onsite flexibility for installers. Nonetheless, in all instances, the installer must ensure the sealants are properly located.

By paying attention to the details of sealing and caulking, a metal building constructed with IMPs will be a quality installation that will hold up quite well over time. To find out more about IMP metal products and systems that can help your next building be more vapor- and weathertight, contact your local MBCI representative.

Fire Resistance for Insulated Metal Panels

When it comes to understanding fire ratings for wall panels on buildings, one of the first things to overcome is incorrect information or misunderstanding that sometimes emerges around this topic. In an effort to achieve some greater clarity, let’s look at some of the basics of fire resistance ratings, particularly for insulated metal panels (IMPs).

Building Code Requirements

The fundamental reason that any wall needs to provide some degree of fire resistance is to allow people enough time to safely evacuate from a space or building in the event of a fire, or to prevent the spread of fire between defined areas or whole structures. Building and fire codes have been developed and adopted, in part, specifically to define the situations, building types, conditions and circumstances where different degrees of fire resistance are required to protect the public health, safety and welfare. Therefore, when looking at a specific building and the fire resistance ratings required, the applicable codes must be consulted and the proper determination made regarding the minimum fire resistance requirements for the different exterior and interior walls of that building.

Ratings-Based on Testing

The established means for knowing whether or not a wall meets a particular fire resistance rating is based on conducting a fire test in an independent laboratory. For IMPs, that means a manufacturer needs to submit full-size product samples to a laboratory such as Underwriter’s Laboratories (UL), which will then prepare and carry out the test according to standard, agreed-upon procedures such as ANSI/UL 263, “Standard for Fire Tests of Building Construction and Materials.” The procedures dictated by a standard such as this are intended to be the same for all similarly tested materials or products to determine the actual fire resistance rating for each. When the products are subjected to the prescribed heat and flame under uniform laboratory conditions, then they can be classified based on how well they performed. Some products, for example, may survive the test long enough to qualify for a 1- or 2-hour rating, while others may only qualify for a 30-minute rating before succumbing to the fire.

Urology Medical Office Building MBCI
The Urology Medical Office Building in Virginia Beach, Virginia utilizes 7.2 Insul-Rib® and CF Architectural – Horizontal insulated metal panels. View the product data sheets for these products for information on their fire resistance ratings.

Selecting Products

In creating or renovating a building, then, it is incumbent on the design and construction team to choose products and materials that have a proven, tested fire rating that meets or exceeds the building code requirements for the particular building at hand. If a manufacturer of IMPs has been identified ahead of time, then it may be possible to ask for evidence of the UL or similar test to prove that the selected product or assembly meets the code requirements. But many times, there is a need to first determine the requirements, and then look for the available products and manufacturers who can provide the needed fire resistance. Fortunately, UL maintains an online directory of all of the products that they have tested and certified. Their online certifications directory allows users to input selected criteria to search for specific result reports. Using this resource for IMPs, the UL Category Code of BXUV and the UL File Number of U050 should be entered to do a search. This will yield a summary list referencing the ANSU/UL263 test with a link to the BXUV.U050 test report for IMPs. There you will see under item 2: “Metal faced panels, nominal 42 in. wide by nominal 4 in. thick (for the 1 Hour Rating) nominal 7 in. thick (for the 2 Hour Rating) or nominal 8 in. thick (for the 3 hour rating) installed vertically or horizontally. Panels supplied factory double tongue and grove joint.” This lets the design and construction know that 1-, 2-, or 3-hour ratings are available depending on the thickness of the IMP and given that the factory joint is provided. Hence, the manufacturer can label their products accordingly.

By specifying and selecting the proper products that have been correctly tested and certified, then building code compliance is not only streamlined, the building will meet the inherent fire and safety requirements for the people who will occupy it.

For fire resistance information on MBCI panels, please review the product data sheets.

Combatting Thermal Bridging with Insulated Metal Panels

When using compressible insulation, say for instance fiberglass batt, consideration must be given to how that insulation is going to be deployed in the actual wall or roof. For instance, installers might place the insulation across the framing members and then smash it down with the cladding and run a screw through to the underlying structure. The problem here is that the insulation is rated with some R-value—and that R-value is determined by an ASTM procedure that also determines what its tested density is. So in essence, it’s ‘fluffy’ insulation.

One manufacturer’s insulation, however, might be thicker than another’s. The contractor is buying an R-value, not a density or a thickness. The insulation is tested to that R-value at whatever thickness and density¹ is needed to achieve it. Let’s say R-19 fiberglass batt is specified, but then it is put in an assembly and smashed down flat… now it’s not R-19 anymore; it’s now R-something else. That’s a thermal bridge—when the insulation’s R-value has been compromised.

Manufacturers have the ability to run long length panels that minimize the number of end joints. This continuity provides significant advantages over traditional insulated materials when designing for energy efficiency. This image illustrates the difference between fiberglass batting made discontinuous by compression between panel and framing members and the continuous insulation provided by insulated metal panels.

Unfortunately, thermal bridging is almost impossible to eliminate. In the example above, another choice might be to put it between studs. Except in this situation, the studs break the insulation. While it’s not pinched, the studs are separating it. Whether the studs are metal or wood, in either case it’s still a significant thermal short circuit or a thermal bridge.

Even with the highest quality insulation systems—insulated metal panels, for example—a joint is required. Building is not possible without putting neighboring panels together. Therefore, insulation is discontinuous. While it’s impossible to avoid thermal bridging, there are two requirements to ensure the building performs the way it needs to perform.

  1. Thermal bridging must be mitigated. In other words, the designer or installer has to try to eliminate as much of it as possible.
  2. If thermal bridging is unavoidable, it must be accounted for in some fashion, which usually means putting more insulation somewhere to make up the difference. This is called a “trade-off” and is allowed by most building energy efficiency codes.²

Why Insulated Metal Panels?

Insulated metal panels then are the best bet, because although the joint is a thermal bridge, in effect, it is not nearly as impactful as breaking a line of fiberglass with a stud or smashing the fiberglass between the panel and a framing member. In the illustration below, R-value doesn’t just vary at that point where the panel and the stud meet. The entire insulation line gets smashed and one would have to go some distance from the stud before the insulation returns to its normal, fluffy thickness. These issues need to be mitigated and accounted for.

assembled side joint
Continuous insulation is critically important to an efficient envelope design. Insulated metal panels, with their side laps designed for concealed fasteners, eliminate the possibility of gaps in the insulation and thermal bridges. Continuous insulation is important because thermal bridges and discontinuities introduced by compressing non-rigid insulations cause the in-place R-Value of the assembly to be less than the tested R-Value of the insulation used. This effect has become a focus in newer energy efficiency codes such as ASHRAE 90.1 and IECC.

Manufacturers such as MBCI and Metl-Span publish insulated metal panels as U-factors because the joint is tested as part of the assembly (both mitigating and accounting for the aforementioned issues). These values can be found on product data sheets and technical bulletins, such as Metl-Span’s Insulation Values technical bulletin, published January 2017.

References

  1. ASTM C 665 – 12, Standard Specification for Mineral-Fiber Blanket Thermal Insulation for Light Frame Construction and Manufactured Housing, Table 1, Footnote c.
  2. ASHRAE 90.1 – 13, Energy Standard for Buildings Except Low-Ride Residential Buildings, Section 5.6
  3. High Performance Green Building Products – INSMP2A (CEU)
Find a sales representative