The Importance of Vapor Seals in IMP Installations

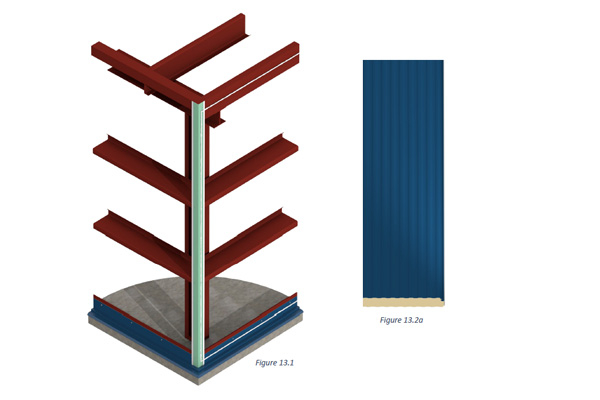
Insulated metal panels (IMPs) used for building envelopes offer great simplicity in terms of enclosing a building in an attractive, energy-conscious manner. However, they require somewhat different thinking in terms of design and installation compared to conventional single skin panels on metal building with separately installed fiberglass insulation and vapor liners. That’s because, while the insulation aspect of IMPs is well controlled in the factory, the air and vapor sealing aspects are entirely in the hands of the installers in the field.

Why is vapor sealing a concern? Because it can make or break a building envelope. Airborne moisture that travels through seams, joints, or gaps between IMPs or between the panels and the structural steel can condense and wreak havoc on the integrity of the wall system. If that condensed moisture makes its way to unprotected edges of metal, then rusting, staining, and deterioration can occur. If it collects and drains out the bottom of the panel, then a building owner may mistakenly think that the IMPs are leaking water. If the moisture works its way inside a panel and becomes trapped it could freeze in cold climates or applications, and push panels enough to make unsightly or fail to perform as intended.

How does an installer of insulated metal panels avoid these issues? By properly using sealants as recommended by the IMP manufacturer to close the gaps and assure a vapor-tight installation. Here are the key things that installers need to pay attention to:

Sealant Types

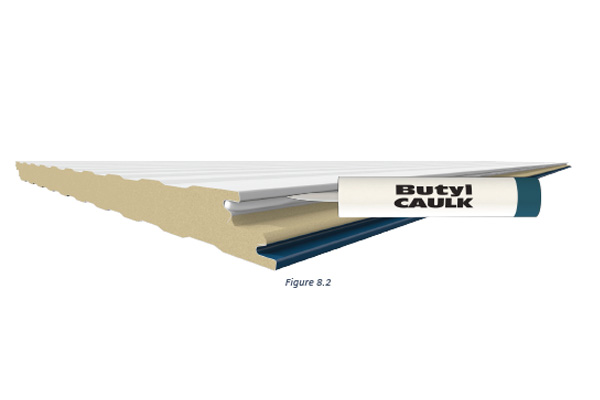
In most cases, butyl caulking is the recommended sealant for panel joints and perimeter attachments, although urethane sealant may be called for in some cases. For fire-rated panels, silicone sealants are usually required. The important caveat for all of these sealants is that they are most successfully installed when they’ve been stored within acceptable temperature ranges. In cold weather, they may need to be kept in a warming bin; in warm weather they must be kept out of direct sunlight.

IMP
Apply continuous non-curing butyl sealant to the interior panel joint with a bead size of approximately 1/4″ as shown above.

Tools to Use

Applying any of the needed sealants will require using the proper tools. Manual caulking guns don’t provide the consistent quality of application needed, so electric or pneumatically operated applicators are required.

Sealant Location

For typical building applications (non-freezer/coolers), the vapor sealant is placed in the interior panel joints when IMPs are installed vertically. For refrigerated spaces, the sealant is commonly placed on the exterior. If the IMPs are installed horizontally, then it usually is sealed on both the interior and the exterior panel joints to help with weather sealing as well. Note that the final placement of the sealant, as well as type and location, is actually the responsibility of the mechanical contractor/architect and not the panel supplier as it is to be based also on the mechanical design of the building envelope. In addition, the entire perimeter of the panels where they meet the building structure needs to be sealed. This includes the base flashing, interior corner trim, and eave struts. Further, marriage beads of butyl sealant must be placed at all panel terminations.

IMP
Panel Installation – Sealant

Sealant Continuity

In order to be effective, all sealant and caulking must be fully continuous. That means that the thickness of the sealant bead must be consistent and thick enough to fully close all gaps between or around IMPs. It should not be overdone, however, since too much sealant will ooze out between panels that are pressed together, causing a bit of a mess on one side of the other. Sealant continuity also means that it can not be interrupted due to poor adhesion. Therefore, before any sealant is installed, the application surfaces must be cleaned and dry to be sure that full adhesion is achieved. Always check with the panel suppliers details for minimum bead size and critical locations.

Factory-Installed Option for IMP

Some IMP manufacturers offer the option of having sealant pre-installed along the edges of the IMPs. Since the panels are wrapped and sealed for shipping, the sealant is protected and should be ready for use onsite. However, in this case, it is incumbent on the installers to handle the panels quite carefully, since the inadvertent placement of a hand over the sealant can damage it or deform it enough to render it ineffective. This factory-installed option offers a labor saving in the field but must be checked during installation and can be impacted by time climate depending on the time of year. Field application, while requiring more labor, does provide greater onsite flexibility for installers. Nonetheless, in all instances, the installer must ensure the sealants are properly located.

By paying attention to the details of sealing and caulking, a metal building constructed with IMPs will be a quality installation that will hold up quite well over time. To find out more about IMP metal products and systems that can help your next building be more vapor- and weathertight, contact your local MBCI representative.

Alignment Tolerances of Substrates for Metal Panels

Installers take note! It is your responsibility to ensure the substrate material over which you place the metal panels is in proper alignment before beginning installation. Otherwise, you can suffer some significant negative impacts on the overall appearance of the system.

As we’ve discussed in a previous blog article, Choosing Proper Substrates for Metal Roofing Systems, the substrate (or substructure) rests underneath the metal panels is a key part of the roofing or wall system. It serves two main functions: to act as a base to which the metal material is attached and to serve as a structural member to transfer loads to the primary framing system.

Knowledge is Power

Too many times, inexperienced metal building sheeting installers or sheeting-only contractors may not realize how big an impact alignment can have; it’s very easy to get too far into the process before recognizing there’s a problem. The issues must be dealt with at the very beginning of the process as well as the way through the installation of the panel system, whether it’s roof or wall panel installation, and must be checked frequently.

Major Misconception

One common misconception, especially for those new to the panel system, is that aesthetic anomalies are a result of panel quality. When troubleshooting, the manufacturer will ask a series of questions about the installation and alignment. However, by that stage, the installer may be beyond the point where it’s an easy fix, depending on the circumstances.

Key Considerations

  1. Understand the general panel installation characteristics by reading the installation manual. Become familiar with which screws and clips to use, and how the panels physically connect as well as types of insulation systems that work well with the panel system and if there are any limitations related to insulation types or thicknesses.
  2. Installers must be certain that the substrate material they’re installing over, whether metal or wood or something else, has been properly erected and properly aligned before panel installation begins.
  3. As they’re putting the panels over the substrate, installers should be checking the alignment, whether vertically/horizontally along the leading edge of the panel or inward and outward on the panel itself. With most metal panels, major variances in the substructure will cause the panel to accentuate any errors. As a result, the panels will look unattractive and be difficult to install.
  4. When the panel installation first begins, the installer might not immediately recognize there’s a problem. A variance in the steel or in the substructure can have a big impact, which won’t be known until it’s too late. As an example, consider erecting half a wall on a cloudy day without checking alignment. At the end of the day, it looks fine, but the next day when the sun is shining on it, the “aesthetic delights” due to misalignment are obvious.
  5. Check panels during installation for any damage due to handling, surface irregularities and how it engages or lays on the steel. Do not install any “suspect” panels and contact the manufacturer as needed.

Types of Problems with Alignment

  • Different types of panels can react differently to a substructure out of alignment. Some are more forgiving, and some are terribly unforgiving.
  • Overdriving fasteners combined with improper alignment is a killer 1-2 punch.
  • If alignment is not properly addressed/corrected prior, installers often try to push and pull the panel out of plane, resulting in “oil canning,” a common rippling effect that occurs with improper installation. It should be noted, this often is a direct result of the substrate and/or improper installation and does not have any bearing on performance, weather-tightness and warranty. It doesn’t look nice but is not a cause for rejection.
  • If the steel is out of alignment, the panels can be difficult to engage and perform the way they should.

What Can You Do?

Using a level, laser or a string line, an installer can measure/check the amount that the substructure is either going in or out of plane and correct as needed. For instance, the plane is zero mark-perfectly plumb, perfectly level. There’s an allowable tolerance that the substructure can be out of plane and still be acceptable. Manufacturers often publish recommended tolerances that should always be reviewed. The preferred tolerance being convex (outward) and never concave (inward).

Other Considerations

The main takeaway here is that steps should be taken to prepare a substructure to properly receive the metal panels. Then, diligently check as panels are being installed to ensure proper alignment is maintained and the installer is not inadvertently pushing and pulling them out of alignment, which could result in less than favorable final appearance.

Find a sales representative