As stated in Part 1 of this series, the success of a metal roof or metal wall project can rest on the installer knowing when something isn’t working or just doesn’t seem right. When that happens, a call to the manufacturer is not just suggested but is really imperative to ensure any potential problem is averted before it’s too late. In addition to the previously discussed scenarios, such as damage to the physical panel or problems with the fasteners, let’s take a closer look at a few other common circumstances under which MBCI recommends immediately reaching out to the manufacturer:
Alignment and Substrate Issues
It is the installer’s responsibility to verify the substrate and check for proper alignment before attaching any sheeting materials. If the installer notices any issues of this sort (either before installation or once they start putting on the sheeting), they should stop and address them immediately. This might include oil canning or other irregularity in the appearance of the panel. The installer should investigate the source. If unable to identify and properly remedy the situation on their own, then a call to the manufacturer’s support team is recommended. They may be able to suggest items to check to help locate the source of the problem—whether it be installation or manufacturing—and from there make suggestions as to the best possible means to address the situation.
Accessories
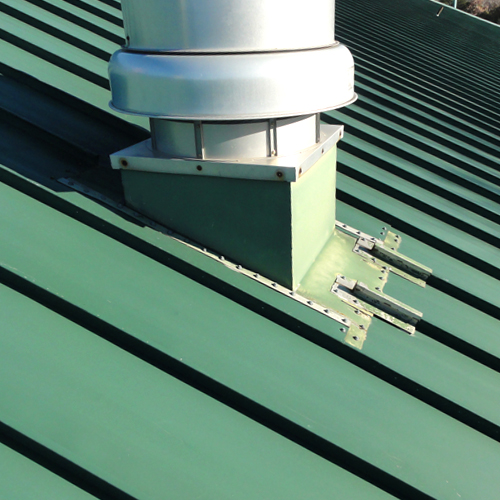
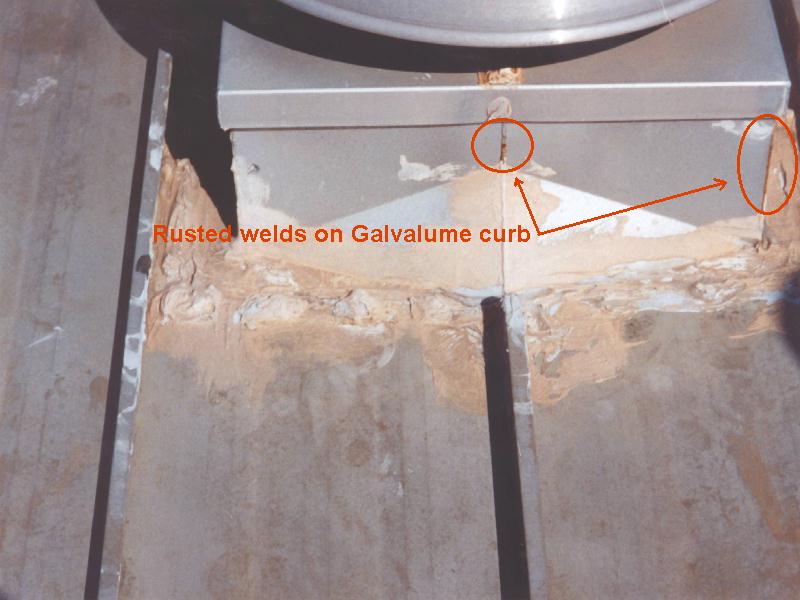
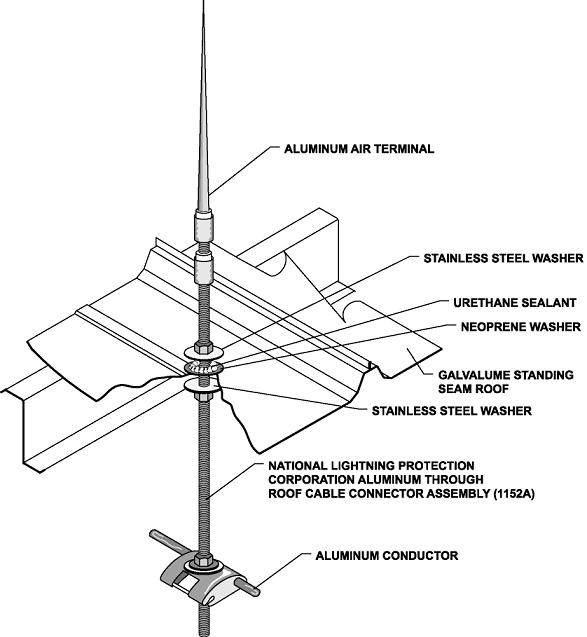
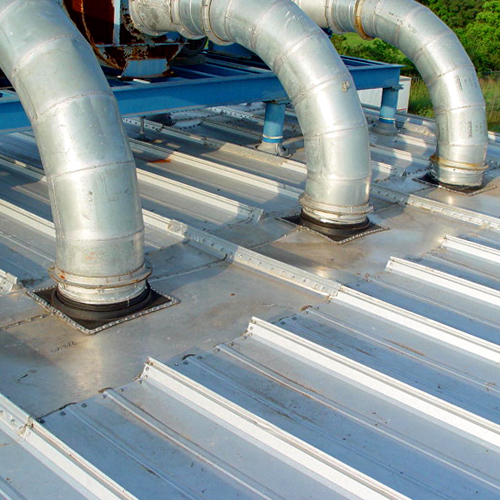
When physically getting ready to modify a panel system by adding things to the roof (such as snow guards or mechanical curbs) or to walls by installing doors, windows and louvers, these penetrations can have an impact on the system and its weather-tightness and appearance. Oftentimes, other trades—who may or may not have knowledge of the sheeting system—are coming onto the job to perform the accessory installation. It’s wise to visit with manufacturer prior to installation and/or alert the non-metal panel installer of precautions to take when adding accessories.
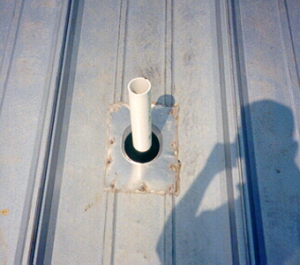
Coordination regarding material types of accessories, fasteners and placement is critical. There are materials that can react negatively with the installed system and lead to damage as well as void manufacturers warranties. Accessories should always be discussed prior to installation. Read more about different types of roof accessories and penetrations in MBCI’s blog article, Roof Penetrations Made By Non-Roofing Contractors.
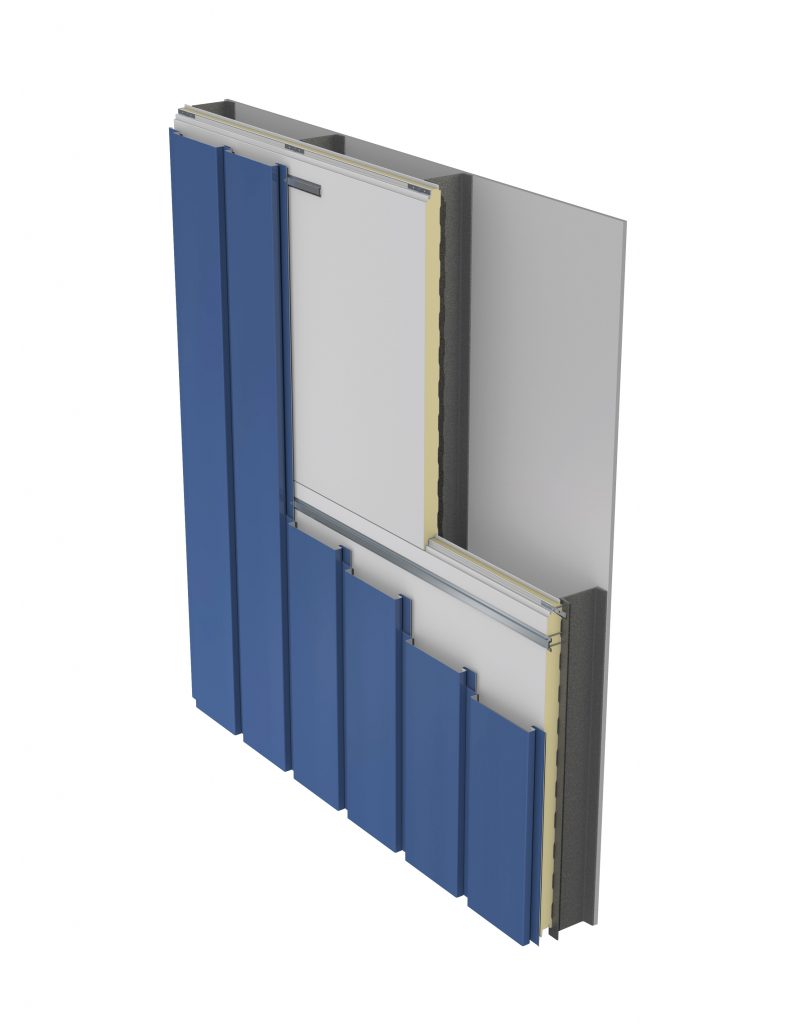
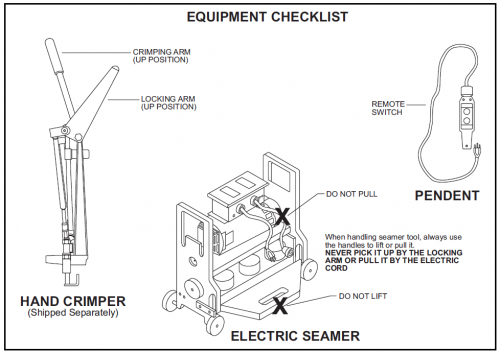
Panel Engagement
Panel systems have an engineered means by which the panels attach and engage one another as shown in the manufacturer’s installation manuals and project drawings. If at any point the panel will not engage as depicted in the details, installation should be halted and reviewed to determine the cause. This can require a call to the manufacturer to help determine if the matter is site and substrate related or potentially a manufacturing issue.
Do not continue to install the system if the laps are not nesting properly, clips are not engaging as detailed, panel modularity cannot be controlled or if the overall panel is not “resting” on the substrate such that there is excessive bowing and stress in the panel. This is the time to call the manufacturer, as once the material is completely installed, it is much more difficult to determine the cause of a problem and is potentially more expensive to remedy. Additionally, in many cases, full installation constitutes acceptance of the product and the manufacturer’s hands could be tied or extremely limited in being able to assist in remedying after the fact.
By knowing when to be proactive with a call to the manufacturer, installers can mitigate many types of potential pitfalls. And if you’re just not sure, it’s best to call.
For more information on metal roof and wall products and training, MBCI offers courses through its Metal Institute. These courses are available for general training purposes or for those seeking installer certification.