Tag: metal roof system
Can Metal Roofing Be Installed Over Shingles?
Looking Ahead: 2022 Trends at a Glance

Why Upgrade a Roof to Metal Panels?
Metal Panel Roof Restoration & Installation
Everything in Order: MBCI’s Online Ordering Assembly Feature
There’s no getting around it. Erecting any building involves thousands of parts. Different sizes, colors, lengths, types – you name it. Depending on the nature of the project, there could be numerous parts to be ordered and accounted for. Although MBCI simplifies the process, it can still be a lot to manage. Until now, everyone has come up with their own method – like the many long-timers who write it all out by hand. But for those newer to the process, it can be overwhelming. Now we’re taking the guesswork out of it and making the process considerably easier, with exciting new user-friendly features on our online ordering platform.
With the new addition of “Assemblies”, you can simply choose which area of a building you’re working on, fill in some details such as panel type, trim condition, attachment type, size, and color, and the system will do the rest of the work for you – making sure you have any necessary fasteners, accessories or other parts, adding everything to your order. No longer will you have to study construction drawings, note fastener types and add everything to your order by hand. No longer will you find yourself on-site without the needed materials. And, even if you do, the online ordering platform is available right from your phone to get whatever you need on the way ASAP.
As Director of Development Tyler Roose says, “We’ve heard testimonials from many, many customers and it’s the only way they like to order anymore. It’s a huge time saver.”
Ready to get started? Head to shop.mbci.com. If you are registered and an existing customer, you should have everything you need to log in. For new customers, simply fill in the requested information and provide your customer number to create an account. If you don’t have a customer number, reach out to your district sales manager or customer service rep.
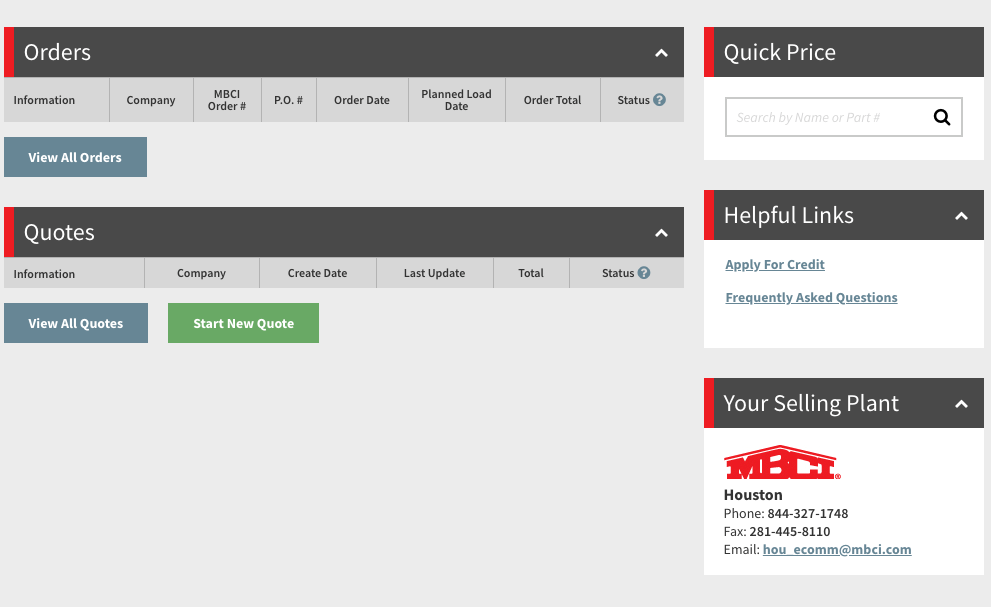
Once you’re logged in, you’ll see the dashboard, which has links to any existing orders, quotes or other information you may need.
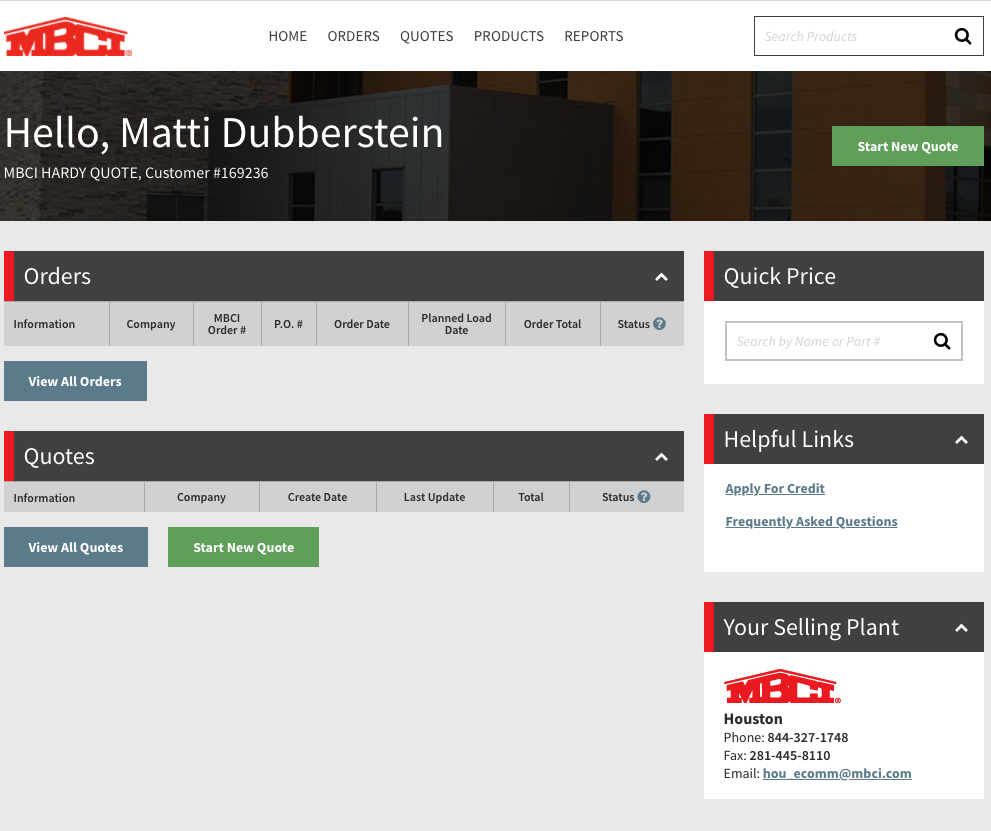
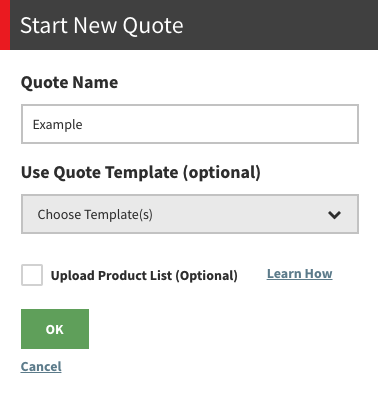
To get started on a new quote, simply click the “Start New Quote” button, which will give you an option to name your new quote and use a template if desired (more on that later).

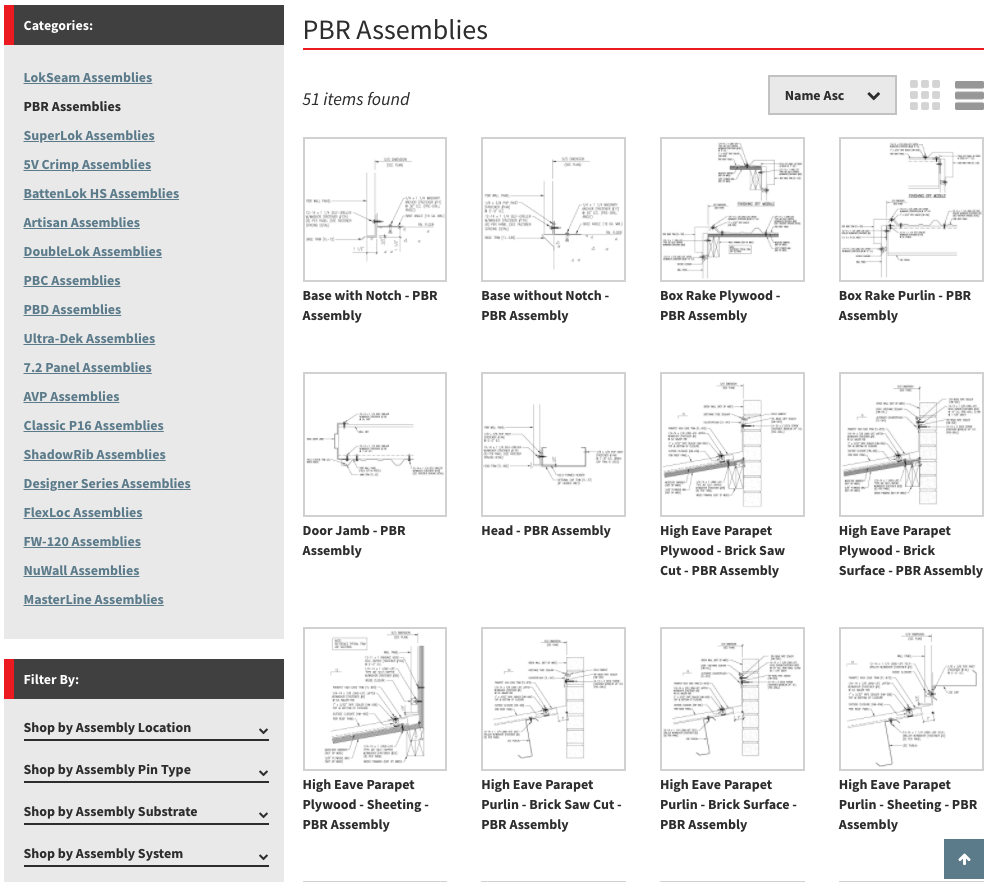
Once you’ve begun a new quote, you will land on the Products page, where you have the option to shop by category, such as accessories, fasteners, panels, structural and trim. However, for this purpose, let’s focus on the newest option: Assemblies.

Choosing “Assemblies” will open a list of component types to choose from. For this example, we’re selecting PBR, but you’ll choose whichever is appropriate to your project. From the next list, select the area you’re working on, such as eaves, gutters, valleys, corners, bases, etc.

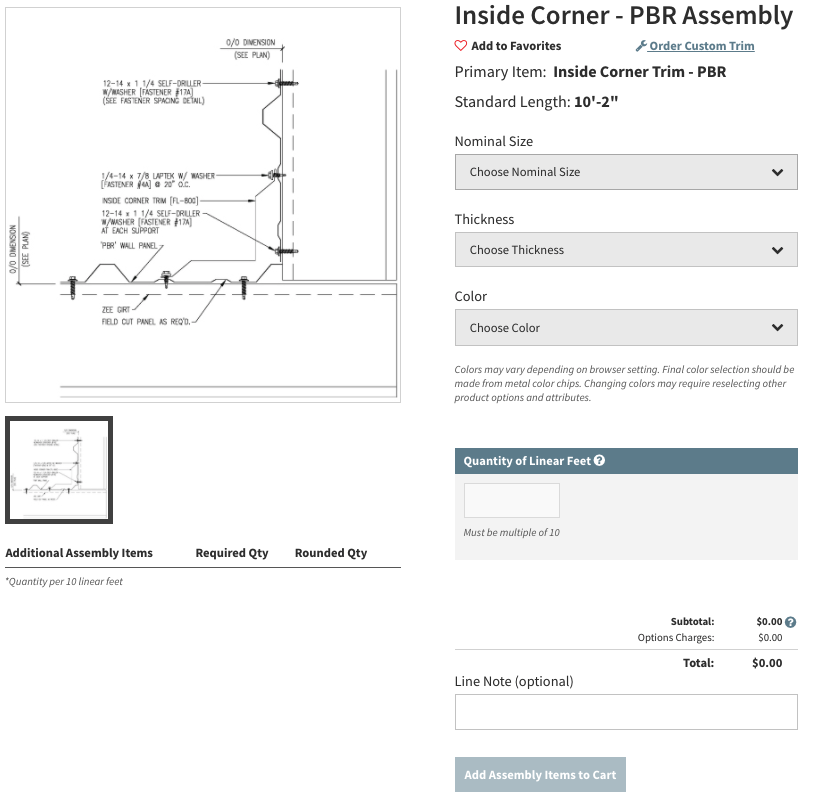
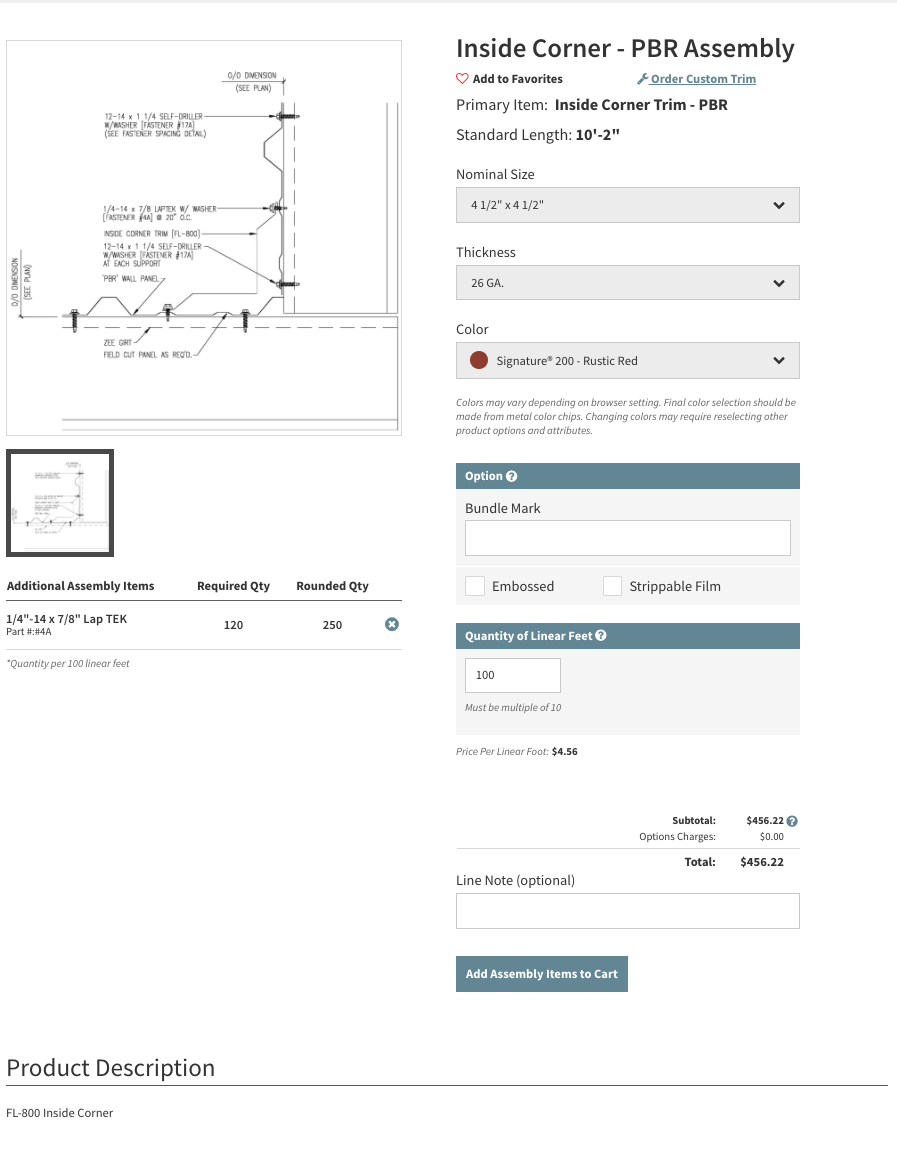
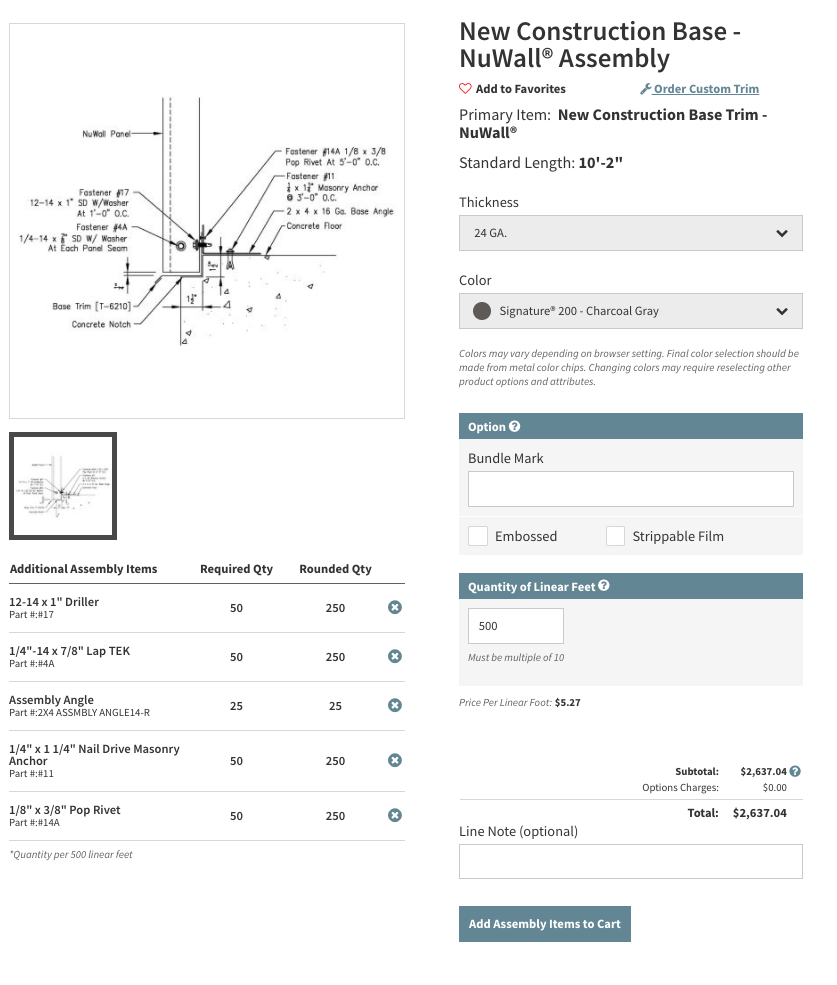
Once you’ve selected your assembly, the form will prompt you to choose details such as thickness, color, lineal footage of the assembly being used, and further options depending on the assembly and area you’re working on. Then, all the core trim items as well as necessary fasteners, sealants and accessories are automatically added to your material list for review. Notice the additional parts automatically added on the PBR form. If satisfied with your work, click “add to cart”, and a more formal review can now be completed once all parts from the project are accounted for.
Now you can simply repeat this process for whatever other areas you need. You can save and share this quote with others who may need to review and approve. If you anticipate needing similar orders in the future, choose the “Save as Quote Template” option in the dropdown box. The next time you have a similar project, choose this option when you start a new quote, then simply make whatever changes are necessary – colors, lengths, quantities, etc. – and you’ll be done with your order in much less time than with previous methods.
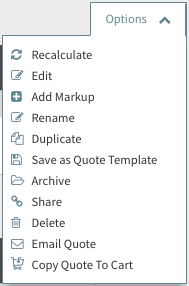
If for any reason you need to make changes to a quote, simply use the “Modify Quote” button at the bottom of the quote page.
![]()
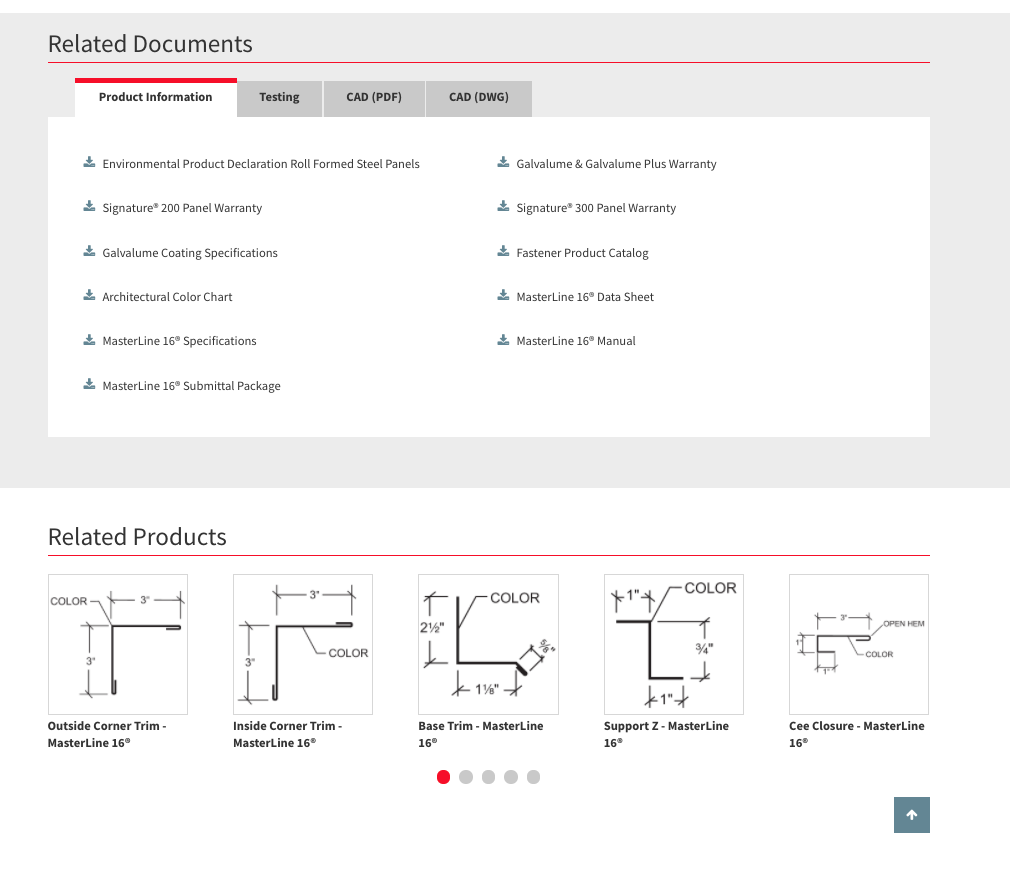
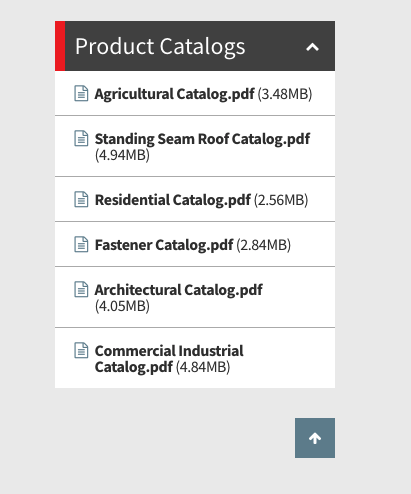
Be sure to check out the other handy features on the online ordering site, such as related literature, documents and parts at the bottom of each product page and in catalogs. You can also search by keyword or use the navigation at the top for anything you might be looking for.
We hope you’ll take the time to learn the new system. It’s sure to save you innumerable hours in the long run. And if you get stuck or run into any problems, we’re here to help. Refer to the FAQ and don’t hesitate to get one of our sales individuals involved. We are all fully versed on online ordering and happy to help.
The Importance of Cleaning Metal Roof and Wall Panels
Metal panels need attention; they should not be taken for granted. True, they are a notably long-lasting and attractive choice, particularly with the myriad colors and protective finishes available, but once installed, proper care is imperative in order to maintain their durability, performance and good looks for decades.
What are the main culprits of potential damage? Dirt and residue (such as from trees or animals) left to sit on metal panels, for instance, can cause the irreversible degradation of protective coatings, thereby compromising the longevity of roof and/or wall systems. Additionally, corrosive elements, including bacteria, mold, mildew or even acid rain can damage the structural integrity of the panels. Additionally, buildup of foreign elements, such as leaves, can hide potential leak areas or places that may be rotting away. Even in terms of energy efficiency, keeping the panels clean may help a roof reflect heat as they were originally intended.
To keep panel appearance in top shape, protecting the finishes must be a priority—otherwise, you may find yourself needing to re-coat the panels. Stains from leaves and moisture, algae and lime deposits that remain on panels for extended periods can do serious harm to the finish. It should be noted, however, that re-coating should only be considered if the panels remain structurally sound and if doing so wouldn’t void the manufacturer warranty.
How often should you clean metal panels? Most experts agree that at a minimum, an annual cleaning is advisable in order to keep the panels free of common elements that can jeopardize the integrity of the finishes. If you have heavy tree overhang, you may need to clean it or remove debris a little more frequently.
Deep cleaning to remove more stubborn substances (e.g., tree sap, oxidation) can be done every 3 to 5 years, depending on the building conditions, location and weather, etc. Interim, moderate cleanings can also be performed following substantial weather events and seasonal allergen build-up. It’s a good idea, in fact, to assess roof conditions before winter hits to identify any potential issues that need to be addressed.
No matter the frequency, perhaps the most important advisory when it comes to cleaning the panels is to follow the panel manufacturer’s recommendations regarding who should perform the work and with what solutions and tools so as not to void any warranties. In some instances, it may be beneficial (or perhaps even required) to have a professional building surface cleaning company with metal panel experience do the work.
Tips on Proper Cleaning Techniques and Solutions
As for the maintenance and cleaning instructions, it’s always best to refer to the manufacturer’s guidelines in order to best protect specific products, for example, to determine which cleaning solutions and techniques work best for a given manufacturer’s panels. Neglect or improper care can degrade the finish, compromising not only the visual appearance and performance but, as noted, can also potentially void the panel warranty. But maintaining the panels doesn’t just entail washing them like you would a car; it also means keeping them free of harmful debris.
Here are a few general tips for the proper cleaning of metal panels (again, refer to the panel manufacturer’s specific directions):
Simple cleaning: generally, water and mild detergent will be sufficient. Do NOT use bleach, which can change the finish color or have a harmful interaction with certain finishes.
Water-soluble dirt or other deposits requiring more complete cleaning: you can use a solution of hot or cold water mixed with detergent. In a container of water, use a 5 percent solution of commonly used commercial (non-industrial, non-bleach) mild detergent. Use a cloth or a soft-bristle brush for application of the cleaning solution, followed by a clean water rinse. Alternatively, pressure-washing with a 40° tip is also an option.
Non-water-soluble deposits such as tar, grease, oil and adhesives: a solvent or alcohol-based cleaner may be required. In this case, since most organic solvents are flammable and/or toxic, they must be handled accordingly. Generally, keep them away from open flames, sparks and electrical motors; use adequate ventilation, protective clothing and goggles; and read the manufacturer’s Material Safety Data Sheet (MSDS) of any solvent used for any other specific safety details.
The following are among the cleaners widely recognized by manufacturers for this type of non-water-soluble cleaning: alcohols—denatured alcohol (ethanol) and isopropyl alcohol (rubbing alcohol); and solvents, including VM&P Naphtha, mineral spirits, kerosene, and turpentine (wood or gum spirits).
For any level of cleaning, do NOT use wire brushes, abrasives, or similar tools that will erode the surface coating and leave scratches or other finish damage that can lead to corrosion. Additionally, always test a small area before proceeding with any of the cleaning agents mentioned to ensure there is no adverse effect resulting from the product’s use.
Remember, the misuse or abuse of any of the acceptable cleaning agents will automatically void any manufacturer’s warranty for the affected surfaces, so be sure to check with the manufacturer and also follow directions on any cleaning products used.
By following the tips above, installers can keep metal panels looking great and performing well for years to come.
To learn more about the importance of cleaning metal panels, contact your MBCI representative or check out our blog post on metal panel maintenance.
How to Avoid Common IMP Installation Mistakes
Insulated metal panels (IMPs) are ideal for many roofing and wall applications. They are considered a top-of-the-line choice known for their superior insulation value, high performance air barrier, design flexibility, and fast installation. The simplicity of installation creates a high-performance building envelope. The many design options provide a versatile building solution for commercial, industrial, and institutional projects.
Sounds great, doesn’t it? What’s the catch? Well, those benefits won’t mean much if proper care is not taken during the installation process to ensure you’re getting what you paid for. Potential consequences can span the gamut—from minor aesthetic headaches to extremely costly errors such as leaks and structural issues.
Here are some ways to avoid common pitfalls when installing IMP panels on your next metal wall or roof project.
1. Pay attention to the manufacturer’s product installation manuals.
Installation manuals are not just for show! Even the most experienced installer should read, review and understand the installation guide before installing IMPs, and the panels should always be installed in accordance with the project’s installation drawings.
Don’t simply rely on the “what-you’ve-done-before” mindset. Take the time to review the specifics for every individual project. In addition to providing the information needed to execute a successful install, it can also give installers an opportunity to build upon their own knowledge base. One of the most common errors is related to proper receipt and handling of the panels. Investing a few minutes before the project starts and at the start of each day to review key topics helps avoid costly errors and improves production.
If you have a question or something does not seem right stop and call the manufacturer. It is always best to address a problem up front than try and fix a problem after the building is in operation.
2. Equipment check. Do you have what you need?
To keep your IMP installation on track, it’s imperative to ensure you have the equipment you’ll need for the job. Does your project need one or two forklifts, is a crane a better option? Will your project include longer-length IMPs being installed in a vertical orientation? If so, you may need special lifting equipment so as not to damage the panels. Whatever the details, crews need to be prepared to receive a project’s specific materials on site. A little advance planning will ultimately save you time and money by reducing labor and avoiding costly mistakes.
3. Don’t assume every IMP application is the same.
All buildings are not created equal. Just because a construction crew has had experience installing insulated metal panels on past jobs, doesn’t mean they can assume the process will be exactly the same every time. There will always be specific conditions and variables that need to be taken into consideration. Techniques used for vertical industrial panels will be different for horizontal architectural panels.
The vapor barrier (a key function of an IMP) is a great example of how a miscalculation can be problematic. Depending on the panel, the vapor barrier may be applied either at the factory or at the jobsite. If the project calls for a cold storage environment, the “warm” side of the vapor barrier will be on the exterior. Alternatively, a commercial or industrial application generally calls for the vapor seal to be on the opposite side of the panel. Confuse placement of the seal and you’re bound to run into problems down the road.
4. Be on the lookout for creases, buckles and framing alignment.
A crease or buckle on the face of a panel might seem like no big deal, but that couldn’t be further from the truth. In fact, framing alignment is one of the most critical aspects to ensure a proper fit-up of the construction as a whole. In terms of the panels themselves, not only will a framing misalignment not LOOK right but can also cause numerous efficiency and performance issues. Installing inexpensive shims can avoid panels needing to be replaced.
Additionally, make sure the first panel is plum and square, if you start right it is much easier to finish right.
Purlins must be level and square and all framing and bracing should be installed before installing panels. (The IMP manufacturer should specify the amount of tolerances allowed.) Also, take care with caulking and taping, foam-to-foam connections (in order to mitigate potential vapor leaks), seaming, and lap joints.
Attention to detail will avoid costly mistakes.
5. Always think ahead.
Being proactive may be the most important piece of advice construction crews need to hear.
For one, be sure to have a panel surplus on hand. You may be of the mindset that ordering extra panels is at worst a waste or at best, not worth the effort. This is a common judgement error that often leads to installation delays. If a crew has only ordered the exact number of panels needed for a job and there is any damage to the product, whether prior to delivery, on-site or during the installation, there a risk to the project schedule. Waiting on replacement panels can wreak havoc on schedules, especially with panels that may need special manufacturing due to custom components, finishes or colors. What do you do with extra panels you don’t need on the initial installation? Building owners can hold on to any surplus panels to be used as replacements, as needed, over the lifecycle of the building. A little preparation today can go a long way.
Other best practices include understanding the project’s site conditions and ensuring crews remain crews up to date on proper installation techniques—including staying current with training and certifications.
By taking this advice to heart, you can exponentially increase your ability to enjoy the many benefits of IMPs and be confident in your investment. For more information on MBCI’s insulated metal panels and proper installation guidelines, we encourage you to contact your local MBCI representative or visit our website.
Hip Roof vs. Gable Roof: What to Consider & How to Choose
Metal roofing is a great option for both residential and commercial structures, but beyond just choosing panel type, roof shape options also come into play. Among the most common roof styles in the U.S are a gable and a hip style.
Here we’ll take a quick look at these two distinct styles, explaining key features and differences, and identifying reasons you might want to consider one over the other for a given metal roofing project, depending on your performance or structural needs as well as aesthetic preferences.
Hip Roof
A hip roof can easily be identified by the fact in most cases it has slopes of equal length on all four sides, which come together at the top to form the ridge. In many cases, two sides form a triangle shape and the other two sides form a trapezoid shape (e.g., a pyramid shape). A hip roof does not have any vertical ends.

Among the key advantages of hip roofs are they:
• provide greater stability and are more durable than gable roofs due to the inward slope of all four sides.
• do well in areas prone to high wind and rain.
• are typically seen with lower roof slopes.
• allow for more appealing roof lines to be achieved.
Note: For high wind or strong storm-prone areas, proper engineering design, construction and roof system maintenance are especially critical in order to prevent major problems.
Gable Roof
Marked by two sloping sides that come together at a ridge, which creates end walls with a triangular extension, a gable roof, also known as a pitched or peaked roof, is easy to spot with its iconic pointed shape.
Among the key advantages of gable roofs are they:
• easily shed water and snow; there is nowhere for water to pool.
• provide more space for an attic or vaulted ceilings.
• allow for more air ventilation.
• are easier and more affordable to build than more complex designs as they need less building materials.
Note: It is recommended to use a steeper slope, for snowy regions.
Breaking Down the Key Considerations
Aesthetics: What architectural look are you trying to achieve? For instance, with more industrial architecture, trapezoidal panels are more common and therefore, a gable roof is a likely choice. In residential situations, where there are more hips and valleys, a hip roof may be a good option.
Building shape may play a role in why you would select a type of roof. If you have a change in building direction, such as an angle, (like an L-shaped building), that’s going to automatically create a valley and a hip on the other side. In this case, you may want to keep that appearance uniform, so you’d put a hip on each end of the building as well.
Also, are you trying to cover up equipment on top of a roof? If so, height differences might play into your decision.
Wind Pressures: On a hip roof, you may have lower wind pressures versus the gable, especially at the corners.
Labor and Materials Cost: The more cost-effective choice would be gable; it is the least costly to install because you’re going to have less material to fabricate a gable roof frame and less waste than with a hip roof. A hip roof is going to utilize more material and more labor because you are going to have more cuts involved.
Panel Profiles: The profile of the panel you’re going with can affect the roof shape choice. For example, for a trapezoidal panel, a gable roof would be a lot simpler to install. Less cutting of the panels is involved and will be easier to seal off the ends of the panels. With a vertical rib or flat pan style panel, it is easier to install on a hip roof application.
Slopes: In general, gable roofs are more likely to be found on lower sloped roofs (less than 3:12) where there are fewer valleys, etc. and therefore, less complicated. Hip roofs, on the other hand, will usually have additional conditions going into them. Valley conditions require a minimum of 3:12 slopes.
In Summary…
When looking at hip roof versus gable, there are obviously a host of factors that will go into that decision. To summarize the differences:
Hip roofs have four faces, are pyramid shaped, and are more complicated to build. They are shown to have higher wind force values. Upfront costs of hip roofs are greater.
Gable roofs have two faces, are triangular in shape, and are easier to build. Upfront costs are lower.
In many cases, it should be noted, most roofs feature numerous details and can include both hip and gable roofing.
To learn more about hip and gable roofs for your next metal building panel project, contact your MBCI local sales representative.
Types of Standing Seam Metal Roof Clips & Why They’re Essential
A successful standing seam metal roof project goes beyond the obvious panels, substrate and frame. In order for the roof to look great and perform properly, don’t neglect the importance of selecting the proper roof clips for your given project. What may seem like a minor detail is, quite literally, what’s holding it all together. Here we’ll take a look at the key factors that go into selecting the correct clip type and see why this is so essential for the well-being of any standing seam metal roof.
When you are looking at the installation manual or if you’re ordering your materials directly—or even if you’re submitting the order to MBCI to do the engineering for you—you’re going to need to know and identify certain details. The roof clip selection criteria will be based predominantly on two main factors: 1. What is your insulation system and 2. What are the expansion and contraction requirements for your roof? You’ll also need to know your project’s roof geometry and how the panel you’ve selected is able to meet the roof clip range on a particular plane, because the distance the panel spans impacts what type of clip you would use. Additionally, the type of substrate you are attaching the clip to will dictate what type of clip you should use. Is it going over wood, metal decking, open framing?
With that information in hand, you’re ready to do your due diligence. MBCI classifies clips in two ways: high or low; fixed or floating.
The high and low clips are predominantly determined by insulation systems. For a low clip, for instance, MBCI will typically will go up to a maximum of four inches of insulation; a high clip will go up to six inches of insulation.
Here’s a bit of a caveat. What we’re referring to is how much insulation you’re trying to compress between the roof panel and the substrate—and particularly the purlins or the steel frame you’re attaching it to. The clips are designed with a “stand-off” that elevates the roof panel above the substrate to permit insulation to pass between the roof panel and the substrate at the structural attachment points. A low clip is typically a 3/8-inch stand-off; a high clip, depending on panel type, can be 1-inch, 1-3/8-inch or even possibly 2-inch.
Knowing this helps determine whether you’re choosing the right clip because, let’s say, you go with too tall of a clip or not tall enough to accommodate your insulation system, then the system’s going to be difficult to install and will not perform correctly. And watch out for roof systems that have roof clips with no stand-off that do not permit fiberglass insulation to be installed or is discouraged from being installed at the clip lines due to impact on the panel appearance.
Another factor here is if you are putting the roof over a solid substrate, such as wood or metal decking. In this case, we will typically default customers to a low clip system because they don’t need to accommodate for any sort of fiberglass insulation systems. We’re assuming the insulation is occurring elsewhere below the decking or incorporated with the decking, such as rigid board insulation. In the case of rigid board insulation over decking, a low clip is still utilized but with an added bearing plate. The clip is attached through the rigid board insulation into the decking or structure below.
The more particulars you know of your intended insulation system to determine the clip height needed, the better prepared you will be in determining the right clips. Will there be fiberglass insulation or rigid board insulation or no insulation? What is the insulation thickness? What type of insulation system? Share these details with your MBCI sales rep to help you get started selecting the right clip height.
You can also find much of this information on the MBCI website by searching the roof type and then reviewing the corresponding installation manual and details to determine what clip height to use based on your insulation and substrate.
Which brings us to the other main factor in selecting the right clip. A fixed or floating clip is dependent on the substrate and how much anticipated movement is needed for the roof size.
With fixed clip systems, there are no moving parts in the clip. The ability for that clip to expand and contract as the roof expands and contracts is dependent on the substrate. In layman’s terms, if you were to screw that clip to a purlin, as the purlin heats up and cools down, it’s going to allow for some of the movement of that roof. Generally, when a fixed clip is installed over a metal building purlin, the manufacturer advises a limit of 100-foot maximum on a single roof surface. This is an average and can be impacted also by roof color and geographic location of the roof install that control temperature swing ranges, i.e., 100-foot maximum is a guide.
It is advised that the fixed clip always be installed over open framing in order to permit the greatest ability to accommodate roof panel expansion/contraction. It is not advised to use fixed clips attached to a solid substructure because those don’t accommodate roof panel movement.
If the roof needs to be installed over a solid substrate OR if the roof plane is over a slope more than 100 feet, then the manufacturer would prescribe a floating clip system. [Note: A floating clip can also be used even if the slope is less than 100 feet.] The floating clip system permits the roof panel to move (expand/contract) independent of the substrate to which the clip is installed. The system either contains a clip with a tab seamed into the roof panel rib that is able to float/slide where it attaches to the clip, or the clip is such that when it engages the panel seam is doesn’t restrict the panel movement. The only thing controlling for floating clips is the maximum range of the clips that allows it to float. In other words, how far can the clip tab or panel slide at the clip attachment. The panel manufacturer again will have information as to this amount. You will need to make sure they’re aware of what the maximum single panel run distance is from low side to high side.
One more thing to note is that not every roof system is available with fixed clips and not all systems have high and low clips (although the majority do). That said, educating yourself and researching the panel you’re looking at will give you the information you need to make the determination as to which clip will not only work best, but potentially will work at all. Every panel has its own roof clips, so the roof clips are not interchangeable across all systems. An essential part of selecting a roof panel is verifying that its clip attachment is suitable for your project.
It might not be immediately obvious that you have the wrong clip. For instance, let’s say you ordered an Ultra-Dek® roof and you ordered an Ultra-Dek® clip. That sounds straightforward, but did you order the RIGHT Ultra-Dek® clip for your particular project? The roof may even be able to be installed regardless, but, after installation you may discover it doesn’t perform properly or as intended due to the wrong combination of clips, insulation and substrate. That’s why it is so critical to check with the manufacturer that you have the right clip before you purchase or start putting down the roof.
For more information, reach out to your local sales rep or go to the MBCI Ask An Expert site to confirm the clip you need to make your project a success.