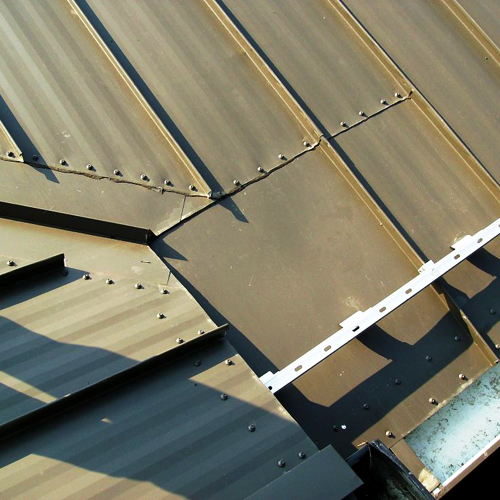
Sloped, standing seam, metal roofing provides a continuous surface that is designed to shed water efficiently while providing a long-lasting and great looking roofing solution. When the roof design and shape is simple, (i.e. continuously extending from ridge to eaves with no changes or interruptions) then all of the attributes of the metal roofing can be assured by using some very conventional and well-known details for design and construction. But in the real world, there are lots of conditions that require more specialized attention to detail. For our purposes here, we will simply refer to those as “specialty roof conditions.”
What types of roofing conditions warrant the special attention? Most are associated with changes in the shape or surface of the roof, say where the ridge line is interrupted or offset. Others could be a means to accommodate a roof feature such as a dormer, a dutch hip type of roof, or the intersection between a ridge and a parapet wall. Some might be related to the design of a valley, particular if it is a “dead valley” that doesn’t drain directly to the gutter but stops short, as around a dormer or elsewhere. Or some could be the result of some special conditions created by the roof design such as cascading water over an edge or heavy snow accumulation conditions. There are certainly many others too, but the point is that any of them are a potential source of water leakage and building damage if they are not properly addressed.

Most metal building manufacturers not only recognize the importance of such specialty roof conditions, but they also have lots of experience in developing very workable solutions for them. The key for success is found in the fundamental principles of properly overlapping (i.e. “shingling”) all materials to allow water to drain smoothly away where it is intended without getting diverted to places where it shouldn’t go. That means the metal roofing panels need to be cut, fit, and installed properly, but it also means that flashing, sealants, and fasteners need to be installed correctly too, all regardless of the slope of the roof. To communicate ways to achieve better results in the field for specialty roof conditions, manufacturers like MBCI make step-by-step details available for installers. The significance of using and following these details can not be overstated since they are a key component in getting a weathertightness warranty from the manufacturer.
As an example of how this might play out on a specific building, let’s look at a dead valley that occurs because a gable roofed dormer is installed in the main area of a roof. The first thing to recognize is that multiple layers of materials are involved in the transition around the dormer, all of which need to be installed in the proper location, following the proper sequence, and with the proper connections. A step-by-step process as detailed by the manufacturer might look like this:
Step 1:
With the substrate in place (rigid insulation over a metal deck), a special width panel will likely need to be installed and serve as the collection area for the dead valley to drain into. Then, plywood spacers and nailers are installed, and the main lower valley area is covered with “rubber” (EPDM) flashing.
Step 2:
Secure continuous eave trim over the plywood nailers and add and offset cleat on top to receive roof panels, all secured with tri-bead tape sealer and fasteners as shown.
Step 3:
Install extended valley trim across the valley with an offset cleat on either side secured as shown.
Step 4:
With all of the prior steps in place, then the installation of upper panels can begin to interface with the edge of the dead valley.
Step 5:
Continue cutting and installing panels to fit over and drain into the dead valley, which then drains without interruption onto the special width panel and the roof.
By following step by step details from the manufacturer for this or other specialty roof conditions, then the likelihood increases that everyone involved in the project is both proud and satisfied with the end results. The key is to start at the beginning with the proper planning and preparation by communicating with the manufacturer about all roof conditions that require special attention like this example.
To find out more about the library of specialty roof conditions available for metal roofing projects, contact your local MBCI representative.