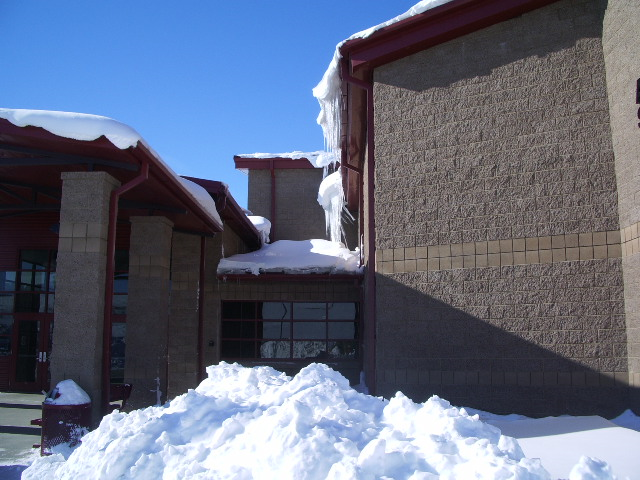
Applying high-quality paint finishes to metal roof and wall panels will help to maintain their appearance and provide protective value. If panels are maintained improperly, they will accumulate dirt and film deposits over time, which causes the panels to lose their original appearance. To prevent this, it is important to establish a proper maintenance program to keep the finishes in prime condition.
The most essential cleaning is done immediately after the erection of the building, as metal shavings are present and are somewhat magnetized because of the screw and drill rotation. Even if not visible to the naked eye, these shavings can lead to corrosion. If left on the surface of panels, these shavings will stain the panel surface and make irrevocable marks that cannot be removed.
Regular Maintenance:
Under normal conditions, freshwater washing two or three times per year using a regular garden hose under pressure will keep the paint finish in good condition. If additional cleaning is needed, consider the following methods that shouldn’t affect the panel warranty when used correctly:
Hot or Cold Detergent Solutions for Use On Water-Soluble Deposits:
Apply a 5% solution of commonly used commercial (non-industrial, non-bleach) detergents in water using a cloth or soft bristle brush.
Rinse thoroughly with water after cleaning.
Solvents/Alcohol for Use on Non-Water-Soluble Deposits:
Exercise caution with flammable and toxic solvents.
Recommended solvents: Denatured alcohol, Isopropyl (rubbing alcohol), VM&P naphtha, Mineral Spirits, Kerosene, Turpentine (wood or gum spirits).
Precautions:
Avoid wire brushes or abrasives that can damage the coating.
Misuse of cleaning agents may void the warranty.
Specialized Cleaning:
Remove smudge marks from bare Galvalume:
– Use Formula 409 by lightly rubbing with a clean cloth and rinsing with water.
Remove rust stains:
– Utilize a soft scrub (without bleach) with Simple Green or a similar product, rubbing lightly and rinsing thoroughly.
Touch-up/Repair of Damaged Paint Surface
The first step in repairing damage to your paint surface is to observe and evaluate the damage to determine which of the following steps should be taken.
Minor scratches or abrasion, metallic substrate not exposed:
Clean the area of all dirt, oil, grease or other foreign matter (see Cleaning and CARE for the appropriate cleaning solution)
Lightly scuff the damage with Scotch-Brite pads.
Dampen a lint-free cloth or tack cloth with acetone using the proper precautions for handling solvents as instructed on the MSDS or container of the solvent. This may include safety glasses, gloves, protective clothing and a respirator. Wipe the surface liberally to clean the areas to be touched up. The surface must be dry before the touch-up coat is applied. Before you use the paint, read the instructions on the container carefully.
When applying the touch-up paint, it is important to remember that “LESS IS BEST.” Be sure to apply the touch-up paint with a very small applicator. We suggest using a brush similar in size to a fingernail polish applicator. Dip the brush into the paint to no more than half the length of the bristles. Next, tap the brush against the side of the container, and apply light pressure to make the bristles flex slightly as you re-apply the paint. Be sure not to wipe the paint against the lip of the paint can. Proper application requires you to feather the touch-up into the scratch using as small an amount as possible. USE OF AEROSOL PAINT IS NOT RECOMMENDED.
Scratches or gouges that expose the metallic substrate:
Clean the area of all dirt, oil, grease or other foreign matter (see CLEANING and CARE for appropriate cleaning solutions).
Sand the damaged area with Scotch-Brite pads.
Dampen a lint-free cloth or tack cloth with acetone using the proper precautions for handling solvents as instructed on the MSDS or container of the solvent. This may include safety glasses, gloves, protective clothing and a respirator. Wipe the surface liberally to clean the areas to be touched up. The surface must be dry before the touch-up coat is applied. Before you use the paint, read the instructions on the container carefully.
Apply a quality epoxy or urethane primer to the area that needs to be touched up. Allow the primer to cure according to the primer manufacturer’s directions.
When applying the touch-up paint, it is important to remember that “LESS IS BEST.” Be sure to apply the touch-up paint with a very small applicator. We suggest using a brush similar in size to a fingernail polish applicator. Dip the brush into the paint to no more than half the length of the bristles. Next, tap the brush against the side of the container, and apply light pressure to make the bristles flex slightly as you re-apply the paint. Be sure not to wipe the paint against the lip of the paint can. Proper application requires you to feather the touch-up into the scratch using as small an amount as possible. USE OF AEROSOL PAINT IS NOT RECOMMENDED.
Precaution: DO NOT USE touch-up paint over broad areas. Touch-up paints will not have the same color retention capabilities as the thermally cured factory-applied coating. Long-term differential fading between the two coatings will be much more apparent if the touch-up paint is not applied properly. We highly suggest following the manufacturer’s directions for application instructions for touch-up paint. It is also important to remember that there is no guarantee of performance for touch-up paints
Field Painting/Major Repair
WARNING: REPAINTING/FIELD PAINTING WILL VOID THE MANUFACTURER’S PANEL FINISH WARRANTY.
On the occasion where a building or homeowner chooses to field paint their metal roof or wall panels, use the following guidelines:
Lightly scuff sand the finish with Scotch-Brite pads.
Power wash the surface with a solution of water and 5% commercial (non-industrial, nonbleach) detergents. This will help to remove the protective wax in the area that needs to be repaired, as well as get rid of dust, dirt, and grease. Pressure should not exceed 2,000 PSI. Rinse thoroughly after cleaning and allow to dry.
Use acrylic latex exterior paint or high-quality oil-based paint if it contains mineral spirits. Avoid “rust inhibitive” paints.
High-quality oil-based paints may be used only if they contain mineral spirits. Do not use any paint that is designated as “rust inhibitive.” Paints of this type may cause the baked-on finish to peel.
Brush application is recommended. Do not paint in direct sunlight or when part of the surface is warm to the touch. This will result in lap marks.
6. Avoid spray painting with solvent-type paints; if necessary, thin with VM&P Naphtha.
The following thinners should not be used: Xylene (Xylol), Turpentine, MEK (Methyl Ethyl Ketone), MIBK (Methyl Isobutyl Ketone), MIAK (Methyl Iso-Amyl Ketone), DIBK (Diisobutyl Ketone), Toluene (Toluol), Lacquer thinner.
By following these guidelines, you can ensure the longevity and appearance of your metal roof and wall panels.
**WARNING: REPAINTING/FIELD PAINTING SHALL VOID THE MANUFACTURER’S PANEL FINISH WARRANTY. NCI MAKES NO GUARANTEES REGARDING THE GUIDELINES ABOVE AND SHALL NOT WARRANT ANY FIELD-APPLIED COATING OR WHERE RECOATING HAS OCCURRED.**